White balance controls in camera raw – Adobe Photoshop CS4 User Manual
Page 95

88
USING PHOTOSHOP CS4
Camera Raw
Last updated 1/10/2010
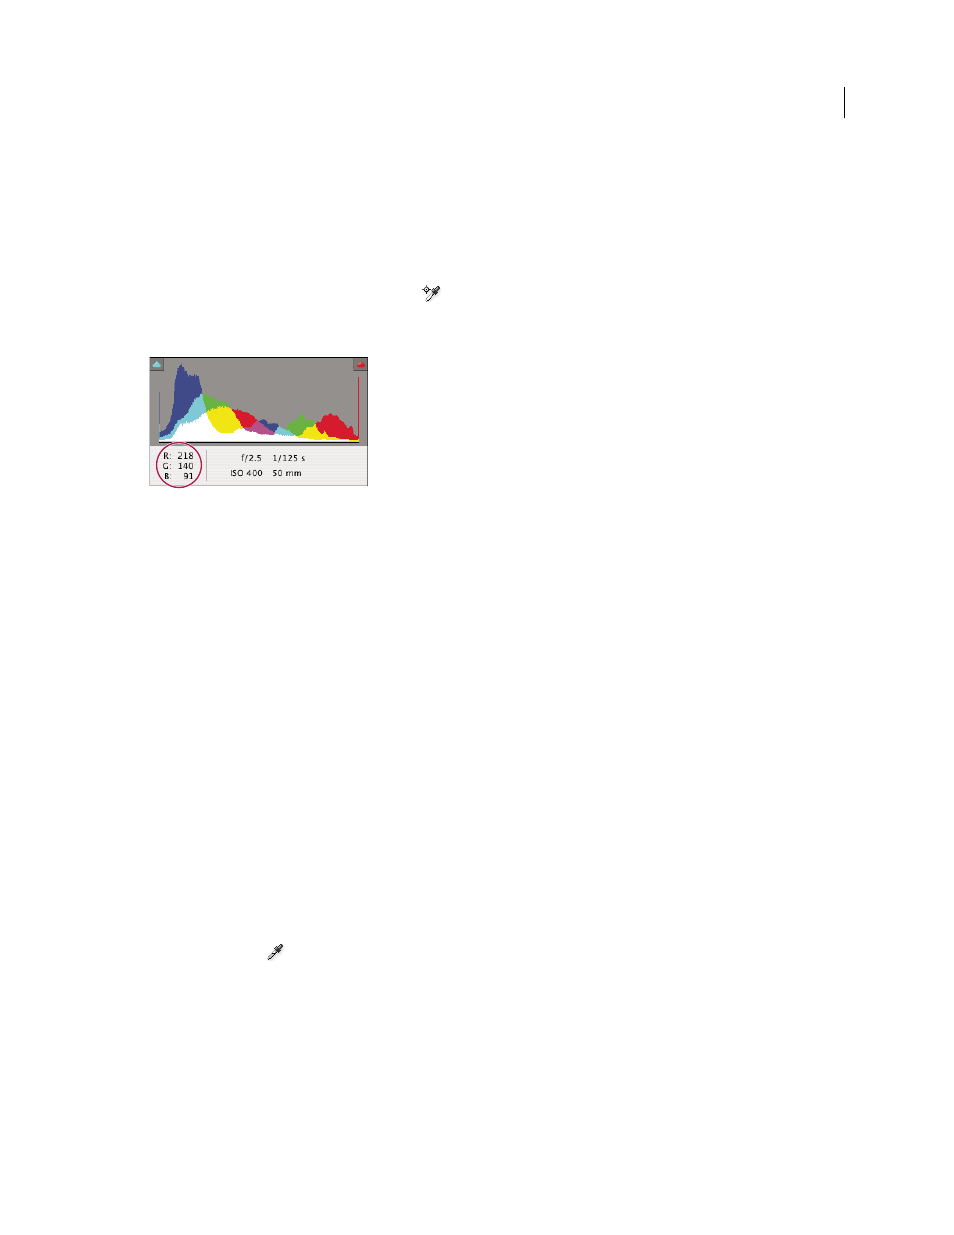
A histogram is made up of three layers of color that represent the red, green, and blue color channels. White appears
when all three channels overlap; yellow, magenta, and cyan appear when two of the RGB channels overlap (yellow
equals the red + green channels, magenta equals the red + blue channels, and cyan equals the green + blue channels).
The histogram changes automatically as you adjust the settings in the Camera Raw dialog box.
The RGB values of the pixel under the pointer (in the preview image) appear below the histogram.
Note: You can also use the Color Sampler tool
to place up to nine color samplers in the preview image. The RGB
values appear above the preview image. To remove a color sampler, Alt-click (Windows) or Option-click (Mac OS) it. To
clear the color samplers, click Clear Samplers.
The Camera Raw dialog box displays the RGB values of the pixel under the pointer.
Preview highlight and shadow clipping in Camera Raw
Clipping occurs when the color values of a pixel are higher than the highest value or lower than the lowest value that
can be represented in the image. Overbright values are clipped to output white, and overdark values are clipped to
output black. The result is a loss of image detail.
•
To see which pixels are being clipped with the rest of the preview image, select Shadows or Highlights options at
the top of the histogram. Or press U to see shadow clipping, O to see highlight clipping.
•
To see only the pixels that are being clipped, press Alt (Windows) or Option (Mac
OS) while dragging the
Exposure, Recovery, or Blacks sliders.
For the Exposure and Recovery sliders, the image turns black, and clipped areas appear white. For the Blacks slider,
the image turns white and clipped areas appear black. Colored areas indicate clipping in one color channel (red, green,
blue) or two color channels (cyan, magenta, yellow).
Note: In some cases, clipping occurs because the color space that you are working in has a gamut that is too small. If your
colors are being clipped, consider working in a color space with a large gamut, such as ProPhoto RGB.
White balance controls in Camera Raw
In simple terms, adjusting the white balance is a matter of identifying what objects in the image should be neutral-
colored (white or gray) and then adjusting the colors in the image to make those objects neutral-colored. A white or
gray object in a scene takes on the color cast by the ambient light or flash used to shoot the picture. When you use the
White Balance tool
to specify an object that should be white or gray, Camera Raw can determine the color of the
light in which the scene was shot and then adjust for scene lighting automatically.
Color temperature (in Kelvins) is used as a measure of scene lighting because natural and incandescent light sources
give off light in a predictable distribution according to their temperature.
A digital camera records the white balance at the time of exposure as a metadata entry. The Camera Raw plug-in reads
this value and makes it the initial setting when you open the file in the Camera Raw dialog box. This setting usually
yields the correct color temperature, or nearly so. You can adjust the white balance if it is not right.
