Select pixels using anti-aliasing, Define a feathered edge for a selection tool, Define a feathered edge for an existing selection – Adobe Photoshop CS4 User Manual
Page 271: Remove fringe pixels from a selection
264
USING PHOTOSHOP CS4
Selecting and masking
Last updated 1/10/2010
Note: Feathering effects become apparent only after you move, cut, copy, or fill the selection.
Select pixels using anti-aliasing
1
Select the Lasso tool, the Polygonal Lasso tool, the Magnetic Lasso tool, the Elliptical Marquee tool, or the Magic
Wand tool.
2
Select Anti-aliased in the options bar.
Define a feathered edge for a selection tool
1
Select any of the lasso or marquee tools.
2
Enter a Feather value in the options bar. This value defines the width of the feathered edge and can range from 0 to
250 pixels.
Define a feathered edge for an existing selection
1
Choose Select > Modify > Feather.
2
Enter a value for the Feather Radius, and click
OK.
Note: A small selection made with a large feather radius may be so faint that its edges are invisible and thus not selectable.
If you see the message “No pixels are more than 50% selected,” either decrease the feather radius or increase the size of the
selection. Or click OK to accept the mask at its current setting and create a selection in which you cannot see the edges.
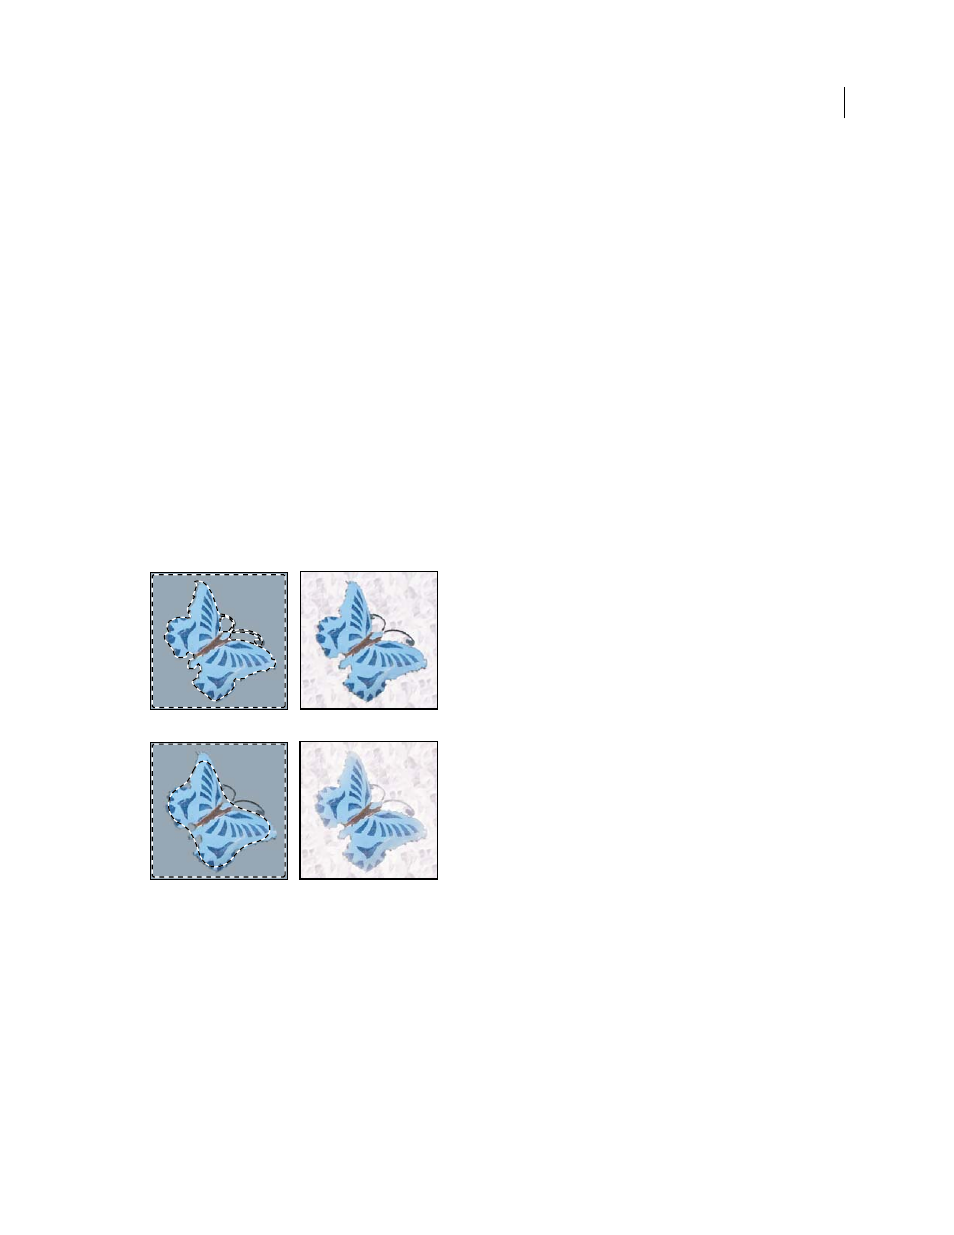
Selection without feathering and with feathering.
A. Selection with no feather, same selection filled with pattern B. Selection with feather, same selection filled with pattern
Remove fringe pixels from a selection
When you move or paste an anti-aliased selection, some of the pixels surrounding the selection border are included
with the selection. This can result in a fringe or halo around the edges of the pasted selection. These Matting
commands let you edit unwanted edge pixels:
•
Defringe replaces the color of any fringe pixels with the color of pixels farther in from the edge of the selection that
don’t contain the background color.
A
B