Adobe Photoshop CS4 User Manual
Page 403
396
USING PHOTOSHOP CS4
Filters
Last updated 1/10/2010
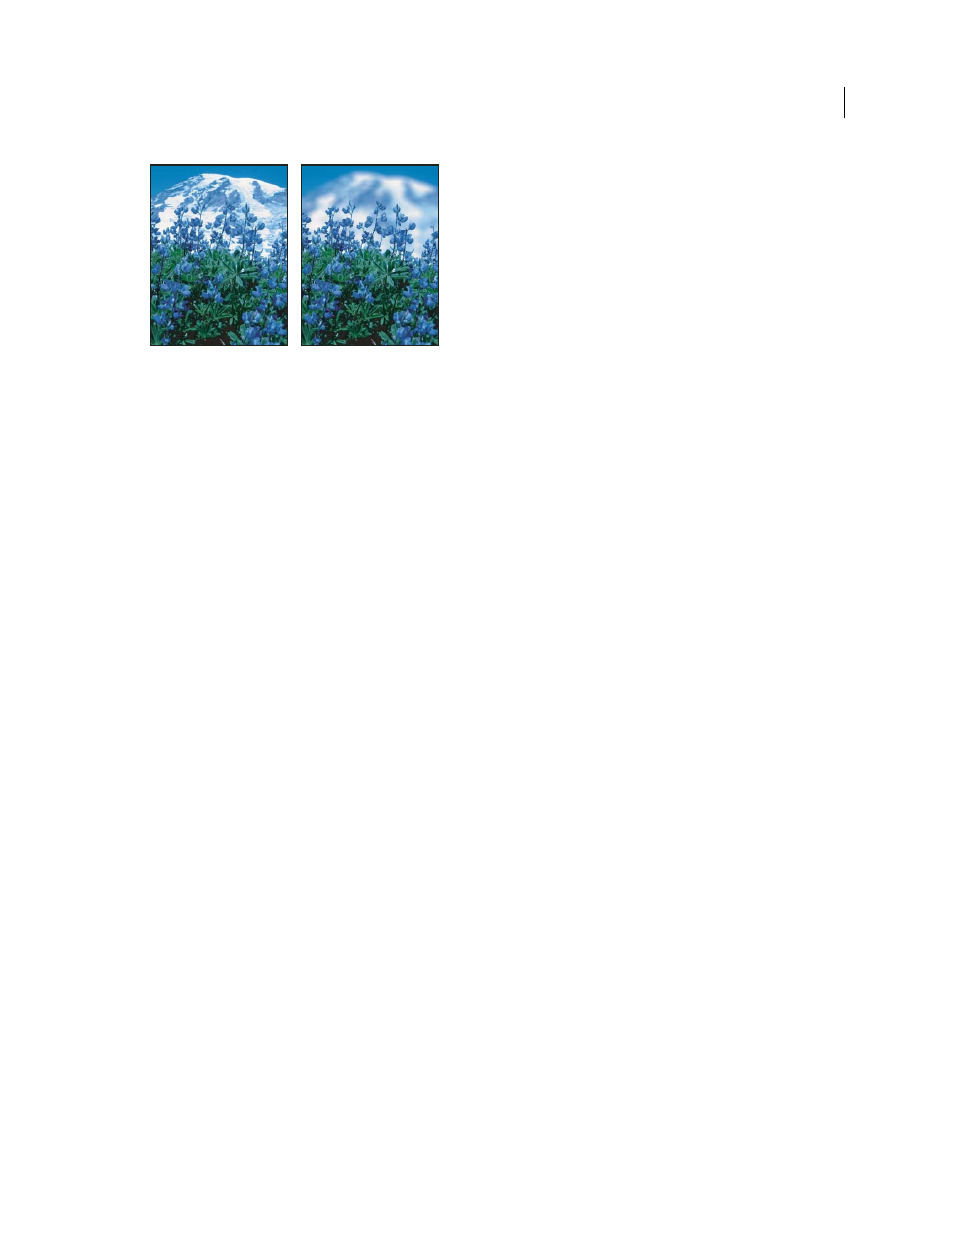
Before (left) and after (right) using the Lens Blur filter; the background is blurred but the foreground stays sharp.
Note: To apply a Blur filter to the edges of a layer, deselect the Lock Transparent Pixel option in the Layers panel.
Average
Finds the average color of an image or selection, and then fills the image or selection with the color to create
a smooth look. For example, if you select an area of grass, the filter changes the area into a homogeneous patch of green.
Blur and Blur More
Eliminate noise where significant color transitions occur in an image. Blur filters smooth
transitions by averaging the pixels next to the hard edges of defined lines and shaded areas. The effect of the Blur More
filter is three or four times stronger than that of the Blur filter.
Box Blur
Blurs an image based on the average color value of neighboring pixels. This filter is useful for creating special
effects. You can adjust the size of the area used to calculate the average value for a given pixel; a larger radius results in
greater blurring.
Gaussian Blur
Quickly blurs a selection by an adjustable amount. Gaussian refers to the bell-shaped curve that is
generated when Photoshop applies a weighted average to the pixels. The Gaussian Blur filter adds low-frequency detail
and can produce a hazy effect.
Note: When Gaussian Blur, Box Blur, Motion Blur, or Shape Blur are applied to a selected image area, they will
sometimes produce visually unexpected results near the edges of the selection. This is because these blur filters will use
image data from outside the selected area to create the new, blurred pixels inside the selected area. For example, if the
selection represents a background area that you want to blur while keeping the foreground sharp, the edges of the blurred
background area will be contaminated with colors from the foreground, producing a fuzzy, muddy-looking outline
around the foreground. To avoid this effect in such cases, you can use Smart Blur or Lens Blur.
Lens Blur
Adds blur to an image to give the effect of a narrower depth of field so that some objects in the image stay
in focus and others areas are blurred. See “
Motion Blur
Blurs in the specified direction (from –360º to +360º) and at a specified intensity (from 1 to 999). The
filter’s effect is analogous to taking a picture of a moving object with a fixed exposure time.
Radial Blur
Simulates the blur of a zooming or rotating camera to produce a soft blur. Choose Spin to blur along
concentric circular lines, and then specify a degree of rotation. Choose Zoom to blur along radial lines, as if zooming
into or out of the image, and specify a value from 1 to 100. Blur quality ranges from Draft (for fast but grainy results)
or Good and Best for smoother results, which are indistinguishable from each other except on a large selection. Specify
the origin of the blur by dragging the pattern in the Blur Center box.
Shape Blur
Uses the specified kernel to create the blur. Choose a kernel from the list of custom shape presets, and use
the radius slider to adjust its size. You can load different shape libraries by clicking the triangle and choosing from the
list. Radius determines the size of the kernel; the larger the kernel, the greater the blur.
Smart Blur
Blurs an image with precision. You can specify a radius, a threshold, and a blur quality. The Radius value
determines the size of the area searched for dissimilar pixels. The Threshold value determines how dissimilar the pixels
must be before they are affected. You also can set a mode for the entire selection (Normal) or for the edges of color