Paste one selection into another – Adobe Photoshop CS4 User Manual
Page 274

267
USING PHOTOSHOP CS4
Selecting and masking
Last updated 1/10/2010
Paste one selection into another
1
Cut or copy the part of the image you want to paste.
2
Select the part of the image into which you want to paste the selection. The source selection and the destination
selection can be in the same image or in two different Photoshop images.
3
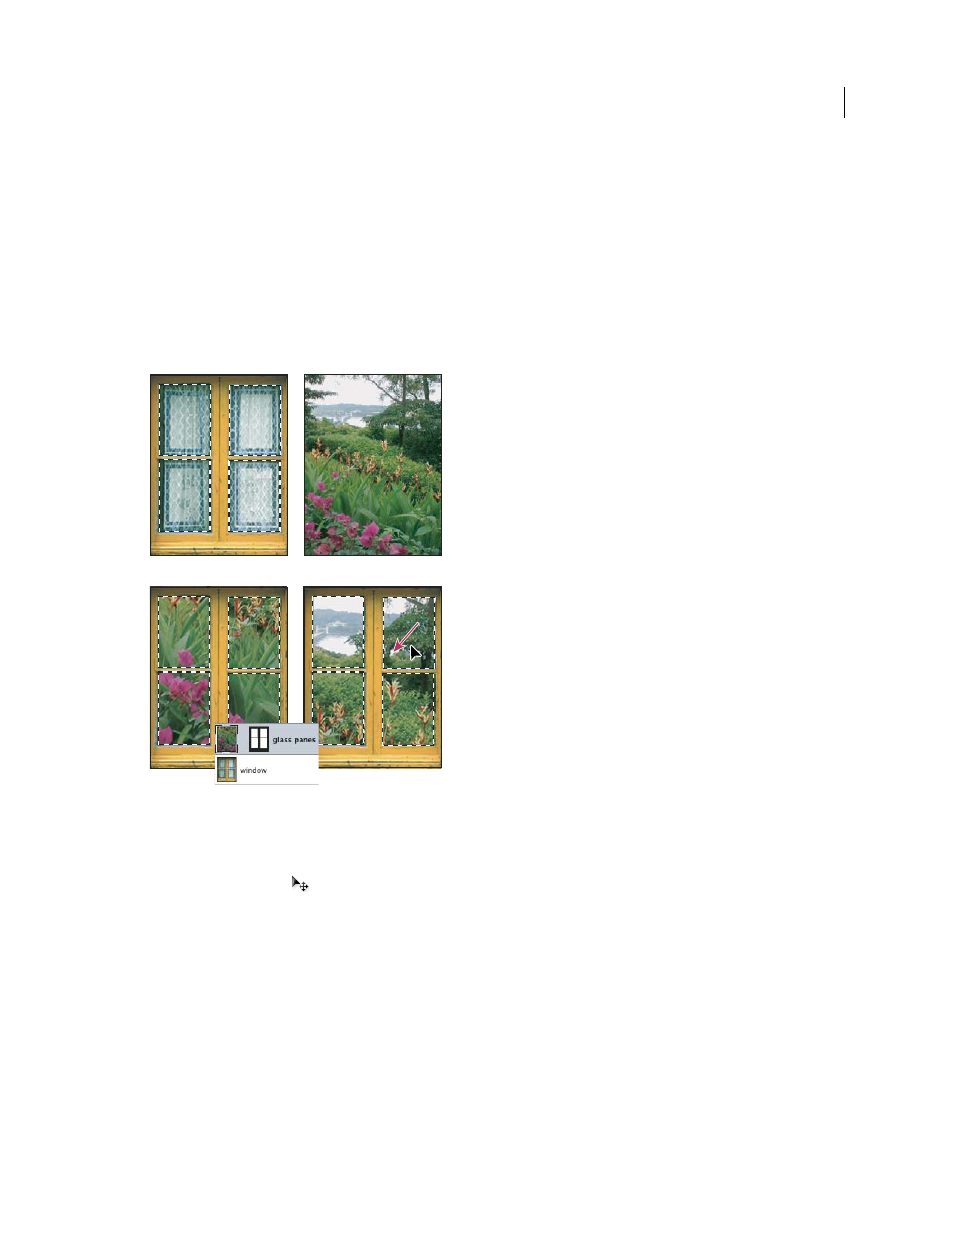
Choose Edit > Paste Into. The contents of the source selection appear within the destination selection.
The Paste Into operation adds a layer and layer mask to the image. In the Layers panel, the new layer contains a layer
thumbnail for the pasted selection next to a layer mask thumbnail. The layer mask is based on the selection you pasted
into: the selection is unmasked (white), the rest of the layer is masked (black). The layer and layer mask are unlinked—
that is, you can move each one independently.
Using the Paste Into command
A. Window panes selected B. Copied image C. Paste Into command D. Layer thumbnails and layer mask in Layers panel E. Pasted image
repositioned
4
Select the Move tool
, or hold down the Ctrl (Windows) or Command (Mac
OS) key to activate the Move tool.
Then drag the source contents until the part you want appears through the mask.
5
To specify how much of the underlying image shows through, click the layer mask thumbnail in the Layers panel,
select a painting tool, and edit the mask:
•
To hide more of the image underlying the layer, paint the mask with black.
•
To reveal more of the image underlying the layer, paint the mask with white.
•
To partially reveal the image underlying the layer, paint the mask with gray.
6
If you are satisfied with your results, you can choose Layer
> Merge Down to merge the new layer and layer mask
with the underlying layer and make the changes permanent.
A
B
C
E
D
