Patch an area – Adobe Photoshop CS4 User Manual
Page 213
206
USING PHOTOSHOP CS4
Retouching and transforming
Last updated 1/10/2010
3
(Optional) Choose a blending mode from the Mode menu in the options bar. Choose Replace to preserve noise,
film grain, and texture at the edges of the brush stroke when using a soft-edge brush.
4
Choose a Type option in the options bar:
Proximity Match
Uses the pixels around the edge of the selection to find an image area to use as a patch for the selected
area. If this option doesn’t provide a satisfactory fix, undo the fix and try the Create Texture option.
Create Texture
Uses all the pixels in the selection to create a texture with which to fix the area. If the texture doesn’t
work, try dragging through the area a second time.
5
Select Sample All Layers in the options bar to sample data from all visible layers. Deselect Sample All Layers to
sample only from the active layer.
6
Click the area you want to fix, or click and drag to smooth over imperfections in a larger area.
More Help topics
Patch an area
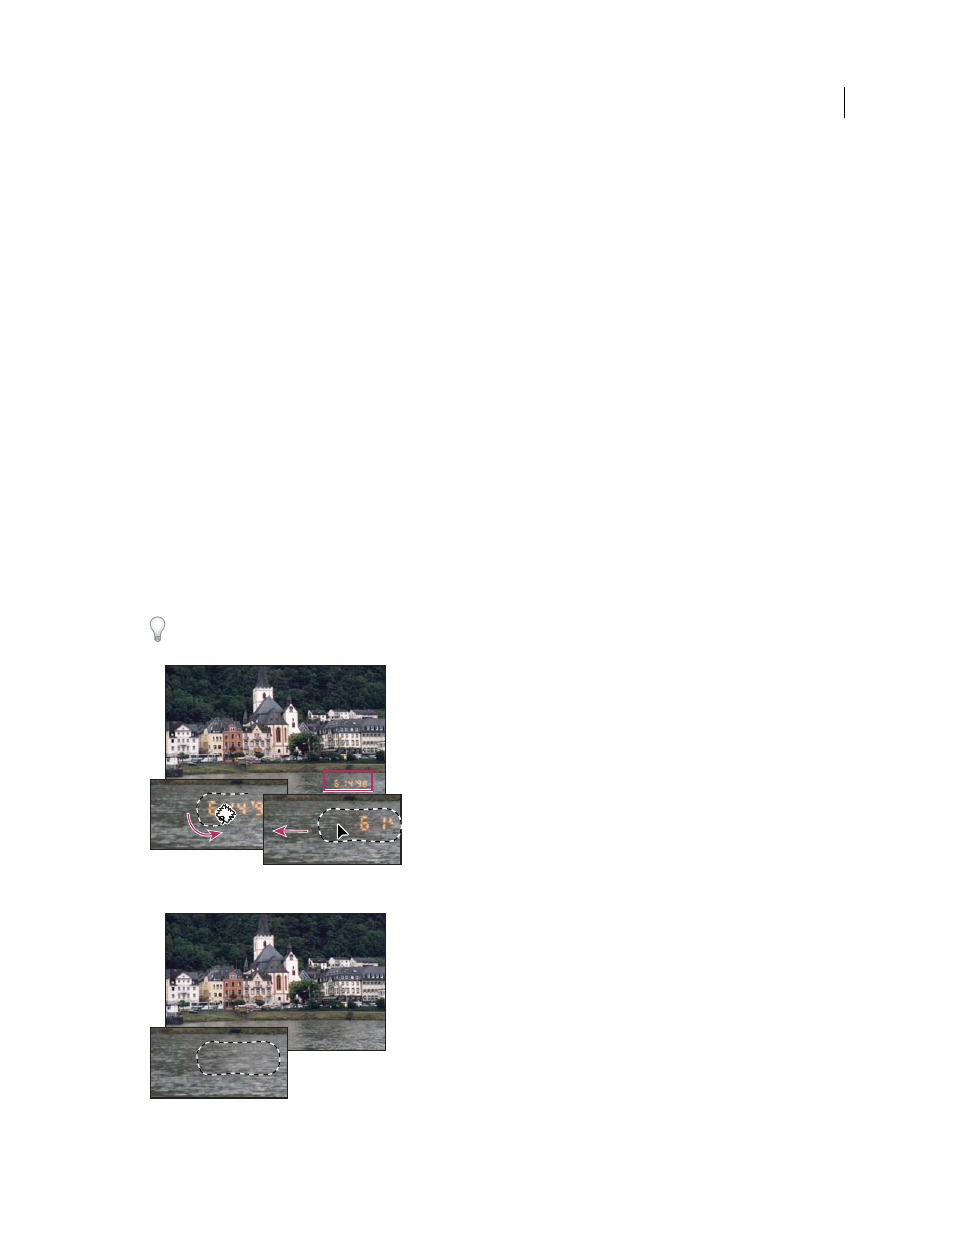
The Patch tool lets you repair a selected area with pixels from another area or a pattern. Like the Healing Brush tool,
the Patch tool matches the texture, lighting, and shading of the sampled pixels to the source pixels. You can also use
the Patch tool to clone isolated areas of an image. The Patch tool works with 8-bits or 16-bits-per-channel images.
When repairing with pixels from the image, select a small area to produce the best result.
Using the Patch tool to replace pixels
Patched image