Saving selections and using masks, About masks and alpha channels – Adobe Photoshop CS4 User Manual
Page 281

274
USING PHOTOSHOP CS4
Selecting and masking
Last updated 1/10/2010
Saving selections and using masks
About masks and alpha channels
When you select part of an image, the area that is not selected is “masked”, or protected from editing. So, when you
create a mask, you isolate and protect areas of an image as you apply color changes, filters, or other effects to the rest
of the image. You can also use masks for complex image editing such as gradually applying color or filter effects to an
image.
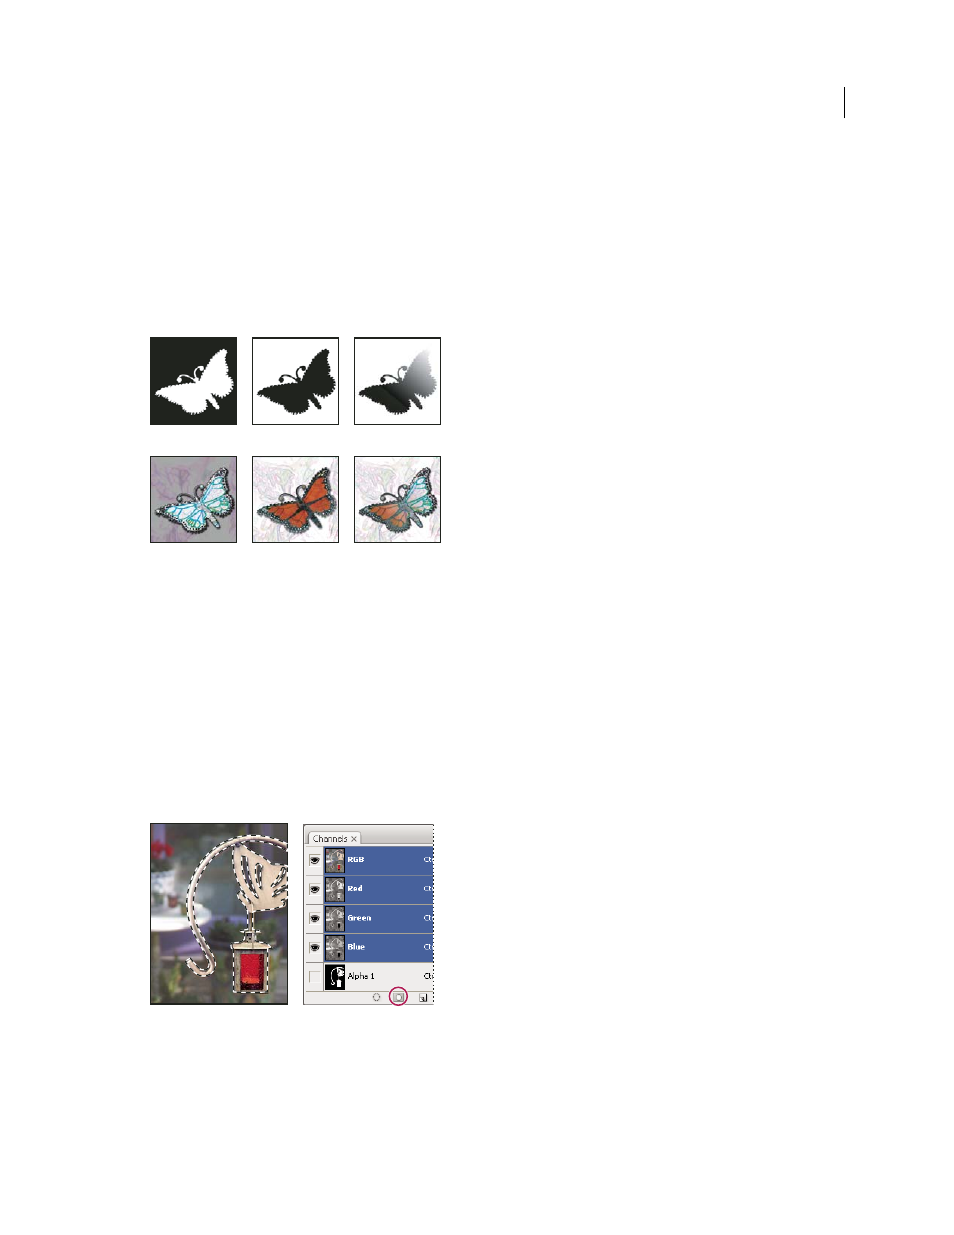
Examples of masks
A. Opaque mask used to protect the background and edit the butterfly B. Opaque mask used to protect the butterfly and color the background
C. Semitransparent mask used to color the background and part of the butterfly
Masks are stored in alpha channels. Masks and channels are grayscale images, so you can edit them like any other
image with painting tools, editing tools and filters. Areas painted black on a mask are protected, and areas painted
white are editable.
Use Quick Mask mode to convert a selection to a temporary mask for easier editing. The Quick Mask appears as a
colored overlay with adjustable opacity. You can edit the Quick Mask using any painting tool or modify it with a filter.
Once you exit Quick Mask mode the mask is converted back to a selection on the image.
To save a selection more permanently, you can store it as an alpha channel. The alpha channel stores the selection as
an editable grayscale mask in the Channels panel. Once stored as an alpha channel, you can reload the selection at any
time or even load it into another image.
Selection saved as an alpha channel in Channels panel
Note: You can mask or hide parts of a layer using a layer mask.
More Help topics
A
B
C
