Change quick mask options – Adobe Photoshop CS4 User Manual
Page 283
276
USING PHOTOSHOP CS4
Selecting and masking
Last updated 1/10/2010
Painting in Quick Mask mode
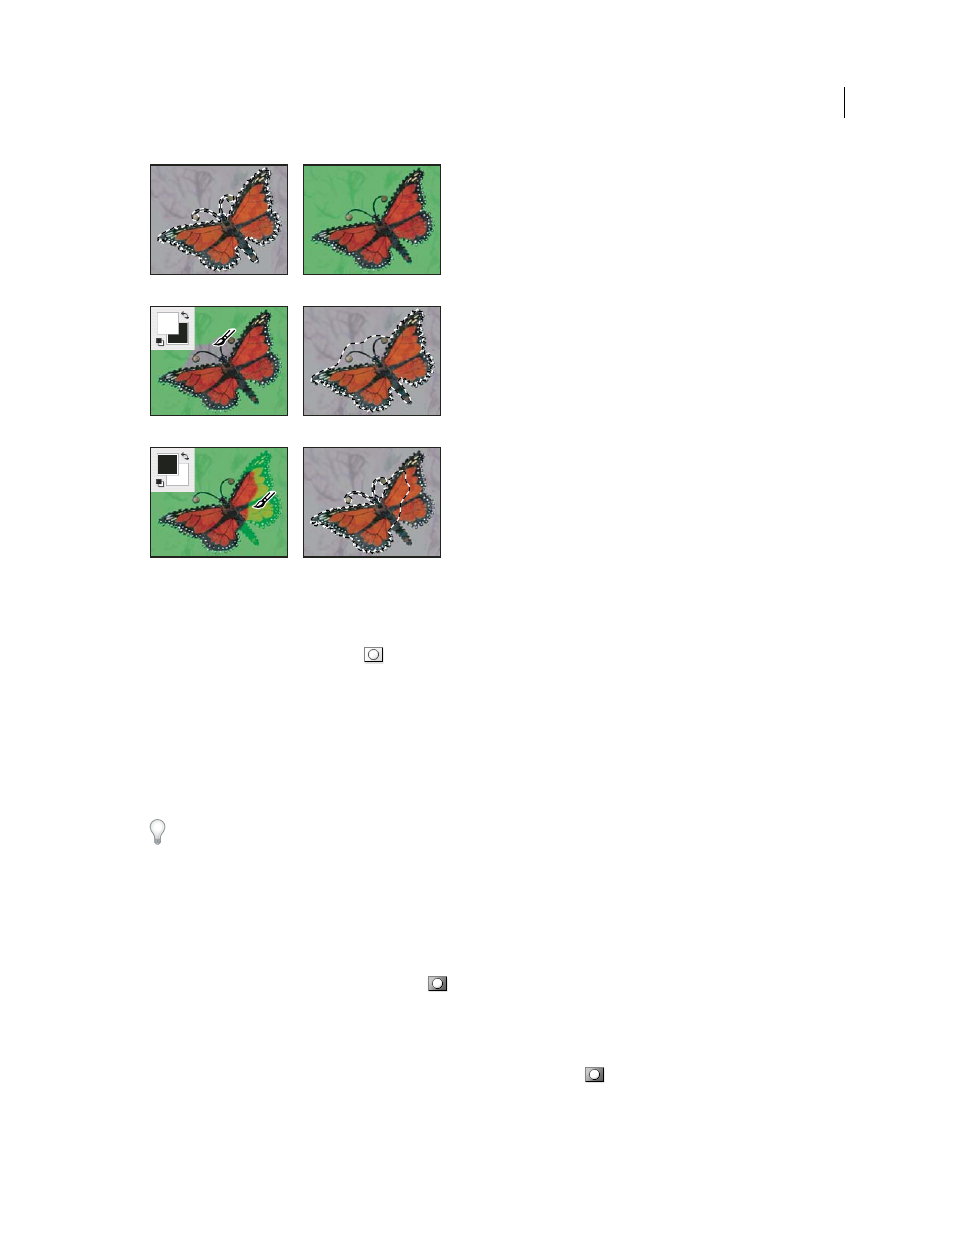
A. Original selection and Quick Mask mode with green chosen as mask color B. Painting with white in Quick Mask mode adds to the selection
C. Painting with black in Quick Mask mode subtracts from the selection
5
Click the Standard Mode button
in the toolbox to turn off the quick mask and return to your original image.
A selection border now surrounds the unprotected area of the quick mask.
If a feathered mask is converted to a selection, the boundary line runs halfway between the black pixels and the white
pixels of the mask gradient. The selection boundary indicates the transition between pixels that are less than 50%
selected and those that are more than 50% selected.
6
Apply the desired changes to the image. Changes affect only the selected area.
7
Choose Select > Deselect to deselect the selection, or save the selection by choosing Select > Save Selection.
You can convert this temporary mask to a permanent alpha channel by switching to standard mode and choosing
Select > Save Selection.
More Help topics
Change Quick Mask options
1
Double-click the Quick Mask Mode button
in the toolbox.
2
Choose from the following display options:
Masked Areas
Sets masked areas to black (opaque) and selected areas to white (transparent). Painting with black
increases the masked area; painting with white increases the selected area. When this option is selected, the Quick
Mask button in the toolbox becomes a white circle on a gray background
.
A
B
C