Paste an item into vanishing point, Paint with a color in vanishing point – Adobe Photoshop CS4 User Manual
Page 250
243
USING PHOTOSHOP CS4
Retouching and transforming
Last updated 1/10/2010
Paste an item into Vanishing Point
You can paste an item from the clipboard in Vanishing Point. The copied item can be from the same document or a
different one. Once pasted into Vanishing Point, the item becomes a floating selection that you can scale, rotate, move
or clone. When the floating selection moves into a selected plane, it conforms to the plane’s perspective.
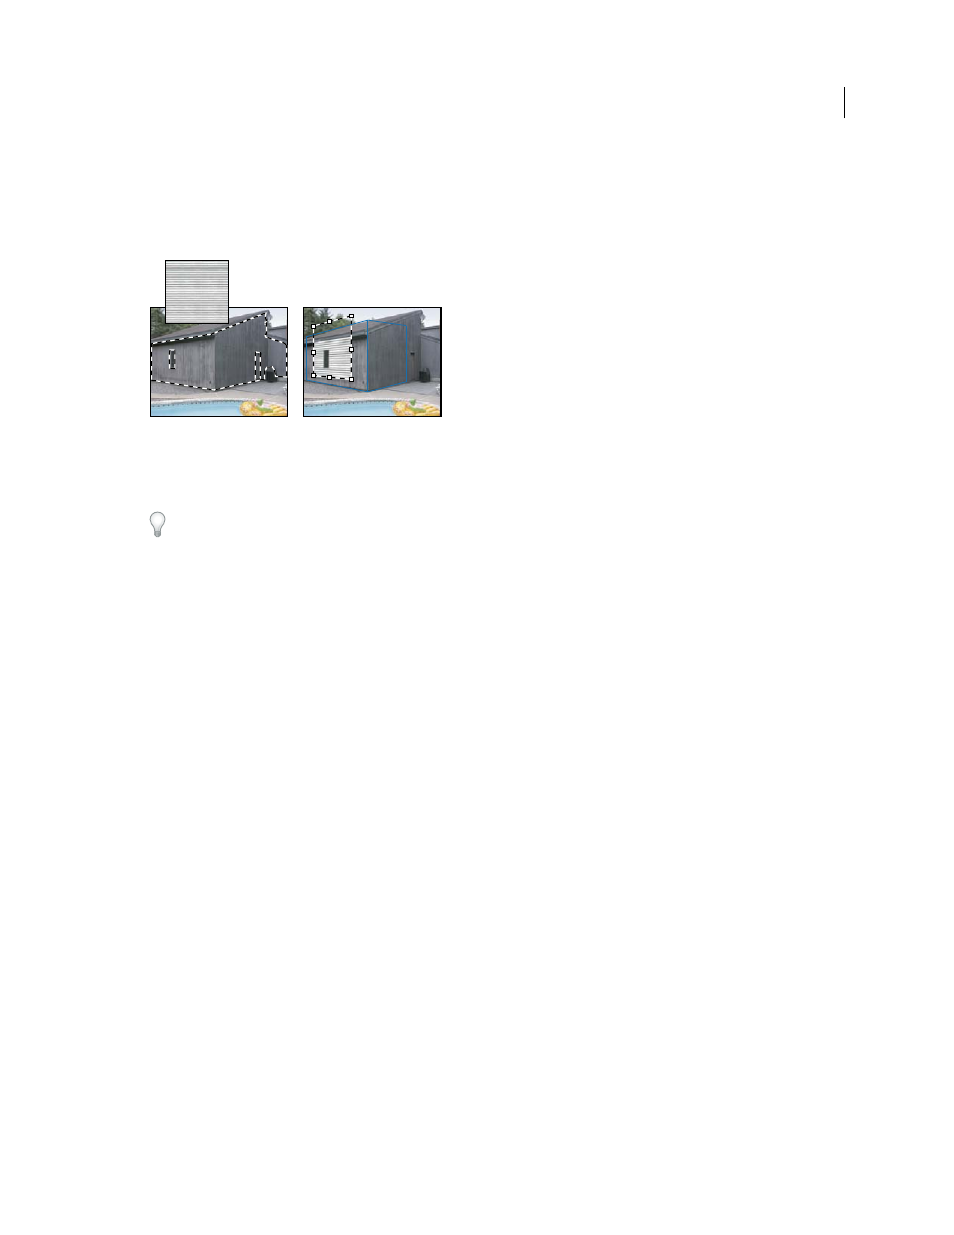
Pasting an item into Vanishing Point
A. Copied pattern from a separate document B. Image with selection (to confine results) created in Photoshop before opening Vanishing Point
C. Pasted pattern in Vanishing Point is moved into the plane and honors the selection
For convenience, it’s recommended that you create perspective planes in a previous Vanishing Point session.
1
Copy an item to the clipboard. The copied item can be from the same or different document. Keep in mind that
you can paste only a raster (not vector) item.
Note: If you’re copying type, you must first rasterize it. Right-click the text layer, and choose Rasterize. Then choose Select
> All and copy to the clipboard.
2
(Optional) Create a new layer.
3
Choose Filter
> Vanishing Point.
4
If necessary, create one or more planes in the image.
5
Press Ctrl-V (Windows) or Command-V (Mac
OS) to paste the item.
The pasted item is now a floating selection in the upper left corner of the preview image. By default, the Marquee tool
is selected.
6
Use the Marquee tool to drag the pasted image to a plane.
The image conforms to the perspective of the plane.
Important: After pasting the image in Vanishing Point, do not click anywhere in the image with the Marquee tool except
to drag the pasted image to a perspective plane. Clicking anywhere else deselects the floating selection and permanently
pastes the pixels into the image.
Paint with a color in Vanishing Point
1
Select the Brush tool.
2
Specify a brush color by doing one of the following:
•
Select the Eyedropper tool and click a color in the preview image.
•
Click the Brush Color box to open the Color Picker to select a color.
3
In the tool options area, set the Diameter (brush size), Hardness (edge smoothness), and Opacity (the degree to
which painting obscures the image below).
A
C
B