6 system options, 1 reporting account, 1 edit accounts – SilentKnight 5820XL User Manual
Page 130: System options, On 7.6 fo, Ion 7.6.1.1, Section 7.6.1.1
LS10061-001SK-E
Programming
7-22
7.6
System Options
This section of the manual explains how to customize software options that affect general operation of the
system. This includes such items as: AC loss reporting delay, system clock options, telephone and reporting
account options. Refer to each individual subsection for complete instructions.
7.6.1
Reporting Account
Up to four reporting accounts can be used with the control panel. Events in accounts are reported by zone.
Each account is assigned an up-to-6-digit account number. Each account is also assigned a unique ID (1-4) which
determines the priority for reporting (“1” has the highest priority; “4” has the lowest).
Disable any unused accounts by selecting “N” for all events (see Figure 7-12). If the system is local only (does
not connect to a central station), disable all events for all four reporting accounts.
Options for each account can be customized. These options appear on the Reporting Accounts screen. Some
related options appear on the Phone Lines screen (see Section 7.6.2).
To access the Reporting Accounts screen:
1.
Enter the installer code. The panel will automatically go the main menu.
2.
Select 7 for Program Menu.
3.
From the Program Menu, select 5 for System Options.
4.
From the next menu, select 0 for Reporting Accounts.
7.6.1.1
Edit Accounts
5.
From the next menu, select 1 for Edit Account.
A screen similar to one shown in Figure 7-12 will display. The following subsections describe the options on
each field.
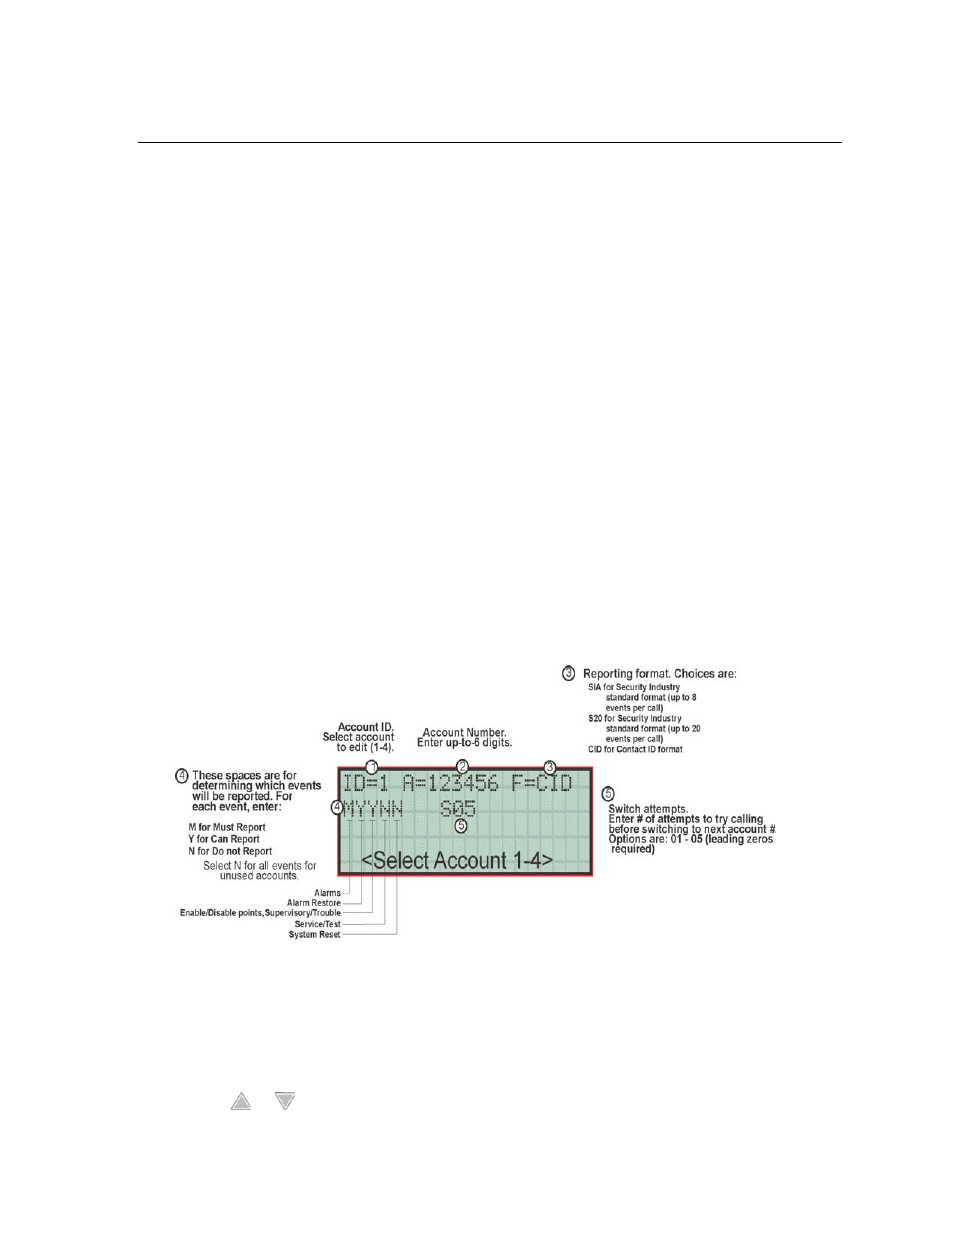
Figure 7-12 Reporting Account Editing Screen
Select Account (ID)
The control panel provides up to 4 reporting accounts. The priority of an account is based on its account ID.
Account 1 is highest priority; Account 4 is lowest. Use Account 1 to report the highest priority events.
6.
Press the
or
arrow to select account ID number, then press ENTER.