1 edit modules, 1 naming modules, 2 editing module features – SilentKnight 5820XL User Manual
Page 110: 2 adding a module, 1 naming modules 7.2.1.2 editing module features, Section 7.2.2). select, Ion 7.2.1.1), On 7.2.2). sel, Section 7.2.1, Section 7.2.2
LS10061-001SK-E
Programming
7-2
7.2.1
Edit Modules
The features that can be edited when this option is selected are module ID, module name, class of wiring (Class
A or Class B), or features that are specific to the module to be edited.
To edit an existing module:
1.
Enter the installer code. The panel will automatically go the main menu.
2.
Select 7 for Program Menu.
3.
Press 1 to enter module menu.
4.
Press 1 to edit a module.
5.
Use the
or
arrow to select the module you wish to edit, then press ENTER.
7.2.1.1
Naming Modules
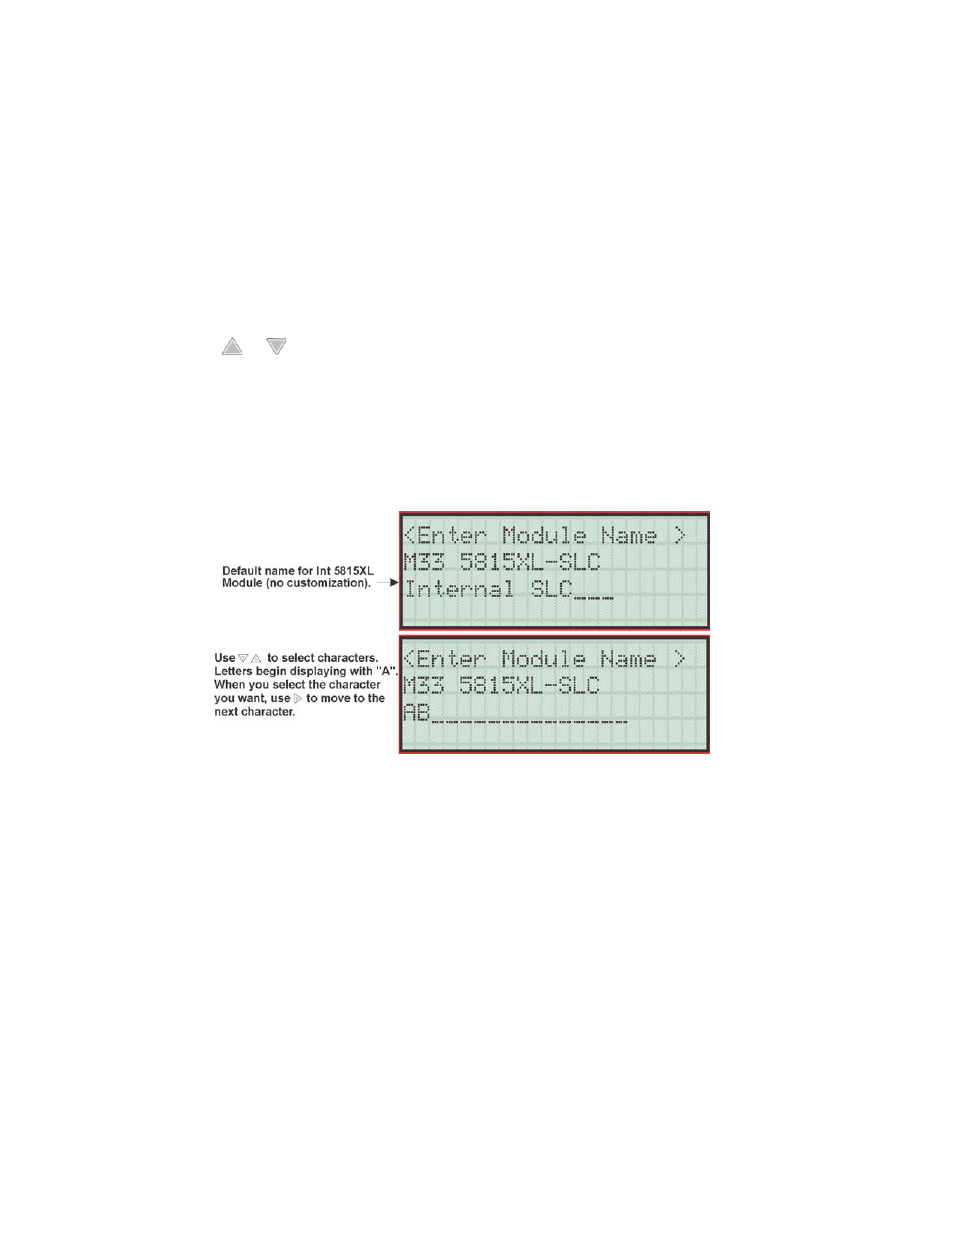
You can assign an English name to a system hardware module to make it easier to recognize on a display.
6.
If you wish to edit the module’s name, press the ENTER on the modules name. Then press the number keys
corresponding to the character to select each character for the module’s name (or press the right arrow to
bypass editing the name).
Press the the right arrow to move to the next character.
Figure 7-1 Edit module Name Programming Screen Example
7.2.1.2
Editing Module Features
Each module has a unique set of options that specifically applies to the functionality of the module being edited.
7.
Use the left and right arrow keys to move between available options.
8.
Option settings are edited by pressing the up or down arrow.
7.2.2
Adding a Module
To add a new hardware module to the system, follow these steps:
You must be in the Main Menu to perform this task. If necessary, enter the Installer Code.
1.
Enter the installer code. The panel will automatically go the main menu.
2.
Select 7 for Program Menu.
3.
Press 1 to enter module menu.
4.
Press 2 to add a module.