Removing a primary hard disk – Nortel Networks BCM200/400 User Manual
Page 274
274
Chapter 22 Replacing the hard disk
N0060612
N0060612
To remove a hard disk from a standard configuration hard disk
cage
1
Remove the standard hard disk cage from the main unit (see
“Removing a hard disk cage” on
2
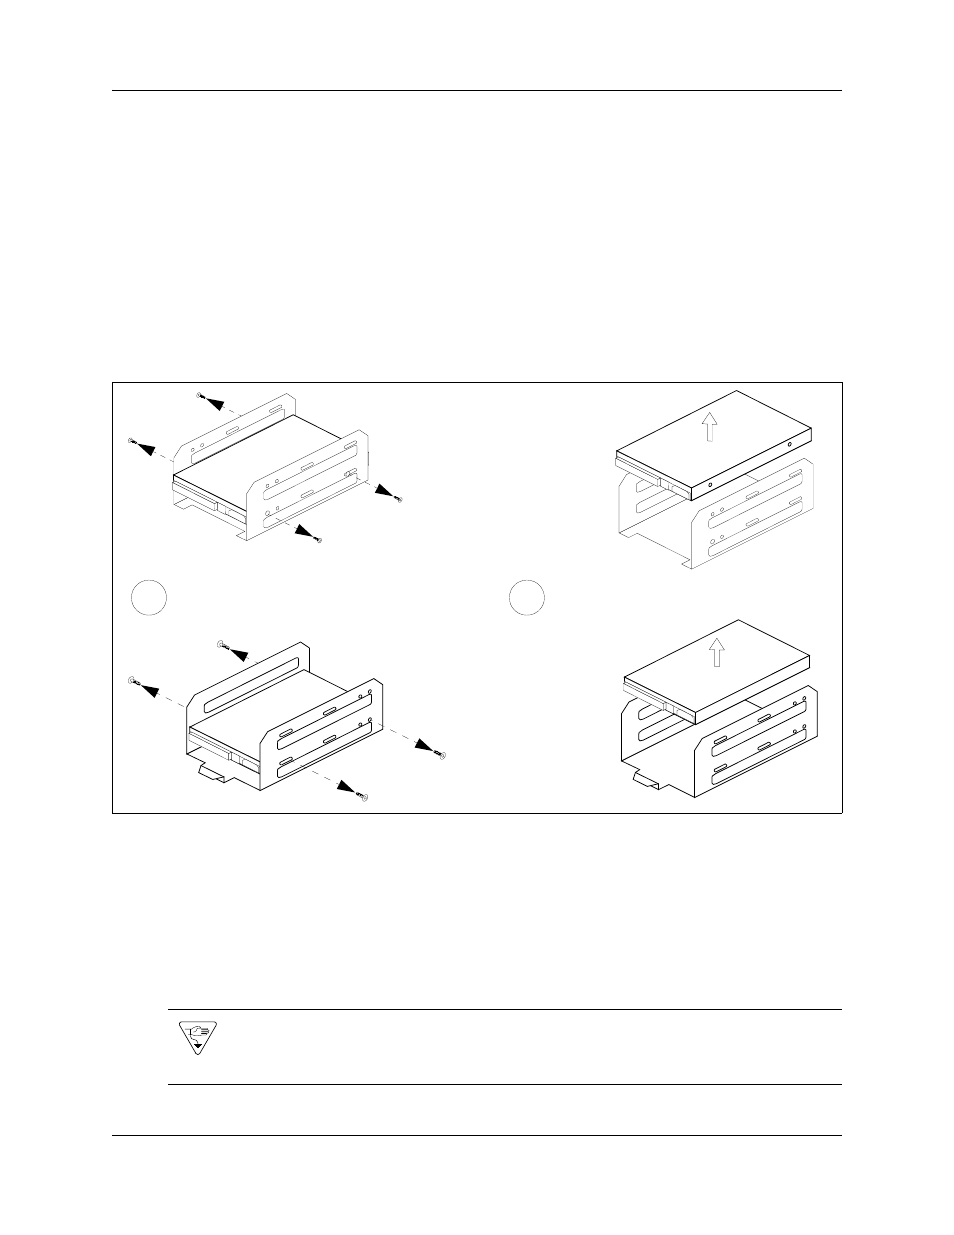
Unscrew the hard disk retainer screws from both sides of the standard hard disk cage (see
). Place the retainer screws in a safe location.
3
Remove the hard disk from the standard hard disk cage (see
4
Place the hard disk on a flat, clean and static-free surface.
Figure 128 Remove the hard disk from the standard hard disk cage
Removing a primary hard disk from a RAID hard disk cage
Use this procedure to remove the primary hard disk from the RAID hard disk cage for the
BCM200 and BCM400 system. Use this procedure if you need to replace a faulty hard disk. If a
primary hard disk fails, the mirror hard disk assumes control and service remains uninterrupted.
Nortel recommends that you replace the failed primary hard disk to retain full redundancy.
Replace the failed primary hard disk during a period of low call traffic.
Warning: Protect the hardware components against damage from electrostatic discharge.
Always wear a grounded wriststrap before you handle components. Always place the
components in a static-free container.
Remove the hard disk retainer screws
Remove hard disk from the hard disk cage
1
2
BCM200 Hard disk cage
BCM400 Hard disk cage
IDE connector and hard disk
cage lift tab are at opposite
ends
IDE connector and hard disk
cage lift tab are at the same
end