Dsmc2 helium operation guide, Install a lens mount – RED DIGITAL CINEMA DSMC2 BRAIN with HELIUM 8K S35 Sensor (2018 Unified DSMC2 Lineup) User Manual
Page 250
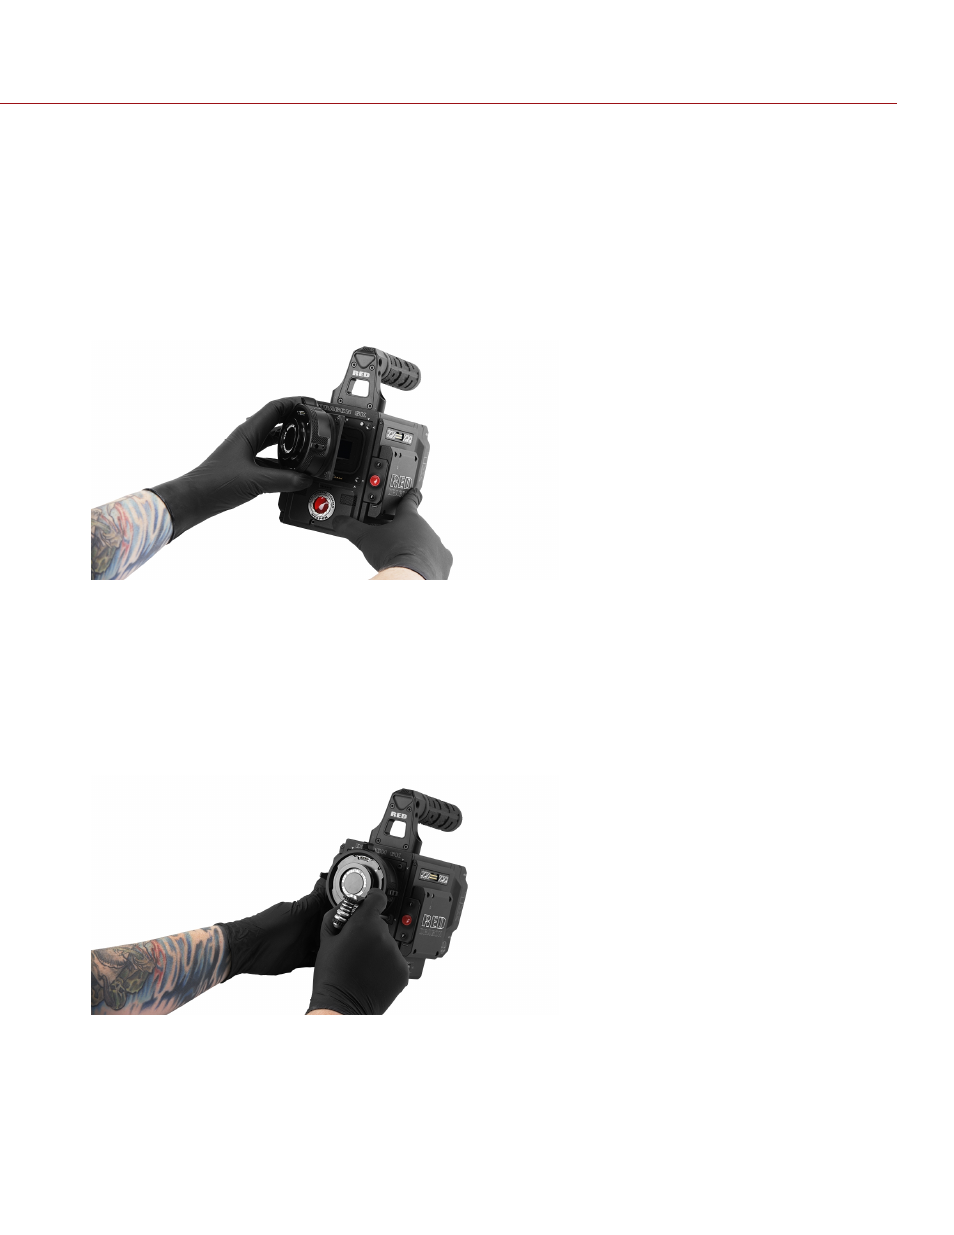
INSTALL A LENS MOUNT
NOTE:
You can change lens mounts in the field. However, RED recommends that you change lens mounts only in a
dust-free environment.
REQUIRED TOOL(S):
T20 TORX driver
1. Ensure that the camera is turned off and remove any accessories or cables that may interfere with installation.
2. Inspect the gold electrical contact pins on the front of the camera and the gold contact pads on the rear of the lens
mount to ensure that they are free of any contamination.
3. Align the lens mount on the front of the camera. The camera connection pins must align with the lens mount pins.
Figure: Align Lens Mount Pins
4. Depending on the lens, you may need to turn the locking ring slightly counter-clockwise so that you can access
the lens mount screws.
5. Replace and loosely tighten the four (4) M4x0.7 x 8 mm lens mount screws in a cross pattern (“X” pattern) using a
T20 TORX driver.
WARNING:
DO NOT FULLY TIGHTEN.
NOTE:
Some lens mounts have captive screws that are not removable.
Figure: Tighten Screws
C O PYR I G HT © 2 0 1 9 R ED.C O M , LLC
9 5 5 - 0 1 6 8 _V 7 .1 , R EV - M
|
2 5 0
DSMC2 HELIUM OPERATION GUIDE