Guide to using the recorder application: cue view – Grass Valley K2 Media Client User Manual v3.3 User Manual
Page 57
June 5, 2009
K2 Media Client User Manual
57
Guide to using the Recorder application: Cue view
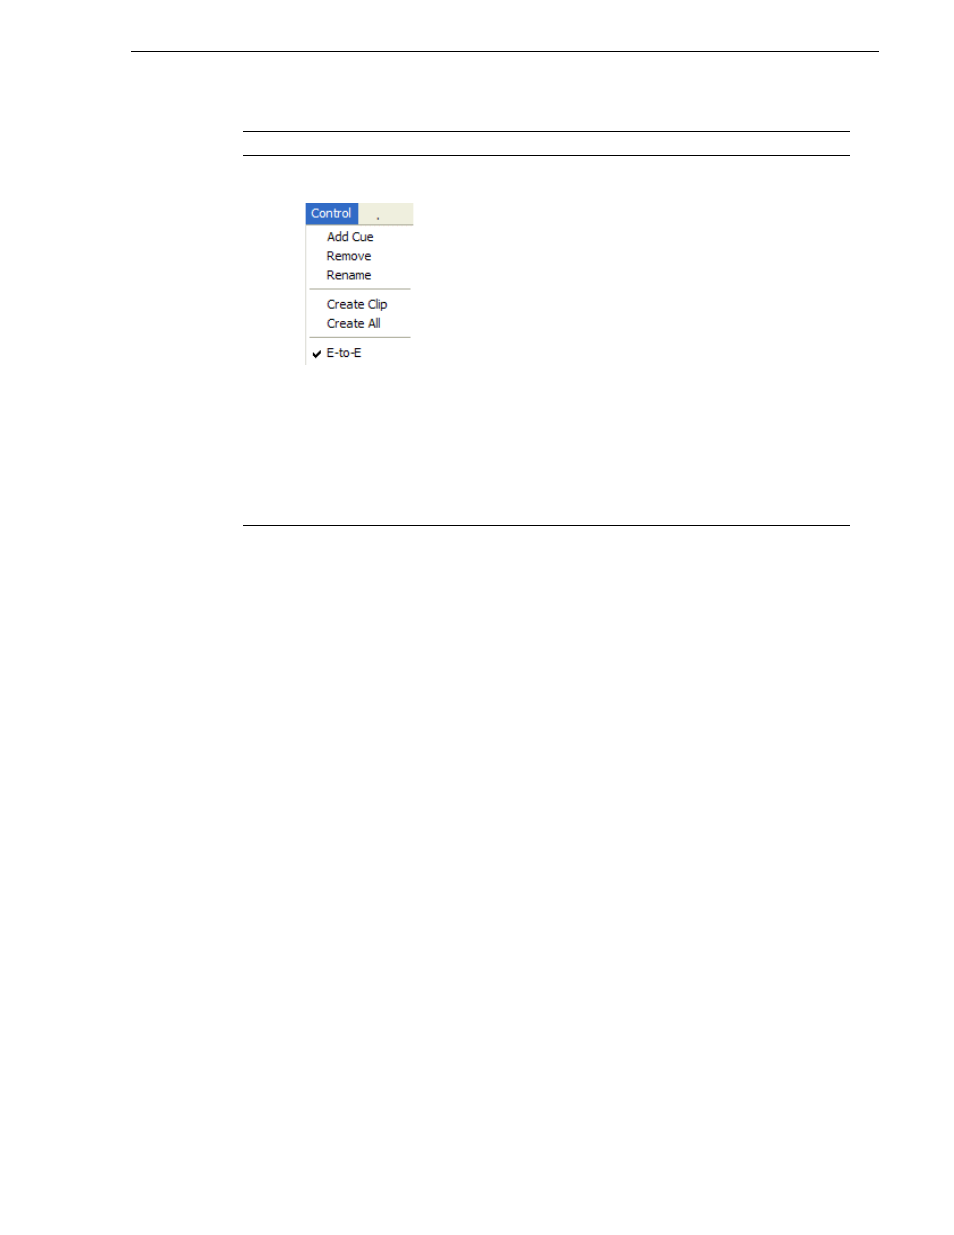
Recorder Menu
Add Cue – Used to add a cue to a recording:
1. In the Control view, start the recording.
2. Select the
Cue
tab.
3. At the desired timecode, select
Control | Add Cue
.
Remove – Used to remove a cue.
Rename – Used to rename a cue.
Create Clip – Creates a sub clip from highlighted cue points.
Create All – Creates sub clips from all cue points.
E-to-E (LoopThru) mode – This menu item available on SD-00 and
HD-00 models. When selected, the following occurs: “EE” is
displayed on the channel pane, next to the Timecode Source
indicator; when no clip is loaded, the signal that is currently present
at the channel input plays out; when a record operation stops the clip
remains in the Recorder. The signal that is currently present at the
channel input plays out.
E to E – This menu item available on SDA-00 models. When
selected, the output video and audio switches to the record channel
input when the play channel is stopped or when no clip is loaded. If
not selected, the output freezes on the last frame of video. If you are
using E-to-E, you must connect a video reference signal to prevent
playback instability.
Control
Description and User Operation