Guide to using the recorder application: cue view, Chapter 4 recording clips – Grass Valley K2 Media Client User Manual v3.3 User Manual
Page 56
56
K2 Media Client User Manual
June 5, 2009
Chapter 4 Recording clips
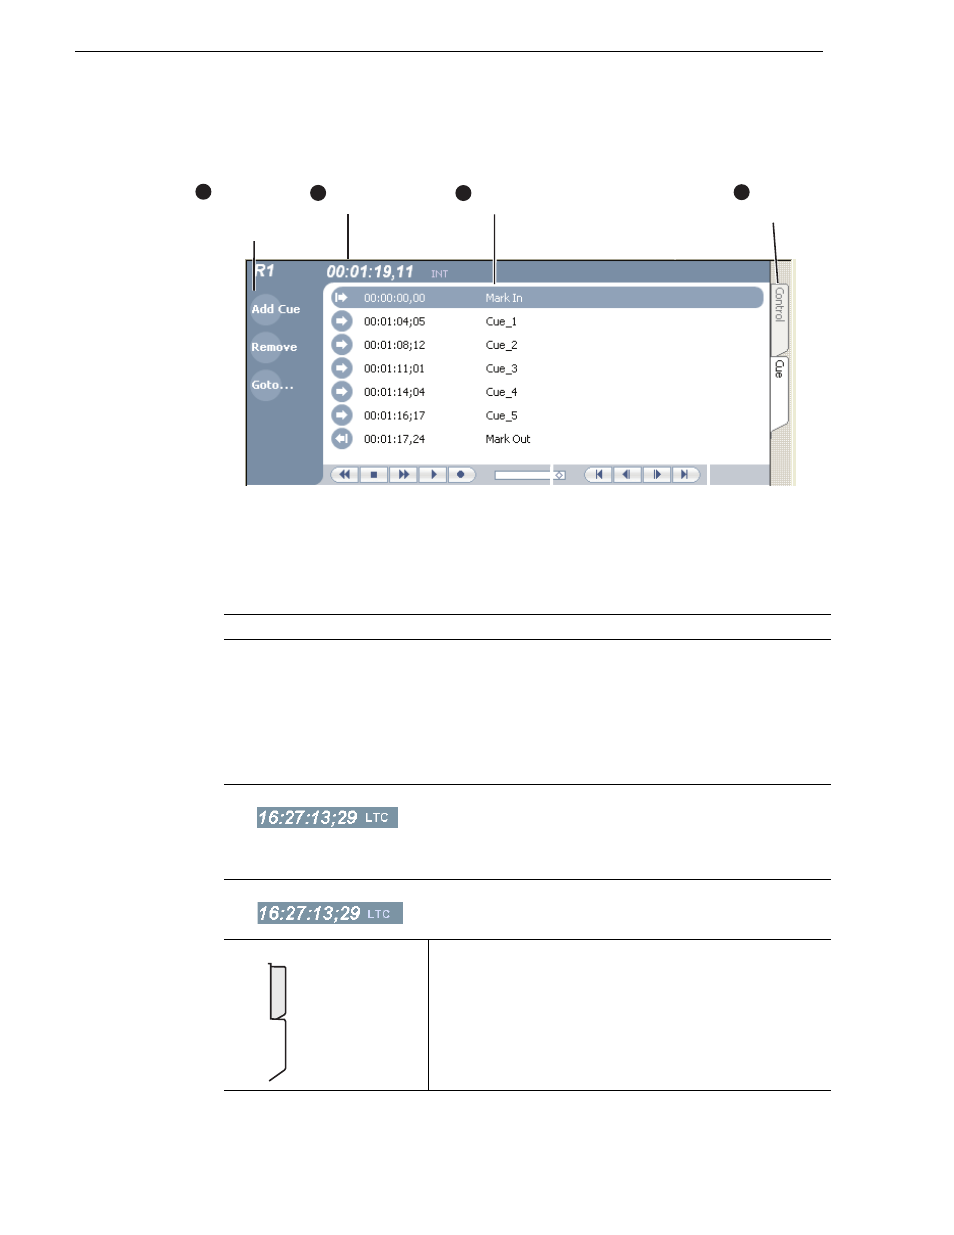
Guide to using the Recorder application: Cue view
Control
Description and User Operation
1
Assignable Buttons
Assignable buttons allow you to modify the button assignments to
best suit your workflow. Hold down a button to open a pop-up menu
that lists the alternative button choices.
Properties
– Same as selecting Properties on the Recorder menu.
New Clip
– Same as selecting New Clip on the Recorder menu.
Preview
– Same as selecting Preview on the Recorder menu.
Locate
– Same as selecting Locate on the Recorder menu.
2
Current Timecode
Indicates the current timecode of the timecode source selected for the
channel. Text color is white during record, and dimmed at other
times. The timecode value of XX:XX:XX:XX is displayed when the
timecode source is not present or is invalid.
3
Timecode Source
Indicates the mark in, mark out, and cue points of the recording
session.
4
View tabs
These tabs toggle between Control view and Cue Points view.
Assignable
Buttons
(Default buttons
are shown)
1
Current
Timecode
2
4
3
View
Tabs
Mark in/out
Cue List
Control
Cue