Grass Valley K2 Media Client User Manual v3.3 User Manual
Page 53
June 5, 2009
K2 Media Client User Manual
53
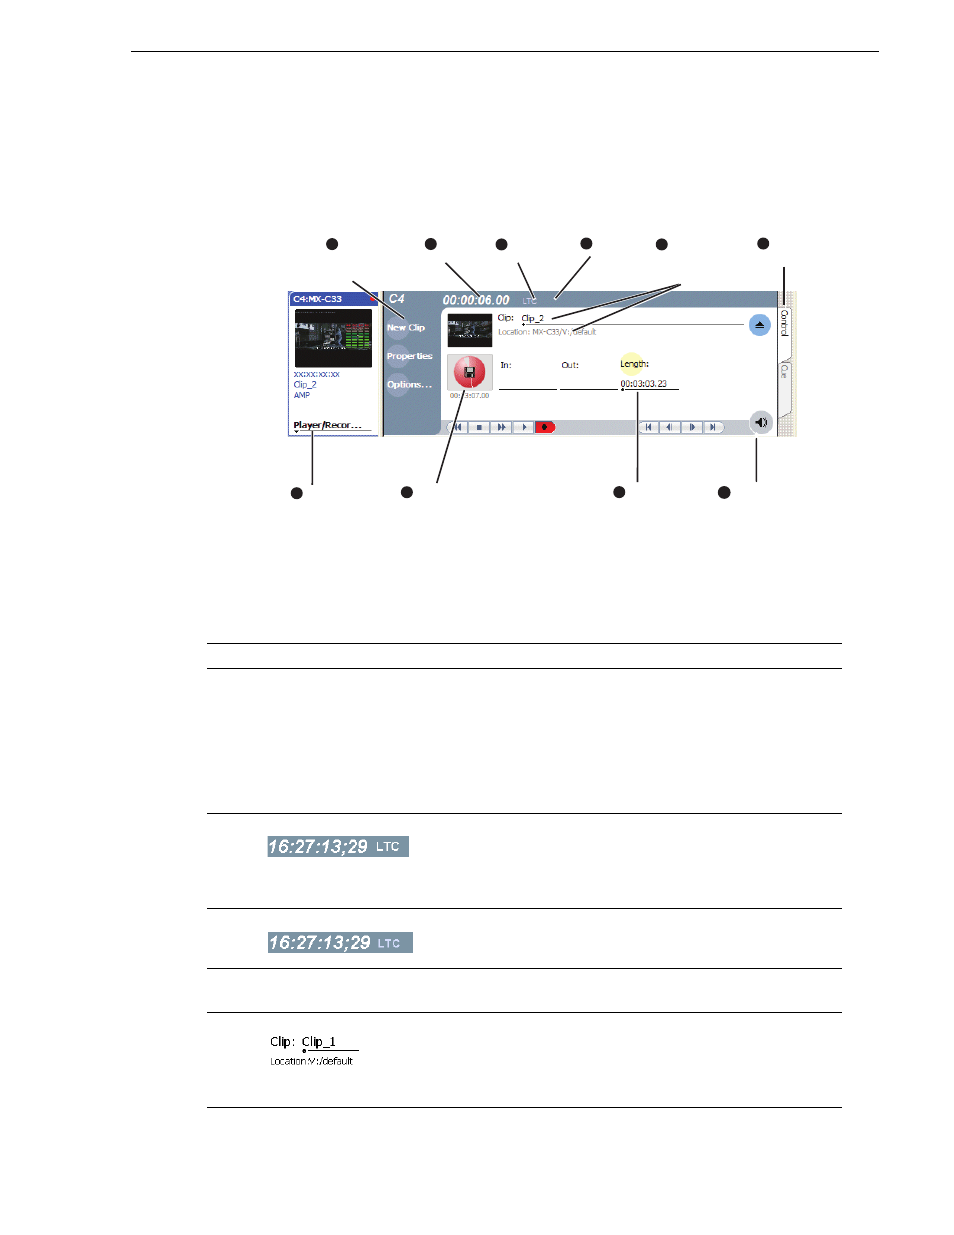
Guide to using the Recorder/Player application: Control view
Guide to using the Recorder/Player application: Control view
The following shows the basic controls in the Recorder/Player application found in an
SD-00 Media Client. This model uses the Player/Recorder application to record a clip.
The Player/Recorder channel is referred to as C1, C2, C3 or C4.
Control
Description and User Operation
1
Assignable Buttons
Assignable buttons allow you to modify the button assignments to
best suit your workflow. Hold down a button to open a pop-up menu
that lists the alternative button choices.
Properties
– Same as selecting Properties on the Recorder menu.
New Clip
– Same as selecting New Clip on the Recorder menu.
Preview
– Same as selecting Preview on the Recorder menu.
Locate
– Same as selecting Locate on the Recorder menu.
2
Current Timecode
Indicates the current timecode of the timecode source selected for the
channel. Text color is white during record, and dimmed at other
times. The timecode value of XX:XX:XX:XX is displayed when the
timecode source is not present or is invalid.
.
3
Timecode Source
The text displayed to the right of current timecode indicates the
timecode source.
See “Changing the timecode source” on page 64
.
4
Loop Thru Mode
This text indicates if “E-to-E (LoopThru) mode” is selected. See
Record Menu below.
5
Clip Name Edit Control
Displays the clip’s name and location in the media storage system. To
rename the clip, click and enter text. To change the current bin, i.e.
the target location for recording clips, refer to
. You can use the Clips pane to manage and organize
clips.
7
Timecode
Source
Meter Bar
Button
(Click to adjust
audio)
2
3
4
Clip Name &
Current Bin
(Click clip name
to rename clip.)
Length
(Click to enter
fixed length)
Time Dome
Assignable
Buttons
(Default buttons
are shown)
1
Loop
Thru
Mode
Current
Timecode
View
Tabs
5
8
Application
6
9
10
EE