Trigger front panel controls – Teledyne LeCroy WaveRunner 6 Zi and 12-Bit HRO Getting Started Manual User Manual
Page 29
Getting Started Manual
922136-00 Rev A
21
B
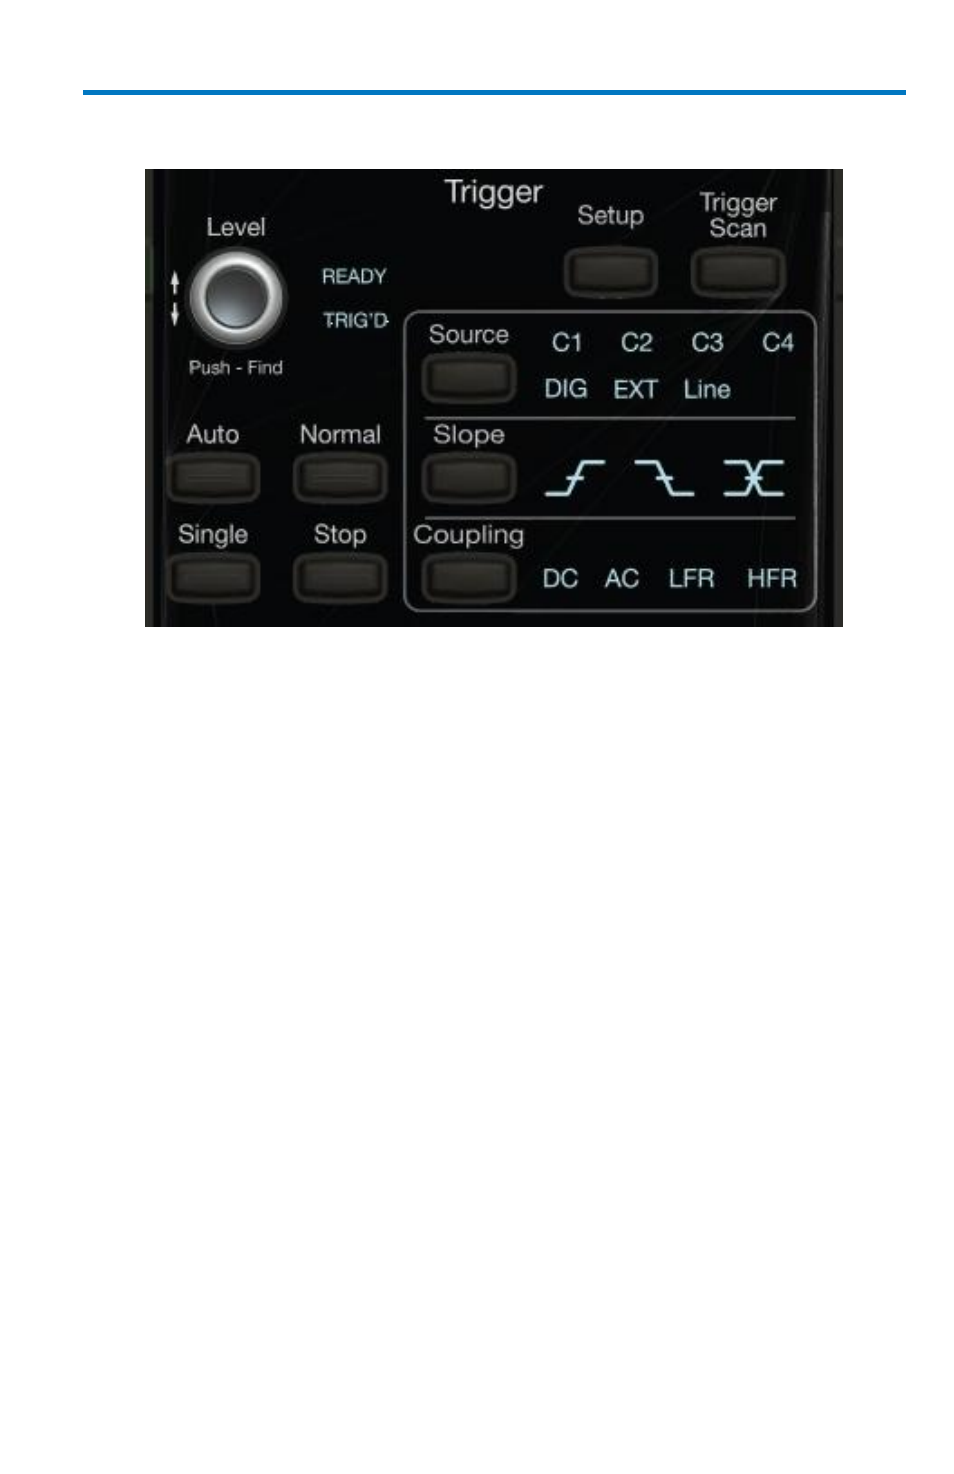
Trigger Front Panel Controls
Level - Pressing this button sets the trigger level to 50%. Turn the
knob to change the trigger threshold level. The threshold level is
indicated on the Trigger label.
READY and TRIG'D Indicators - The READY indicator is lit when the
trigger is armed. TRIG'D is lit momentarily when a trigger occurs. A
fast trigger rate causes the light to stay lit continuously.
Setup - Press once to open the Trigger Setup... dialog. Corresponds
with screen menu selection: Trigger → Trigger Setup.... Press the
Trigger S
ETUP
front panel button again to close the Trigger Setup...
dialog.
Trigger Scan - Pressing the Trigger Scan button opens the
TriggerScan dialog to help you quickly find rare waveform glitches
and anomalies.
Source - This button directly selects through the available Source
field values (C1, C2, C3, C4, Dig, EXT, and Line) usually accessed on
the Setup section of the main Trigger dialog.
Slope - This button directly selects through the available Slope field
values (Positive, Negative, or Either) usually accessed on the Setup
section of the main Trigger dialog.
Coupling - This button directly selects through the available
Coupling field values - DC, AC, LFR (Low-Frequency Rejection), or