About the cursor colors – Grass Valley K2 Dyno v.1.6 User Manual
Page 88
88
K2 Dyno Controller User Manual
15 April 2010
Chapter 5 Marking Function
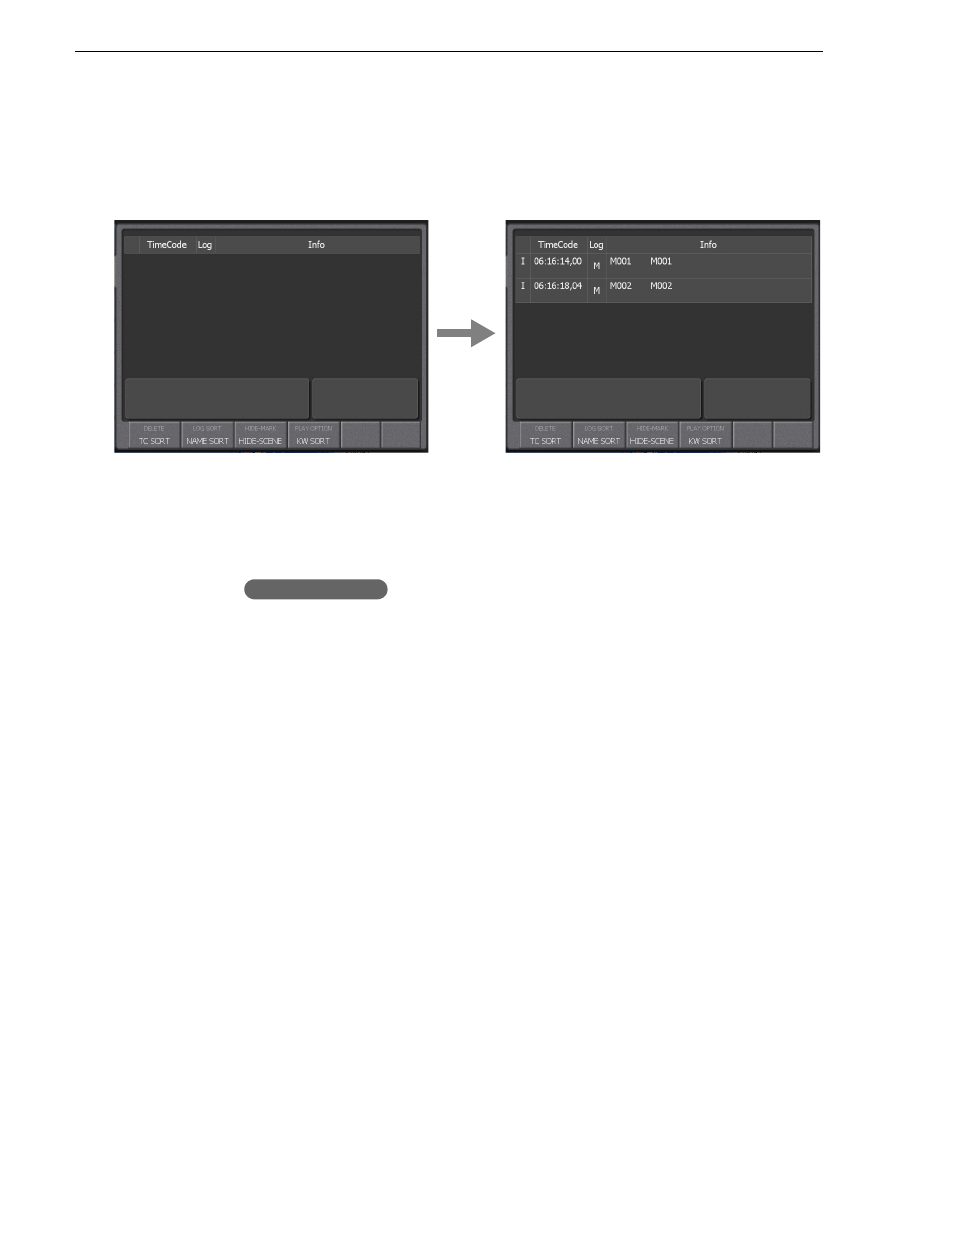
2. Press the
Add Mrk
button at the desired scene.
• The screen display will not change when you press the button in screens other
than the MARK screen. You can check the added marking information in the
MARK screen.
NOTE: Marks are added on the record train. Therefore, when you are making a
recording, you can mark live video while you are watching the video from the
camera even during a replay or playlist playback.
3. Touch the mark you want to cue up, and then press the
Cue Up
button.
Press the
Previous/Next
button to select the mark you want to cue up.
• When the HOME screen is displayed, pressing the
Previous/Next
button
displays the MARK screen.
• For the button operation, the selected mark is cued up automatically.
4. Press the
Play
button.
• You can also perform a slo-mo playback with the T-Bar.
NOTE: The "auto cue up function" for cueing up a mark just by selecting a mark
with a touch operation and the "auto play function" for cueing up and additionally
playing the selected mark are available. For more information about the settings,
see
"Play option settings" on page 185
NOTE: In step 3, if you press the
Shift
button and then press the Previous/Next
button, the controller performs a reverse playback to the In point of the next
previous or next mark. The pre-roll for this reverse playback can be set in the
CONFIG screen. For more information, see
"Playback settings 3 (mark move, cut
point, lever engage)" on page 170
.
About the cursor colors
The K2 Dyno Controller shows the item status with cursors colors. The cursor appears
as an outline around a highlight clip or other item. The cursor colors are common in
all screens. The meanings of the cursor colors are as follows:
• Blue cursors indicate that the item is selected.
Button operation