Assigning the network ports – Grass Valley K2 Dyno v.1.6 User Manual
Page 200
200
K2 Dyno Controller User Manual
15 April 2010
Chapter 10 Settings
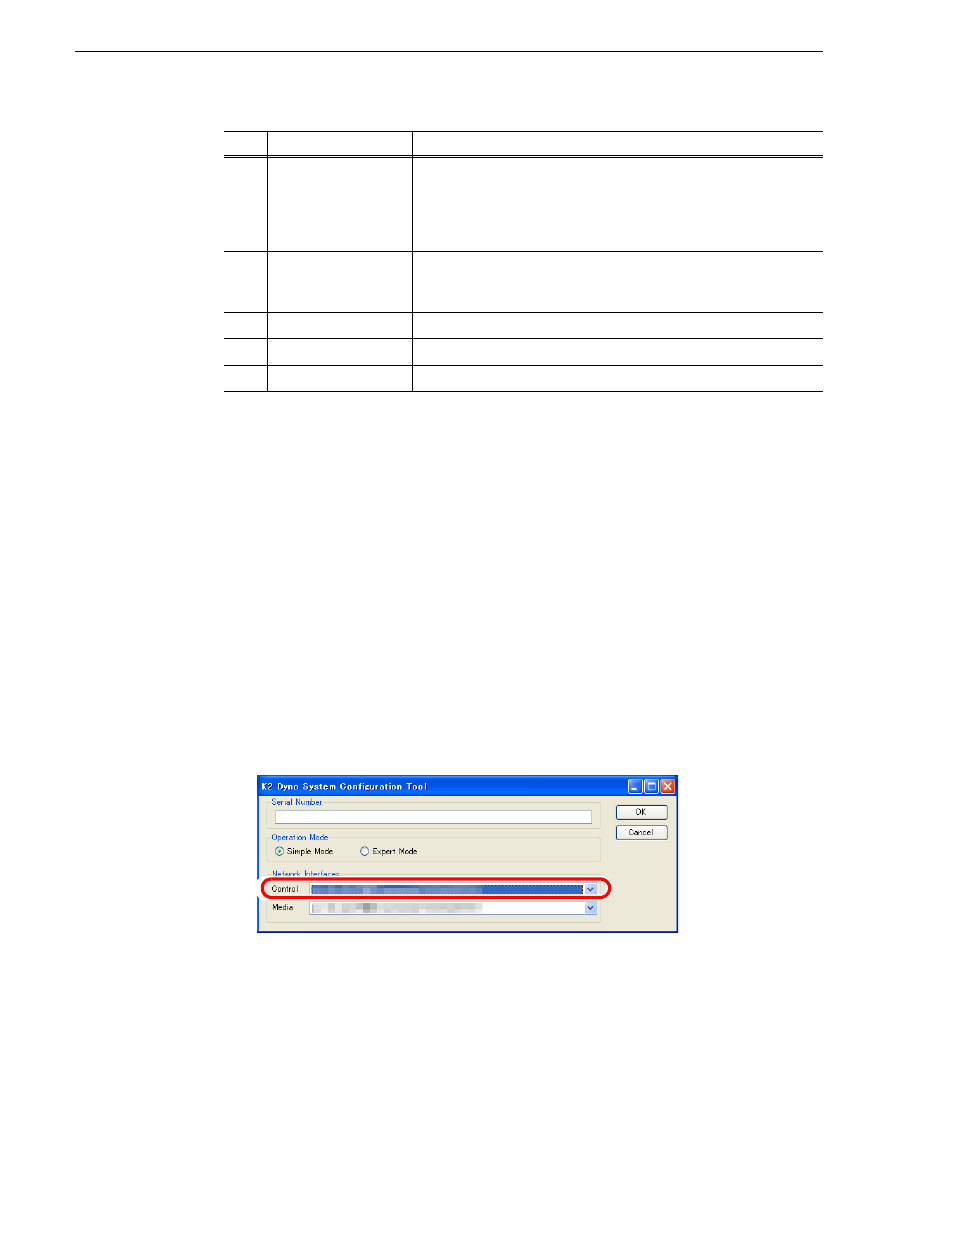
Assigning the network ports
The K2 Dyno Controller is equipped with two GigE ports that can be used for the
transfer and control purposes separately. Port assignments can be set upon installation
or while in the maintenance mode.
This section describes the steps to set it in the maintenance mode.
NOTE: Before proceeding the steps, the transport and control ports of the K2 Dyno
Controller must be connected to the transport and control ports of the K2 Summit
Production Client respectively.
1. Start up the K2 Dyno Controller in the maintenance mode.
• For more information on how to start up the controller in the maintenance mode,
see
"Switching to the Windows OS (maintenance mode)" on page 42
2. Click
Start | K2 Dyno | Maintenance | Client Configuration
.
3. Choose the port you want to use for the control network from the list in "Control"
of "Network Interfaces".
(4)
T-BAR
The 0% and 100% positions of bar operations can be fine-tuned.
Operate the T-Bar to move it to the position you want to set as 0%, and
then touch
Btm
. Similarly, touch
Top
at the position to set as "100%".
Make other settings on the T-Bar screen, as instructed in
(5)
JOG
Sets the idle of the JOG knob.
Touch
<
/
>
to adjust. The idle becomes smaller as you decrease the
value.
(6)
Load Default
Restores the default settings.
(7)
Save & Exit
Saves the settings and exits the calibration.
(8)
Cancel
Discards the settings and exits the calibration.
No.
Name
Function