Tcp/ip, Tcp/ip -12 – Xerox 4595 con Xerox FreeFlow DocuSP Print Controller-15553 User Manual
Page 60
Xerox 4595 Copier/Printer System Administration Guide
3-12
3. Using CentreWare Internet Services
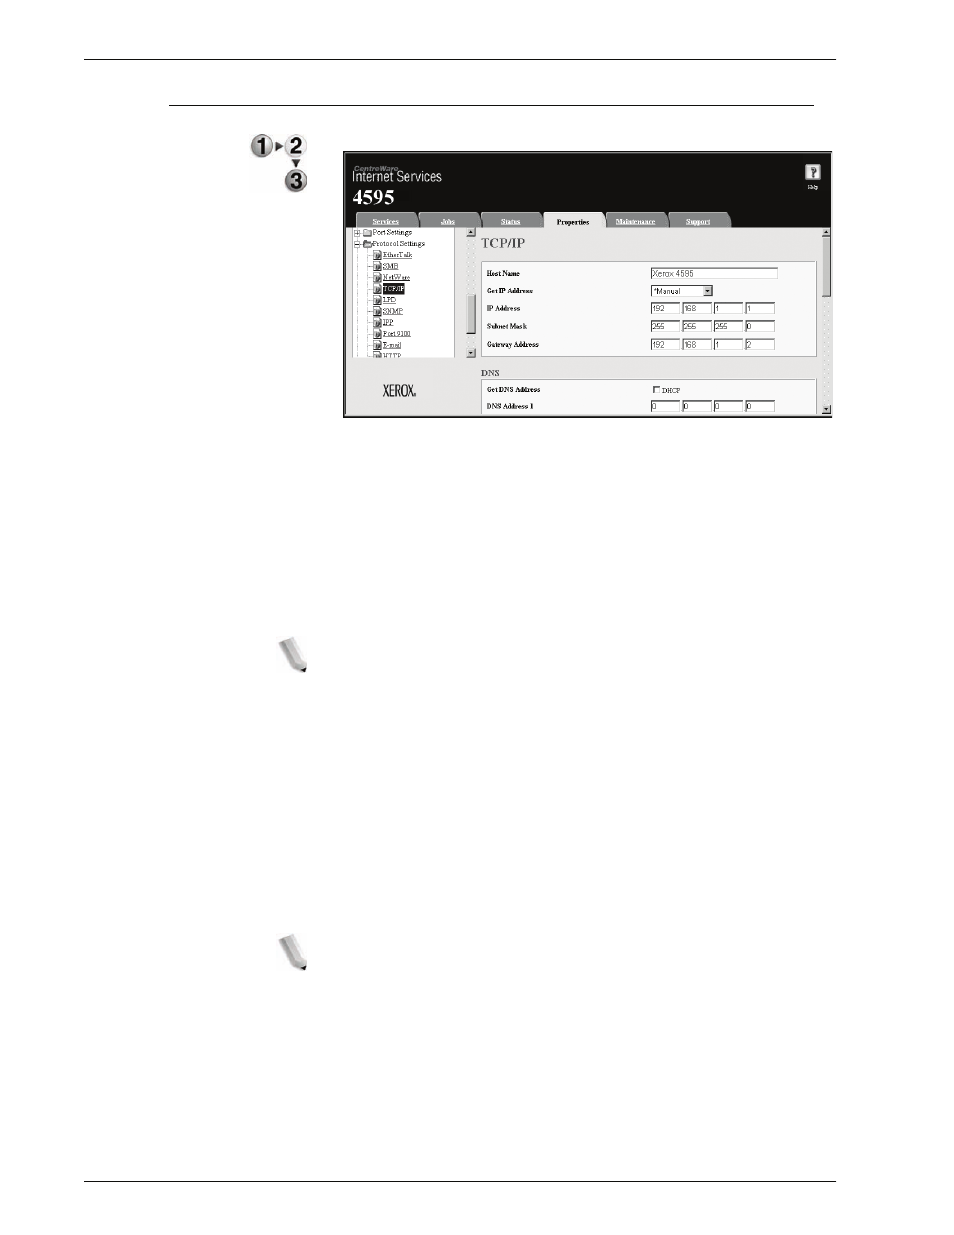
TCP/IP
This section describes the settings for TCP/IP.
1.
Start a web browser.
2.
Type the IP address or the Internet address for the machine in
the address bar on the browser, and press the
Enter
key.
•
Example of the IP address entry:
http://192.168.1.1/
•
Example of the Internet address entry:
http://xxx.yyyy.zz.vvv/
NOTE: When specifying a port number, add ":" and a port
number to the end of the Internet address.
3.
Click the
Properties
tab.
4.
Click
+
on the left of
Protocol Settings
to display the items in
the folder.
5.
Click
TCP/IP
.
6.
Set the
Host Name
.
7.
Select how to obtain an IP address from the
Get IP Address
pull-down menu.
8.
Set the
IP Address
.
NOTE: This item is not necessary if either DHCP, BOOTP,
RARP, or DHCP/Autonet has been selected from the Get IP
Address pull-down menu.
- 4595 con Xerox FreeFlow DocuSP Print Controller-14450 4595 con integrated Copy-Print Server-15547 4595 con Xerox FreeFlow DocuSP Print Controller-15870 4595 con integrated Copy-Print Server-15243 4595 con integrated Copy-Print Server-14444 4595 con integrated Copy-Print Server-15864 4595 con Xerox FreeFlow DocuSP Print Controller-15249 4595 mit integrated Copy-Print Server-9394 4595 mit integrated Copy-Print Server-10919 4595 mit Xerox FreeFlow DocuSP Print Controller-10926 4595 mit Xerox FreeFlow DocuSP Print Controller-9700 4595 mit integrated Copy-Print Server-10082 4595 mit Xerox FreeFlow DocuSP Print Controller-9401 4595 mit integrated Copy-Print Server-9693 4595 mit Xerox FreeFlow DocuSP Print Controller-10089 4595 con Xerox FreeFlow DocuSP Print Controller-17520 4595 con Xerox FreeFlow DocuSP Print Controller-18220 4595 con integrated Copy-Print Server-18213 4595 con integrated Copy-Print Server-17819 4595 con Xerox FreeFlow DocuSP Print Controller-17826 4595 con integrated Copy-Print Server-17513