Custom buttons 1, 2, and 3, Custom buttons 1, 2, and 3 -30 – Xerox 4595 con Xerox FreeFlow DocuSP Print Controller-15553 User Manual
Page 188
Xerox 4595 Copier/Printer System Administration Guide
8-30
8. Setups
4.
Select the desired setting for the specific Screen Defaults
feature.
5.
Select
Save
.
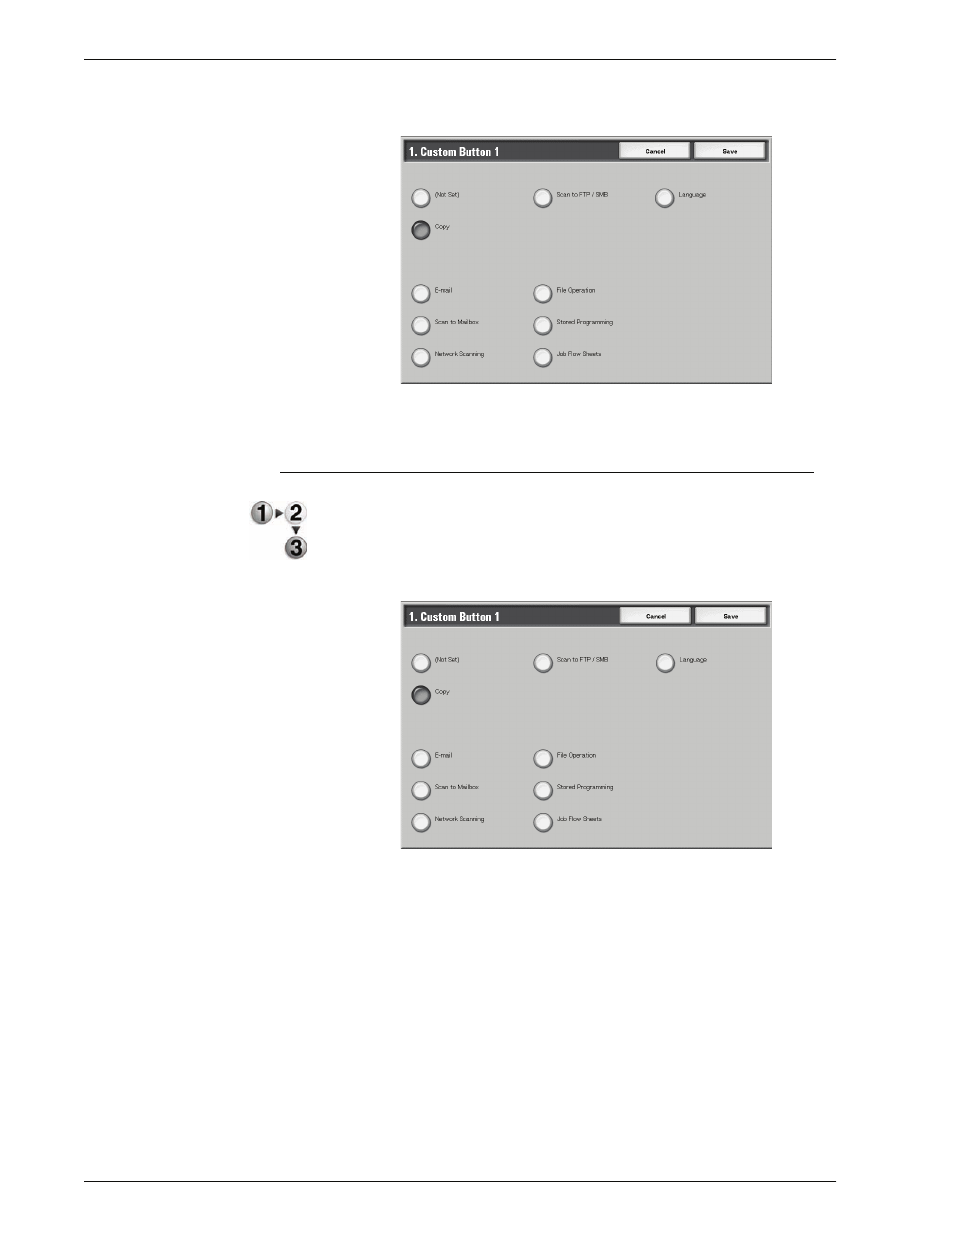
Custom Buttons 1, 2, and 3
You can assign features to the Custom Buttons on the control
panel: Custom Buttons 1, 2, and 3.
To leave a button unassigned, select
Not Set
.
1.
Select
Custom Button 1
, and select
Change Settings
.
2.
Select the feature to be assigned to that button.
This manual is related to the following products:
- 4595 con Xerox FreeFlow DocuSP Print Controller-14450 4595 con integrated Copy-Print Server-15547 4595 con Xerox FreeFlow DocuSP Print Controller-15870 4595 con integrated Copy-Print Server-15243 4595 con integrated Copy-Print Server-14444 4595 con integrated Copy-Print Server-15864 4595 con Xerox FreeFlow DocuSP Print Controller-15249 4595 mit integrated Copy-Print Server-9394 4595 mit integrated Copy-Print Server-10919 4595 mit Xerox FreeFlow DocuSP Print Controller-10926 4595 mit Xerox FreeFlow DocuSP Print Controller-9700 4595 mit integrated Copy-Print Server-10082 4595 mit Xerox FreeFlow DocuSP Print Controller-9401 4595 mit integrated Copy-Print Server-9693 4595 mit Xerox FreeFlow DocuSP Print Controller-10089 4595 con Xerox FreeFlow DocuSP Print Controller-17520 4595 con Xerox FreeFlow DocuSP Print Controller-18220 4595 con integrated Copy-Print Server-18213 4595 con integrated Copy-Print Server-17819 4595 con Xerox FreeFlow DocuSP Print Controller-17826 4595 con integrated Copy-Print Server-17513