Brocade Virtual ADX Graphical User Interface Guide (Supporting ADX v03.1.00) User Manual
Page 81
Brocade Virtual ADX Graphical User Interface Guide
69
53-1003242-01
Virtual servers
7
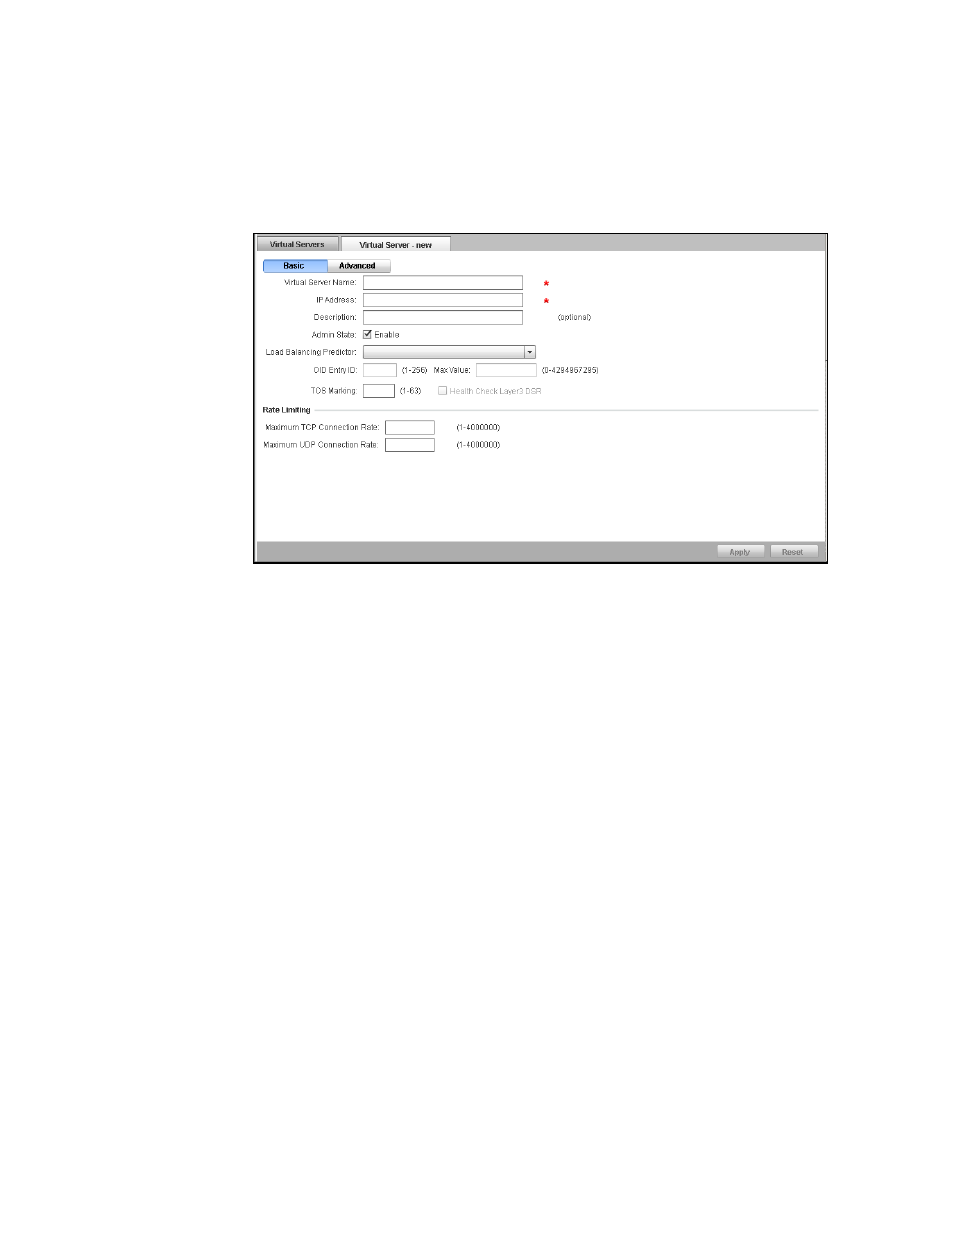
3. Click New at the bottom of the Virtual Server page.
The Virtual Server - new page tab is displayed, as shown in
.
FIGURE 56
Configuring virtual server
4. Click Basic and provide the following information:
•
Virtual Server Name: Enter the name of the virtual server, which distributes the load at the
real server.
•
IP Address: Enter the IP address of the virtual server to which the requests are sent. You
can configure both IPv4.
•
Description: Optionally, enter the description for the virtual server.
•
Admin State: Deselect the Enable check box to disable the virtual server. By default, admin
state is enabled.
•
Load Balancing Predictor: Select a load balancing algorithm from the list to determine the
load distribution among real servers; for example, Weighted Round Robin.
•
OID Entry ID: Enter the SNMP object ID value that represents the weight of the real server.
•
Max Value: Enter the maximum value for the dynamic weighting. The range is from 0
through 4,294,967,295.
•
TOS Marking: Enter the value for the TOS Marking. The range is from 1 through 63.
•
Health Check Layer3 DSR: This option is enable when you enter a value for the TOS
Marking. Click the check box to ensure that the health check reply packets will be sent
back to the VIP on the Brocade Virtual ADX. If you configure TOS marking without this
option, if a reply packet has the VIP as its source IP address, health checks will fail and the
packet will be dropped. The TOS marking with this option implicitly enables DSR
fast-delete, expediting the deletion of DSR SLB sessions when the Brocade Virtual ADX
receives a first TCP FIN message from a client.