Managing the tcp profile – Brocade Virtual ADX Graphical User Interface Guide (Supporting ADX v03.1.00) User Manual
Page 158
146
Brocade Virtual ADX Graphical User Interface Guide
53-1003242-01
SSL profiles
9
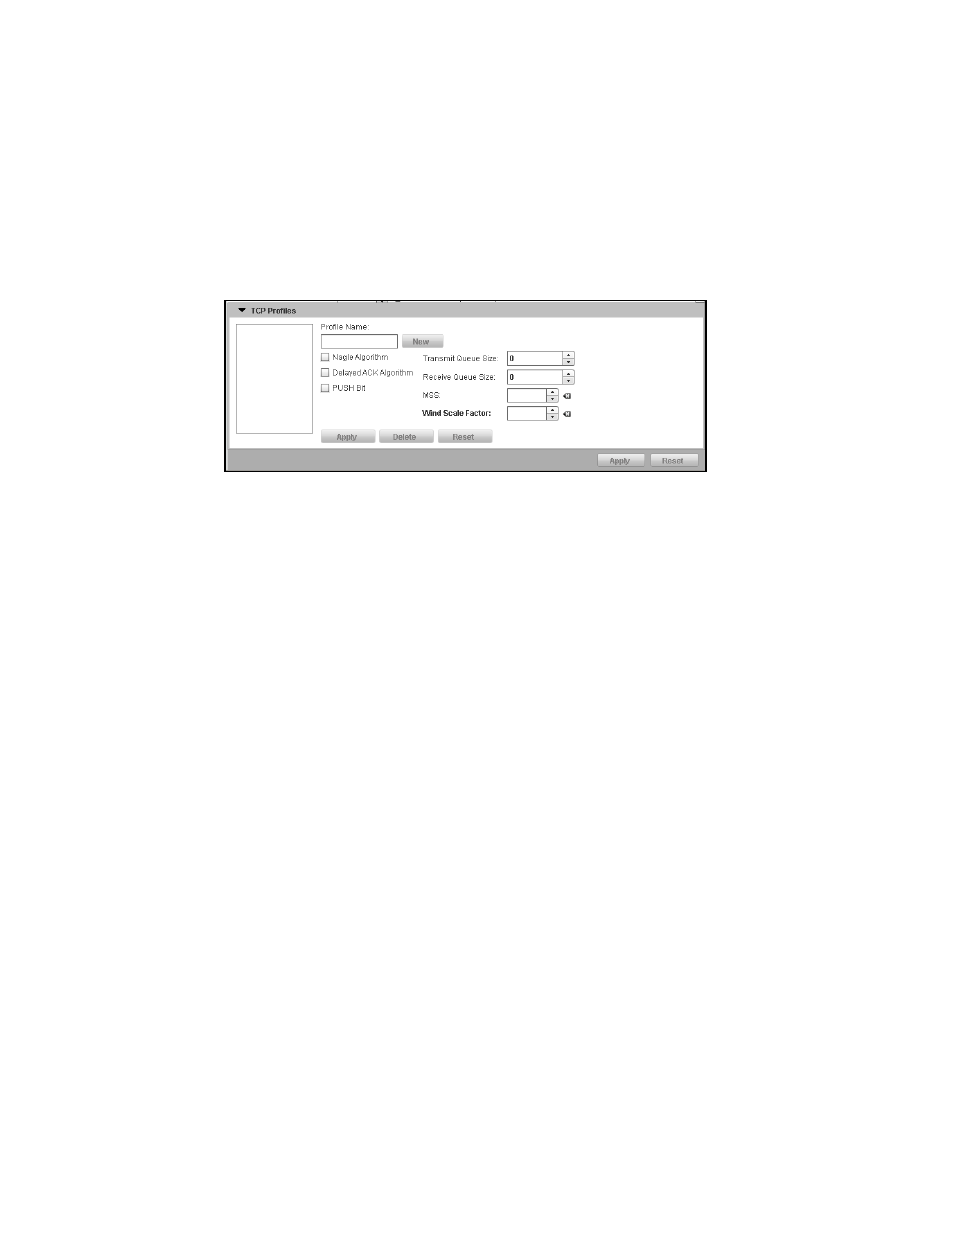
Managing the TCP profile
To manage the TCP profile, perform the following steps.
1. Click Manage TCP Profile to create or edit a profile.
The TCP Profiles page is displayed, as shown in
FIGURE 118
Managing TCP profiles
2. Select a profile you want to edit from the list or click New to create a new profile.
3. Provide the following information:
•
Profile Name: Enter the name of the TCP profile.
•
Nagle Algorithm: Select the check box to enable Nagle algorithm that is used to address
the problem when an application generates several small bytes of data at a time.
•
Delayed ACK Algorithm: Select the check box to send few acknowledgement (ACKs) per
data segment using a TCP delayed ACK mechanism.
•
PUSH Bit: Select the check box to enable PUSH flag in all the outgoing data packets except
when emptying the TCP transmit queue.
•
Transmit Queue Size: Enter the size of the TCP transmit queue.
•
Receive Queue Size: Enter the size of the TCP receive queue.
•
MSS: Specify the Maximum Segment Size (MSS value) or all the real servers bound to the
specified virtual server configured with the specific TCP profile. This value can be from 576
to 9176. The default TCP MSS value configured on a Brocade Virtual ADX is 1460 Bytes.
•
Wind Scale Factor: Specify the TCP window scale option in the TCP header and change the
receive and transmit buffer sizes. Enter a number from 1 to 7. The default is 0.
4. Click Apply to create a TCP profile.
Click Reset to revert the configuration to the previous configured values.