Generating self-signed certificates – Brocade Virtual ADX Graphical User Interface Guide (Supporting ADX v03.1.00) User Manual
Page 153
Brocade Virtual ADX Graphical User Interface Guide
141
53-1003242-01
SSL certificates
9
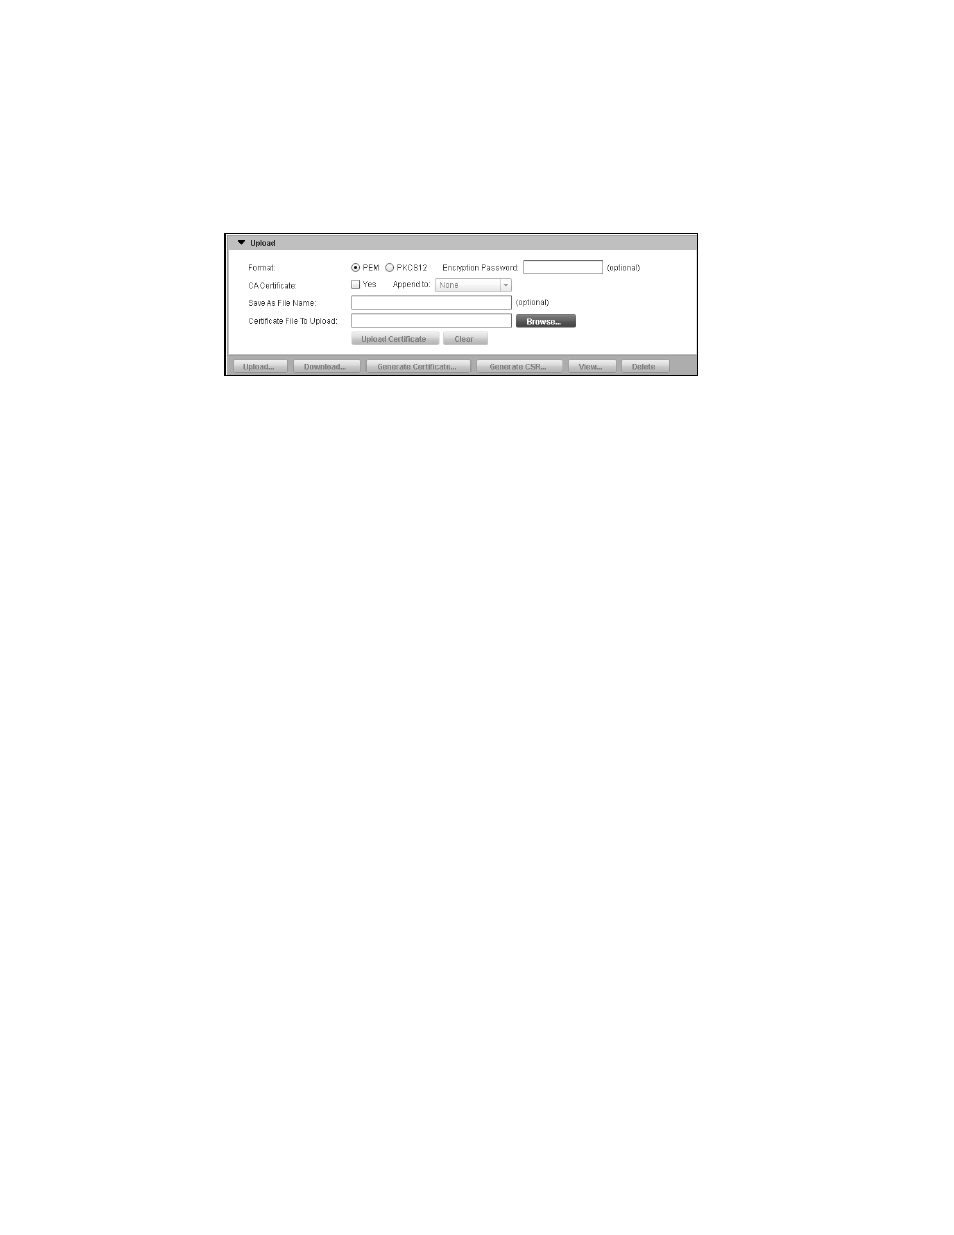
3. Click Upload at the bottom of SSL Certificates page.
The Upload page is displayed, as shown in
.
FIGURE 112
Uploading the SSL certificate
4. Provide the following information:
•
Format: Click PEM or PKCS12 to specify the format of the certificate. The default is PEM.
•
Encryption Password: Optionally, enter the password for the SSL certificate.
•
CA Certificate: Select the Yes check box to enable appending of certificate you are
uploading to an existing certificate on the device. Select an SSL certificate from the
Append to list.
•
Save As File Name: Optionally, enter the name of the certificate if you want to upload the
certificate on the device with a different name. If you leave this field blank, the certificate
will be uploaded with the same name.
•
Certificate File To Upload: Select the server certificate or CA certificate from your local
directory to upload to the device.
5. Click Upload Certificate.
Click Clear to clear all the entries in the fields.
Generating self-signed certificates
You can also generate a self-signed certificate on the device and upload it.
To generate a self-signed certificate, perform the following steps within the Configure tab.
1. Click Security on the menu bar.
2. From the sidebar, select SSL, and then select SSL Certificates.