Access control lists – Brocade Virtual ADX Graphical User Interface Guide (Supporting ADX v03.1.00) User Manual
Page 162
150
Brocade Virtual ADX Graphical User Interface Guide
53-1003242-01
Access Control Lists
9
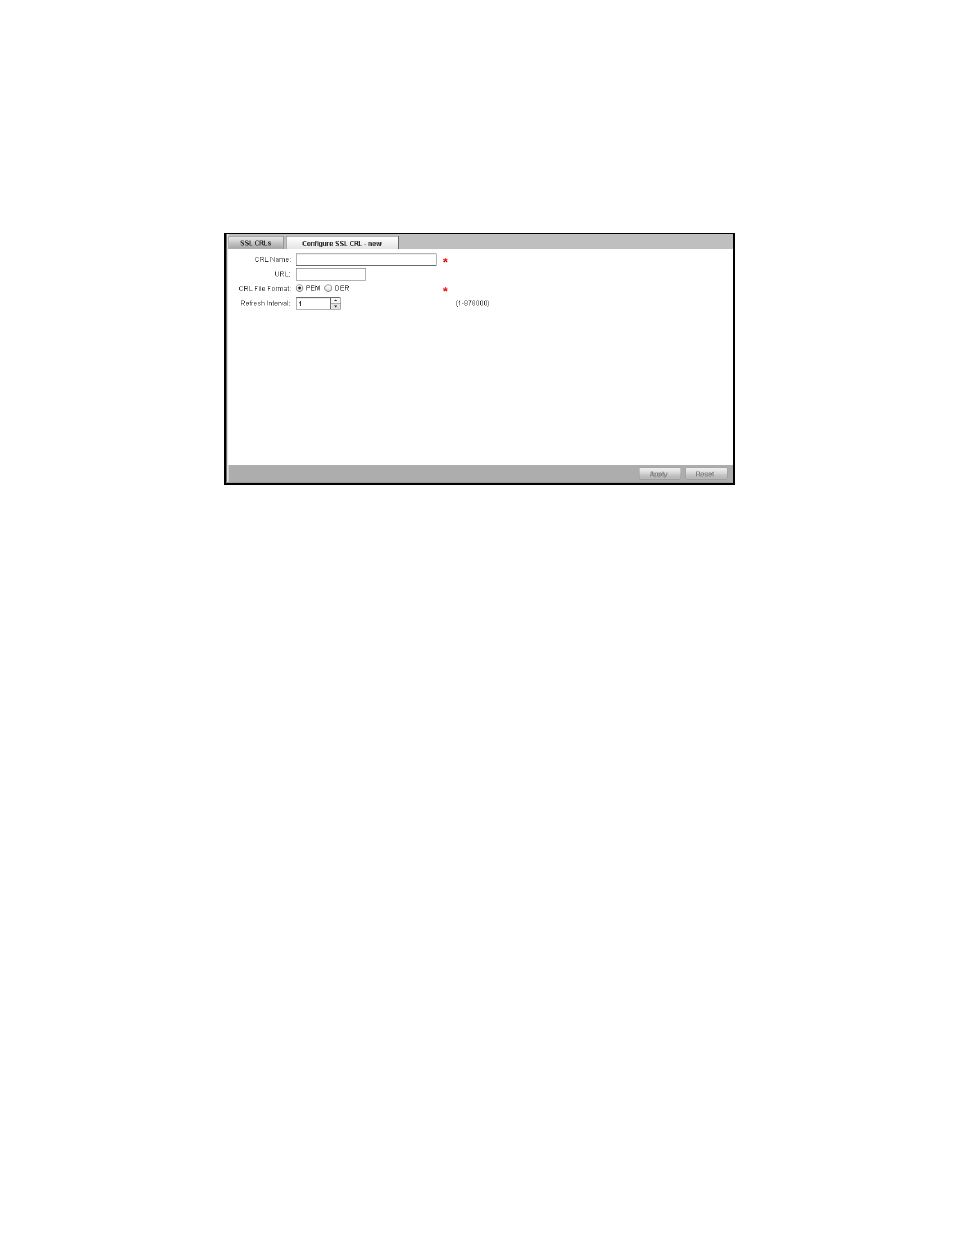
3. Click New at the bottom of SSL CRLs page.
The Configure SSL CRL - new page is displayed, as shown in
FIGURE 122
Configuring SSL CRL
4. Provide the following information:
•
CRL Name: Enter the name of the SSL CRL record.
•
URL: Enter the location where the CRL is located. You can enter an IP address or a domain
name.
•
CRL File Format: Click one of the following options:
•
PEM — To direct the CRL to be downloaded in the PEM format.
•
DER — To direct the CRL to be downloaded in the Distinguished Encoding Rules (DER)
format. By default, PEM is selected.
•
Refresh Interval: Specifies the number of hours to wait before updating the CRL record.
5. Click Apply to save your entries.
Click Reset to revert the configuration to the previous configured values.
For more information on binding the SSL CRLs, refer to the Brocade Virtual ADX Security Guide.
Access Control Lists
Access Control Lists (ACLs) allows you to filter traffic based on the information in the IP packet
header. You can use IP ACLs to provide input to other features such as distribution lists and rate
limiting. The ACLs can be configured in two types:
•
Standard ACL — Permits or denies packets based on the source IP addresses.
•
Extended ACL — Permits or denies packets based on the source and destination IP addresses
and also based on the IP protocol information.
You can also set and configure ACLs for IPv6 network connections.