Virtual server port details – Brocade Virtual ADX Graphical User Interface Guide (Supporting ADX v03.1.00) User Manual
Page 220
208
Brocade Virtual ADX Graphical User Interface Guide
53-1003242-01
Virtual servers
13
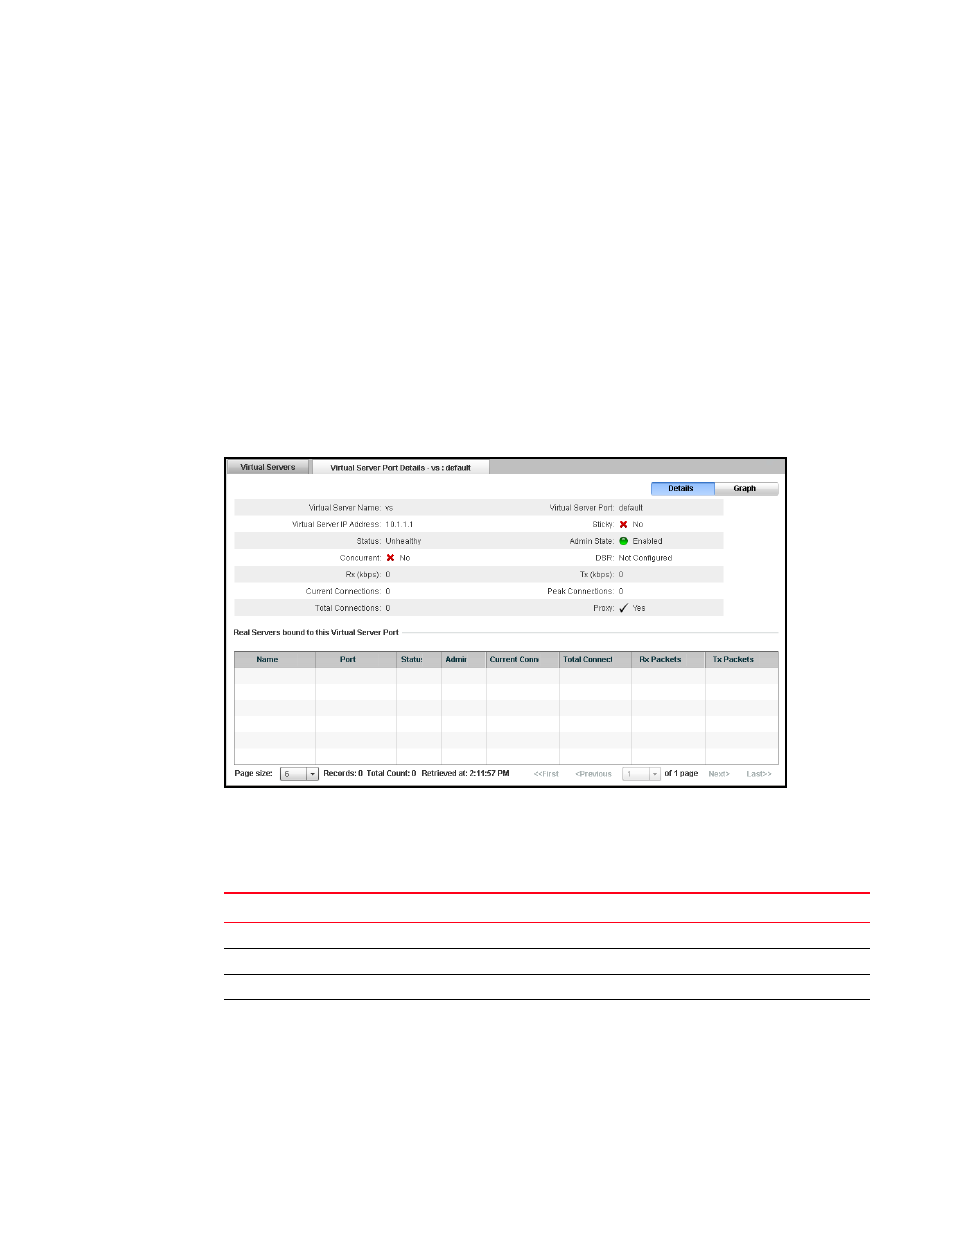
Virtual server port details
To view the details of a virtual server port configured on the Brocade Virtual ADX, perform the
following steps within the Monitor tab.
1. Click Traffic on the menu bar.
2. From the sidebar, select Virtual Servers.
3. Select a configuration from the Virtual Servers page and click Port.
4. Select a port configuration from the All Virtual Servers Ports page and click Details.
A new Virtual Server Port Details page tab is displayed, as shown in
. To view the
port details in the graphical format, click Graph. To switch the view between tabular and
graphical format, click the Details or Graph on top right corner of the Virtual Server Port Details
page.
FIGURE 149
Displaying the virtual server port details
The Virtual Server Port Details page displays a table that lists the real servers that are bound to the
virtual server port.
The following table describes the fields available in the Virtual Server Port Details page.
TABLE 63
Virtual Server Port Details page - fields and descriptions
Field Description
Virtual Server Name
Displays the name of the virtual server bound to this port.
Virtual Server Port
Displays the name of the virtual server port.
Virtual Server IP Address
Displays the IP address of the virtual server bound to this port.
Sticky
Displays the state of the sticky in the virtual server port. The status
can be one of the following:
•
No
•
Yes