Configuring snmpv3 management access, Configuring snmpv3 management access -50, Figure 3-23 configuring snmp trap managers -50 – SMC Networks SMC TigerStack III SMC6824MPE User Manual
Page 100
C
ONFIGURING
THE
S
WITCH
3-50
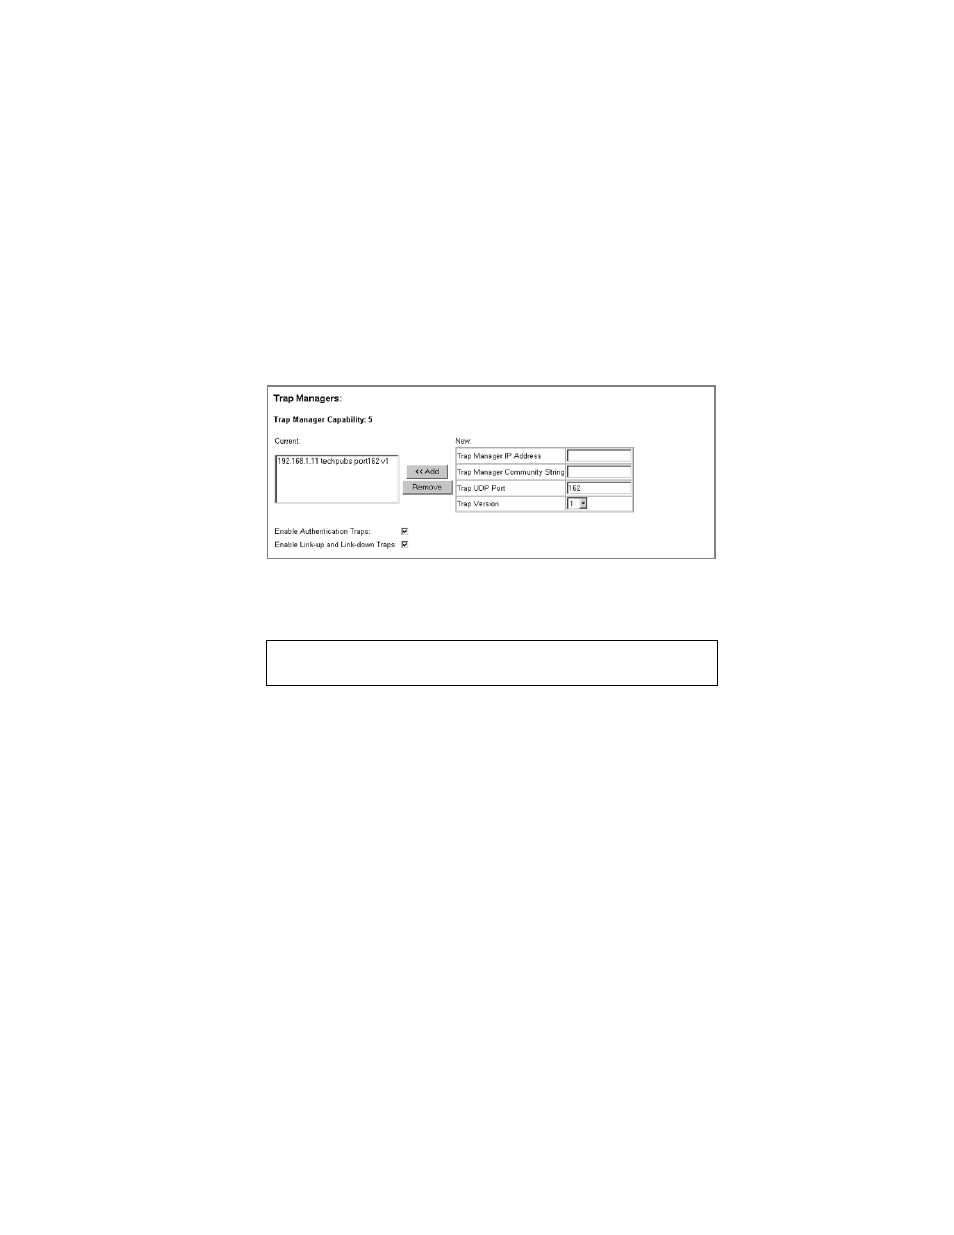
Web – Click SNMP, Configuration. Enter the IP address and community
string for each management station that will receive trap messages, specify
the UDP port and SNMP version, and then click Add. Select the trap types
required using the check boxes for Authentication and Link-up/down
traps, and then click Apply.
Figure 3-23 Configuring SNMP Trap Managers
CLI – This example adds a trap manager and enables authentication traps.
Configuring SNMPv3 Management Access
To configure SNMPv3 management access to the switch, follow these
steps:
1. If you want to change the default engine ID, it must be changed first
before configuring other parameters.
2. Specify read and write access views for the switch MIB tree.
3. Configure SNMP user groups with the required security model (i.e.,
SNMP v1, v2c or v3) and security level (i.e., authentication and
privacy).
4. Assign SNMP users to groups, along with their specific authentication
and privacy passwords.
Console(config)#snmp-server host 10.1.19.23 batman private version
2c udp-port 162
Console(config)#snmp-server enable traps authentication