Using the smart strip, 6 using the smart strip – Native Instruments MASCHINE MK3 Groove Production Studio (Black) User Manual
Page 327
2.
In the submenu that opens, select the source you want to use for changing the MIDI Pro-
gram Change messages. A list of connected controller names appear in the drop-down
menu, or you can select
None
to disable the feature.
3.
Then select
MIDI Note
to trigger your Lock snapshots via MIDI notes, or
Program Change
to trigger your Lock snapshots via MIDI Program Change messages.
4.
If necessary, reopen the same submenu and select the MIDI channel the Lock changes
should receive MIDI messages from (channel 1 by default).
MIDI Scene change has priority over Lock change. If you select the same MIDI Source and Channel
for Lock and Scene changes, only Scenes will be triggered by the corresponding events coming from
the MIDI source. Corresponding Lock snapshots will not be recalled.
For more information on triggering Lock snapshots using your DAW (Digital Audio Workstation),
please check the Knowledge Base on the Native Instruments website.
6.6
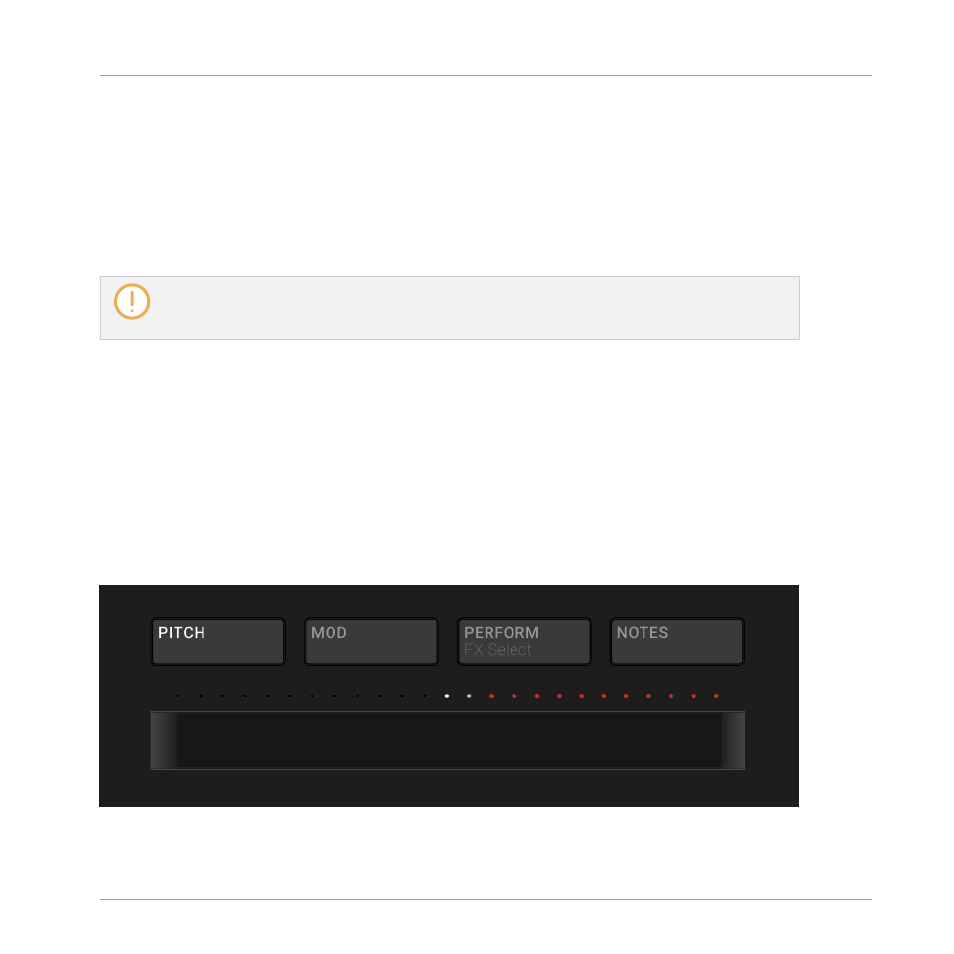
Using the Smart Strip
The Smart Strip on the controller puts control of several parameters literally at your fingertips:
You can use the Smart Strip to apply pitch bend or modulation to the sound you are playing on
the pads, or you can tweak Perform FX in real time. You can also play Sounds by strumming on
the Smart Strip.
Smart Strip on the Controller with
PITCH
mode enabled.
Playing on the Controller
Using the Smart Strip
MASCHINE - Manual - 327