NewTek TriCaster Advanced Edition User Guide User Manual
Page 125
Page | 113
C
OMMENT
The Comment box permits to enter metadata to associate with the file.
Hint: Both the Display Name and Comment box content for the selected clip are available as DataLink keys, which
can in turn be served to live title pages or supplied along with the file to the Publish module.
T
RIMMING
C
LIPS AND THE
S
CRUB
B
AR
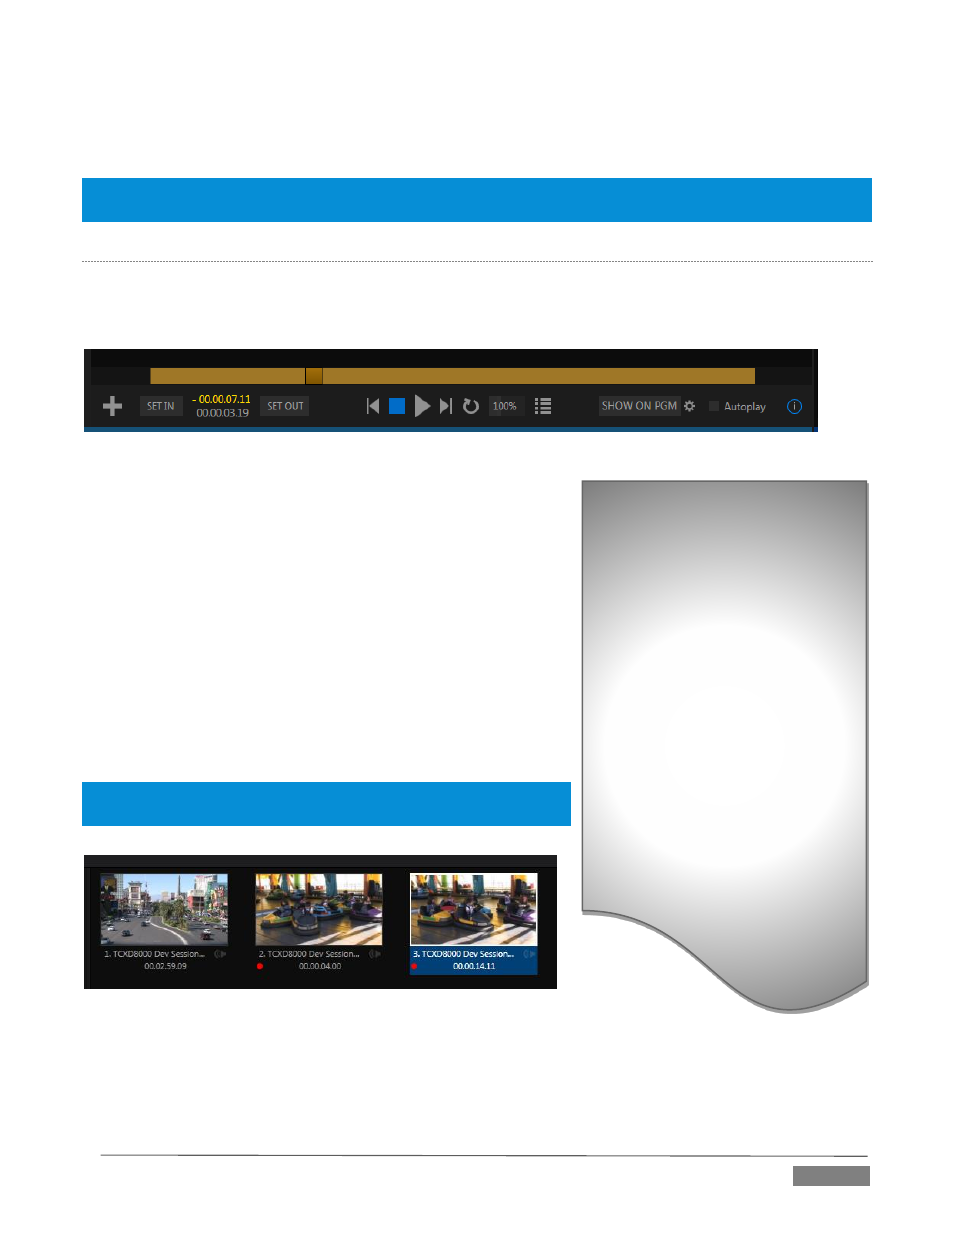
Just beneath the playlist pane is a full-width Scrub-Bar (Figure 123). The width of the scrub-bar represents
the full run time of the current clip or other media file. Drag the knob left or right to change time position in
the current playlist item.
FIGURE 123
As mentioned earlier in this section, In and Out Points for newly
added Media are automatically shortened by 1 second, to
accommodate the addition of transitions.
To reset the file to its full length, press the ‘g’ key.
To trim a clip manually, move the knob to the desired frame
and press ‘i’ or ‘o’ on the keyboard (to set the In Point or Out
Point, respectively).
During playback, the Scrub-Bar knob traverses the span between
the In and Out Points. The duration (taking into account trimming
operations) is displayed as a countdown in the upper of two
timecode fields at left (Figure 123). The lower time display shows
embedded clip timecode.
Hint: For longer durations, holding SHIFT while dragging the scrub bar
knob increases precision.
FIGURE 124
It’s useful to note that clips that are still being captured continue to ‘grow’ even after addition to a DDR
playlist (see Section 11.2.2).
Time-Shifting
By the way, it’s possible to use
growing clips to ‘time shift’ your
program:
Initiate Recording.
Add the captured clip to a DDR
Press “g” on the keyboard to clear
its Out Point.
Trim the In Point to taste.
Assign the DDR to an output.
Wait some length of time, and
begin playing the clip.
(Of course, all of this could easily
be performed by a macro, too.)