D.2.1 getting started, D.2.1.1 equipment list, D.2.1.2 equipment setup – Comtech EF Data CDM-570A User Manual
Page 481
CDM-570L/570AL Satellite Modem with Optional Packet Processor
MN-CDM570A
Appendix D
Revision 2
D–23
D.2 High Performance Packet Processor – Quick Start Guide
This section serves to guide you through the steps needed to pass IP traffic within minutes of
initial installation and setup (i.e., starting from factory default settings), using a pair of
CDM-570A/570AL-IPs. This section refers generically to any Comtech EF Data IP-centric modem
as the CDM-IP.
This section assumes operator familiarity with configuration of base modem ooperations.
D.2.1 Getting Started
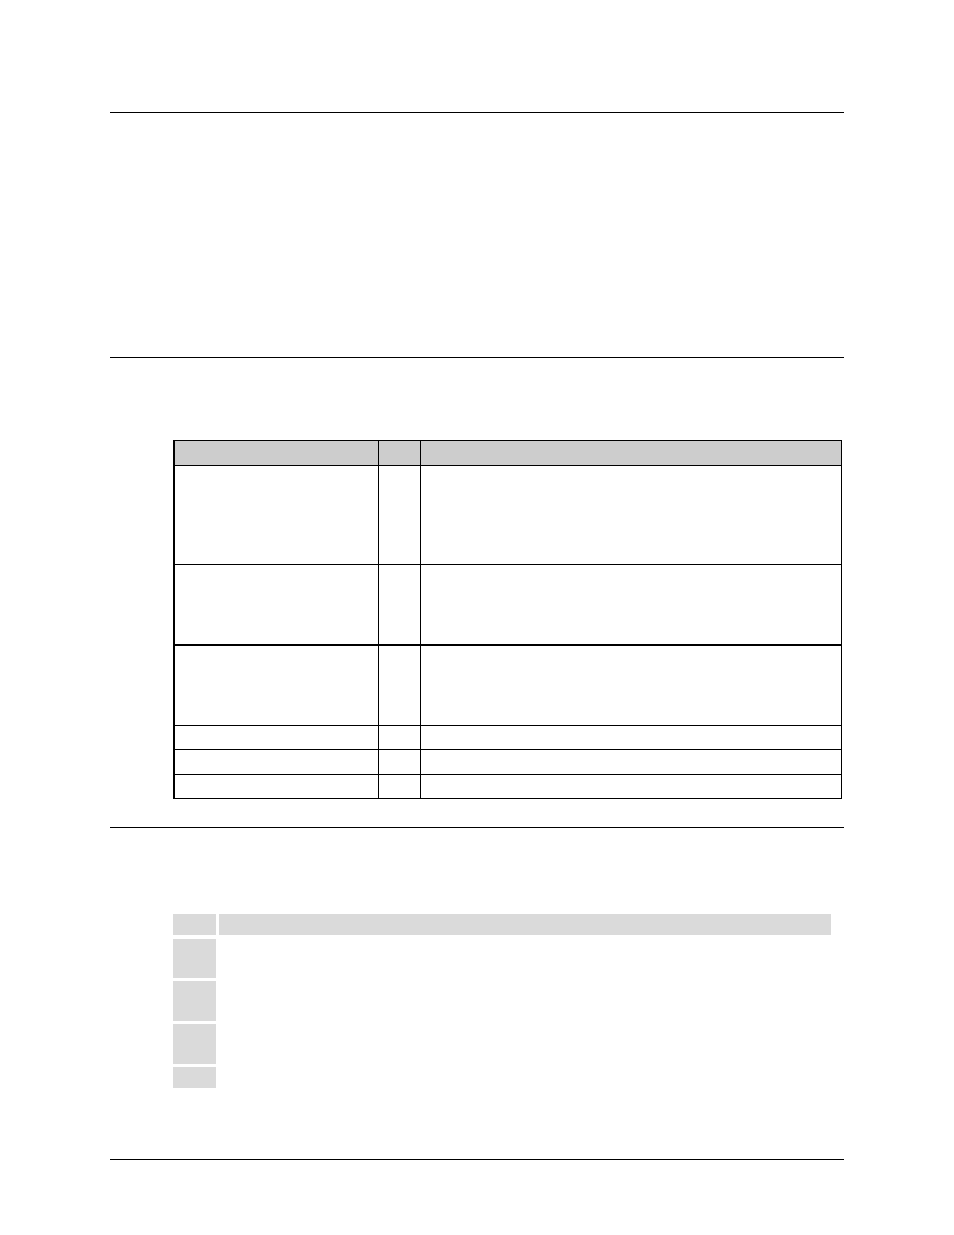
D.2.1.1 Equipment List
Use the following equipment:
Description
Qty Comments
CDM-IP Modem
2 CDM-570A/570AL Satellite Modem w/optional Packet Processor and/or
any other compatible, IP-centric Comtech EF Data modem.
Note: You may need to provide equipment to convert 70 MHz IF to
L-Band for a duplex connection, depending upon modems.
Layer 2 Ethernet Switch or Hub
2 Supplied by User.
Note: RJ-45 crossover Ethernet cables can be substituted to directly
connect the User PC to the CDM-IP Modem without the use of a hub.
Windows-based PC with Network
Interface Card (NIC), terminal
emulation program, and
compatible Web browser
2 Supplied by User.
Console cable (DB-9 to RJ-11)
1 Supplied by Comtech EF Data (CEFD P/N PL/9396-1).
Ethernet cables (CAT5)
4 Supplied by User.
IF Coaxial cables
2 Supplied by User to interconnect Tx-Rx between both CDM-IP modems.
D.2.1.2 Equipment Setup
Do these steps:
Step Task
1
Use CAT5 Ethernet cables to connect each CDM-IP rear panel “Traffic 100” port to the User PC via the
Ethernet hub or switch.
2
Use coaxial cables to connect the Tx IF on CDM-IP 1 to Rx IF of CDM-IP 2, and the Rx IF on CDM-IP 1 to
the Tx IF of CDM-IP 2.
3
Connect the DB-9 end of the CEFD P/N PL/9396-1 console cable to the COM1 or COM2 port of the User
PC, and the RJ-11 end to the CDM-IP 1 rear panel Console port.
4
Connect the CDM-IP 1 and CDM-IP 2 to suitable power supplies and turn them ON.