Dr. Livingstone, I Presume WELDWISE 2400 User Manual
Page 43
0432-INS-400 Rev. E
5-9
5. If for some reason your weld rejected, try making more welds to see if any accept. If the welds
continue to reject, review the failed parameters and skip ahead to the tolerancing section of the
WMS quick start guide. Adjust master tolerances until welds are accepted and continue with the
following steps to make a rejected weld.
Making a rejected weld
Now we will deliberately reject a weld and see
what the resulting halfcycle data looks like. We'll
use an increased halfcycle count as an example.
1. ESCAPE to the main program screen.
2. Increase the weld cycle count by 2 on your
weld controller.
3. Make a weld using the new weld schedule and
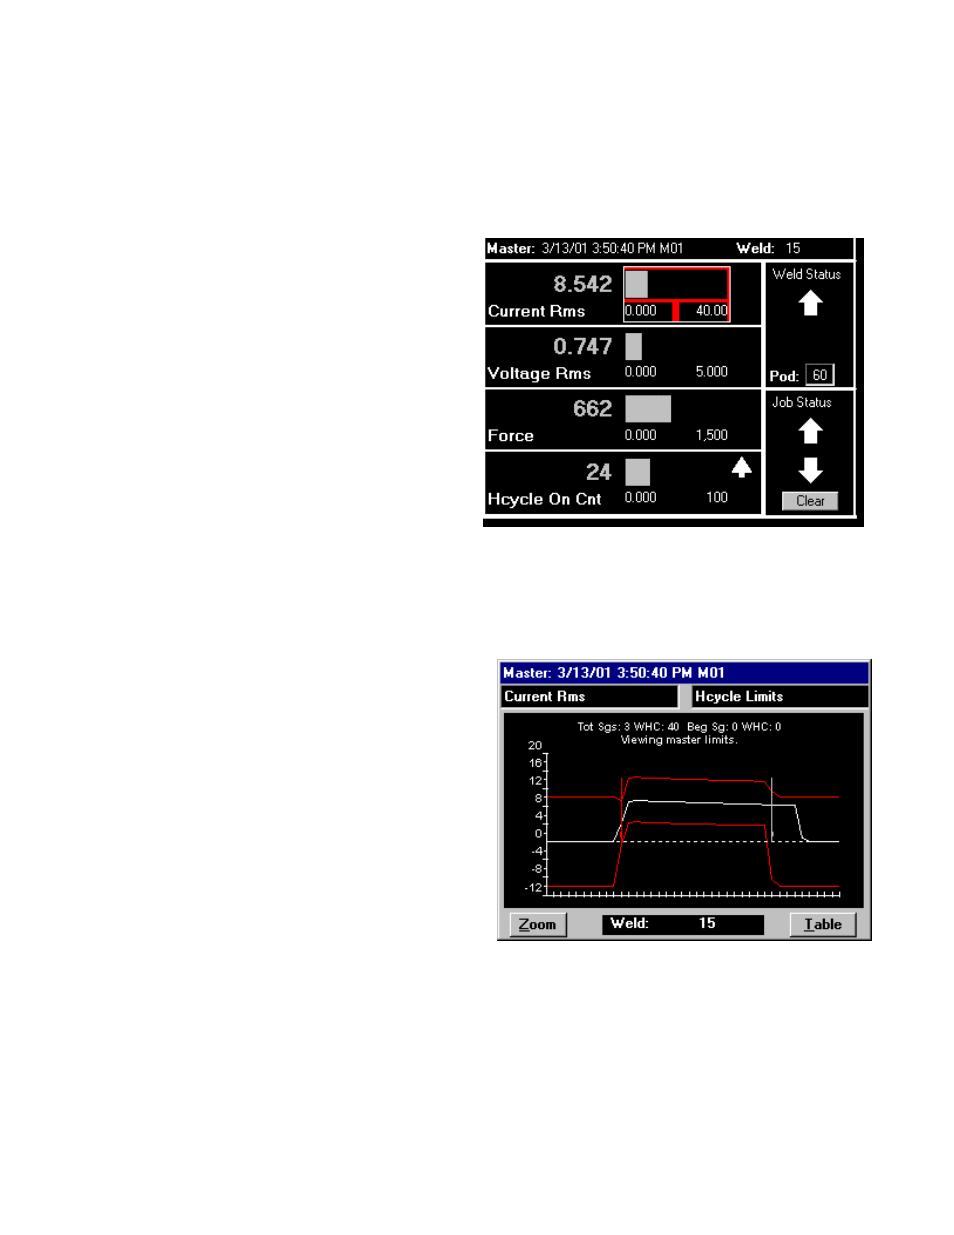
observe the monitor screen. You should see a
blinking arrow in the Weld Status box, as
shown in figure 5-16. If one of your displayed
parameters is Hcycle On Cnt, you'll also see a
small blinking arrow next to the bar graph.
4. Go to the Halfcycle Summary screen. It should look something like figure 5-17.
Notice that although the line representing
Current Rms has remained within the tolerance
boundaries, it has extended past the Weld
segment boundary. Because of the 4 added
halfcycles in the weld schedule, this weld did
not match the master (the master was made
without the extra 2 cycles) and as a result was
not passed (REJECTED).
5. Remove the two additional cycles from your
weld schedule before proceeding.
Figure 5-16 Main program screen showing
REJECTED weld
Figure 5-17 Halfcycle Summary of REJECTED weld