HP StoreEver TapeAssure Software User Manual
Page 133
1.
In the device listing (the By Product or By Connection tab), select the library or drive to test.
2.
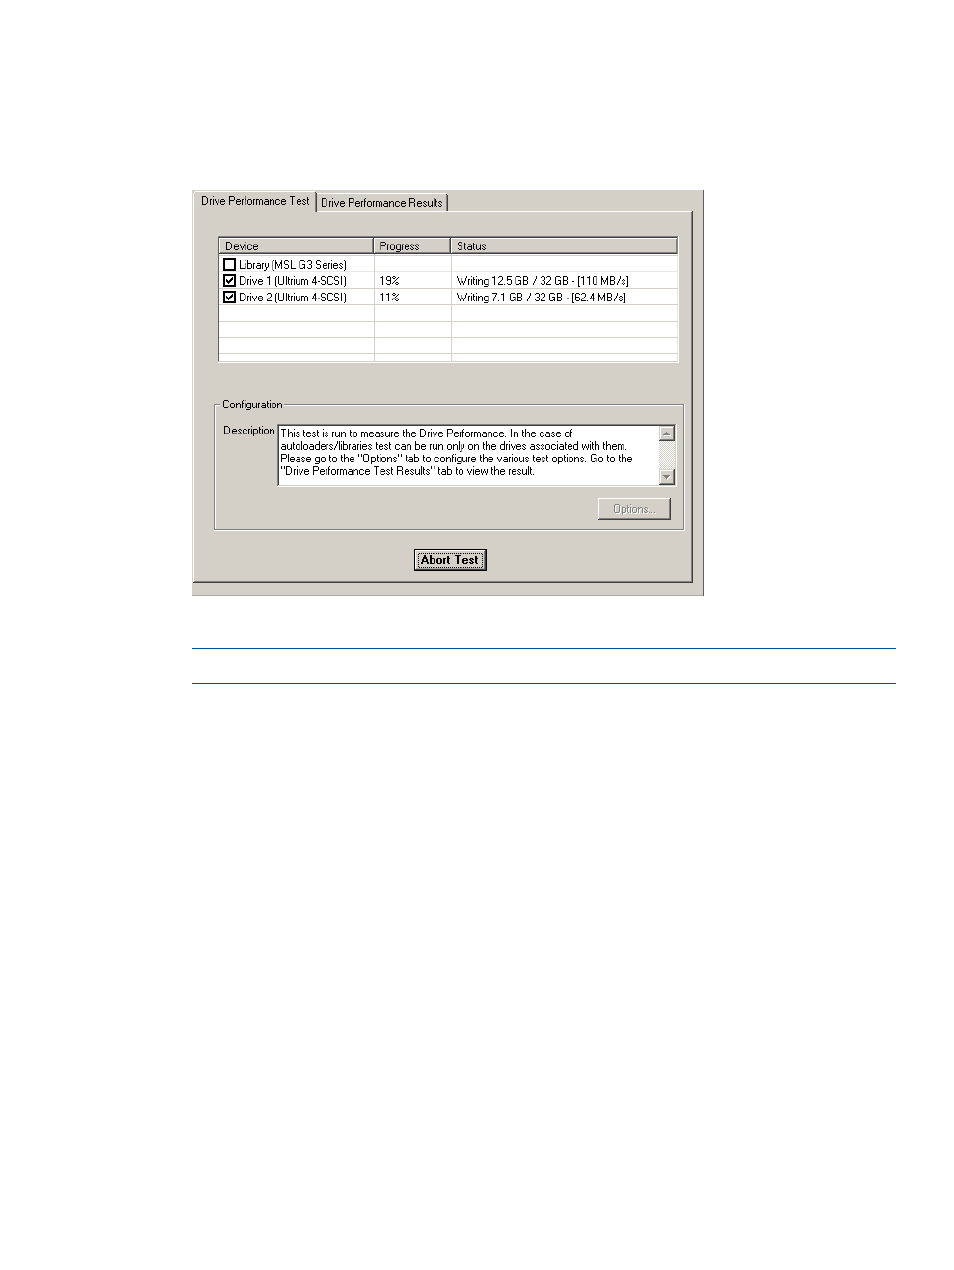
Click Dev Perf on the main toolbar. The Drive Performance screen opens with the Tape Drive
Performance tab selected. For libraries, the Drive Performance Test tab shows the library and
its associated drives. For a stand alone drive, only a single drive will be shown.
Figure 46 Drive Performance screen
3.
Select the tape drives for the Drive Performance test. All of the drives will be tested in parallel.
NOTE:
You cannot select the library because the test only runs on tape drives.
4.
Click the Options button to configure the test data in the Drive Performance Test dialog. To
return all of the options to their default values, click Defaults.
In the Test Logic section of the dialog, use the drop down menus to select a data type for each
of the four tests. The Drive Performance test is actually a series of four write/read subtests
(labeled Step 1-4 on the Drive Performance screen) that measure performance using different
types of data that you can specify.
The following data types can be selected:
•
Zeros
•
1.6:1 Compression
•
2:1 Compression (suggested starting value)
•
3:1 Compression
•
4:1 Compression
You must specify a data type for Step 1, but you can choose not to perform Steps 2 through
4 by selecting No Test (suggested starting value for steps 2 through 4 is No Test).
Performance tests
133