IAI America RCS3PCR-SS8C User Manual
Page 99
11. Maintenance and Inspection
89
11.7.3
How to Apply Grease to the RCS3(P)(CR)
You can apply grease to the RCS3(P) (CR)-SA8 and RCS3 (P) (CR)-SS8 from outside the actuator without
removing the exterior parts.
• For the RCS3 (P) (CR)-SA8, grease can be applied to the guide and ball screw from outside the actuator.
• For the RCS3 (P) (CR)-SS8, grease can be applied only to the guide from outside the actuator.
(1) How to apply grease to the guide (Common to RCS3 (P) (CR)-SA8 and SS8)
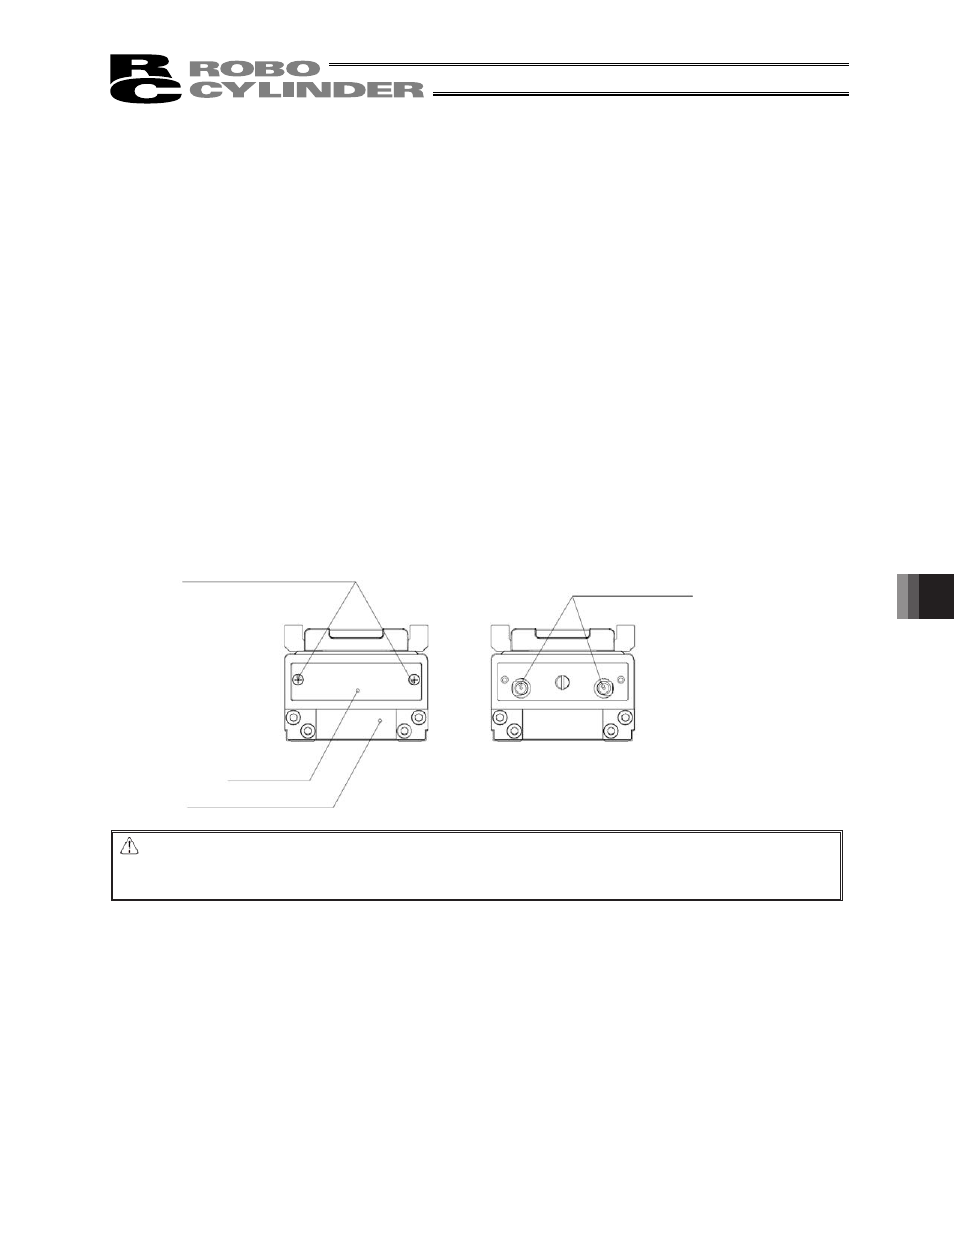
Remove the end face cover from the front bracket on the counter-motor side to expose grease nipples on
the right and left. Use these grease nipples to apply grease.
[1] Remove the end face cover.
[2] Move the slider all the way to the end on the counter-motor side.
[3] Insert a grease gun into the hole in the front bracket and add grease while keeping the slider in place.
*
The right and left grease nipples are connected to different greasing circuits, respectively, so be sure to
add grease into both nipples.
[4] Move the slider back and forth several times by hand.
[5] Repeat the above steps to apply grease.
[6] Use a waste cloth, etc., to wipe off any grease that has overflowed from the slider.
�
11 grease nipple holes
Cross-recessed countersunk
head screw M3x5
End face cover
Front bracket
Caution:
In case the grease got into your eye, immediately go to see the doctor to get an appropriate care.
After finishing the grease supply work, wash your hands carefully with water and soap to rinse the
grease OFF.
- RCS3PCR-SA8C RCS3CR-SS8C RCS3CR-SA8C RCS3P-SS8C RCS3P-SA8C RCS3-SS8C RCS3-SA8C RCS2CR-SS8C RCS2CR-SS7C RCS2CR-SA7C RCS2CR-SA6D RCS2CR-SA6C RCS2CR-SA5D RCS2CR-SA5C RCS2CR-SA4C RCS2-SS8R RCS2-SS8C RCS2-SS7R RCS2-SS7C RCS2-SA7R RCS2-SA7C RCS2-SA6R RCS2-SA6D RCS2-SA6C RCS2-SA5R RCS2-SA5D RCS2-SA5C RCS2-SA4R RCS2-SA4D RCS2-SA4C