IAI America RCS3PCR-SS8C User Manual
Page 186
11. Maintenance and Inspection
166
11.10.7
Replacing the Motor of the Motor Reversing Type: RCS3 (P)- SA8R, SS8R
[Items Required for Replacement]
�
Replacement motor unit
�
Allen wrenches
�
Phillips screwdriver
�
Sound-wave tension gauge or tension gauge (capable of withstanding at least 15 kg of tension)
�
Long tie-band (thin string)
�
Measuring tape
�
Oil-based marker pen
�
PC or teaching pendant
[Overview of Replacement]
1) Loosen the bolts securing the motor unit and replace the motor.
2) Restore the home position.
Fix the slider at a position 2 mm from the mechanical end on home side, pass the belt, and adjust the belt to
the specified tension.
3) Perform homing using a PC or teaching pendant and check for deviation from the initial home position. If
there is a deviation when the SCON controller is being used, use home return offset distance to make the
adjustments. If the SSEL or the X-SEL controller is being used, use home preset value to make the
adjustments.
[Procedure]
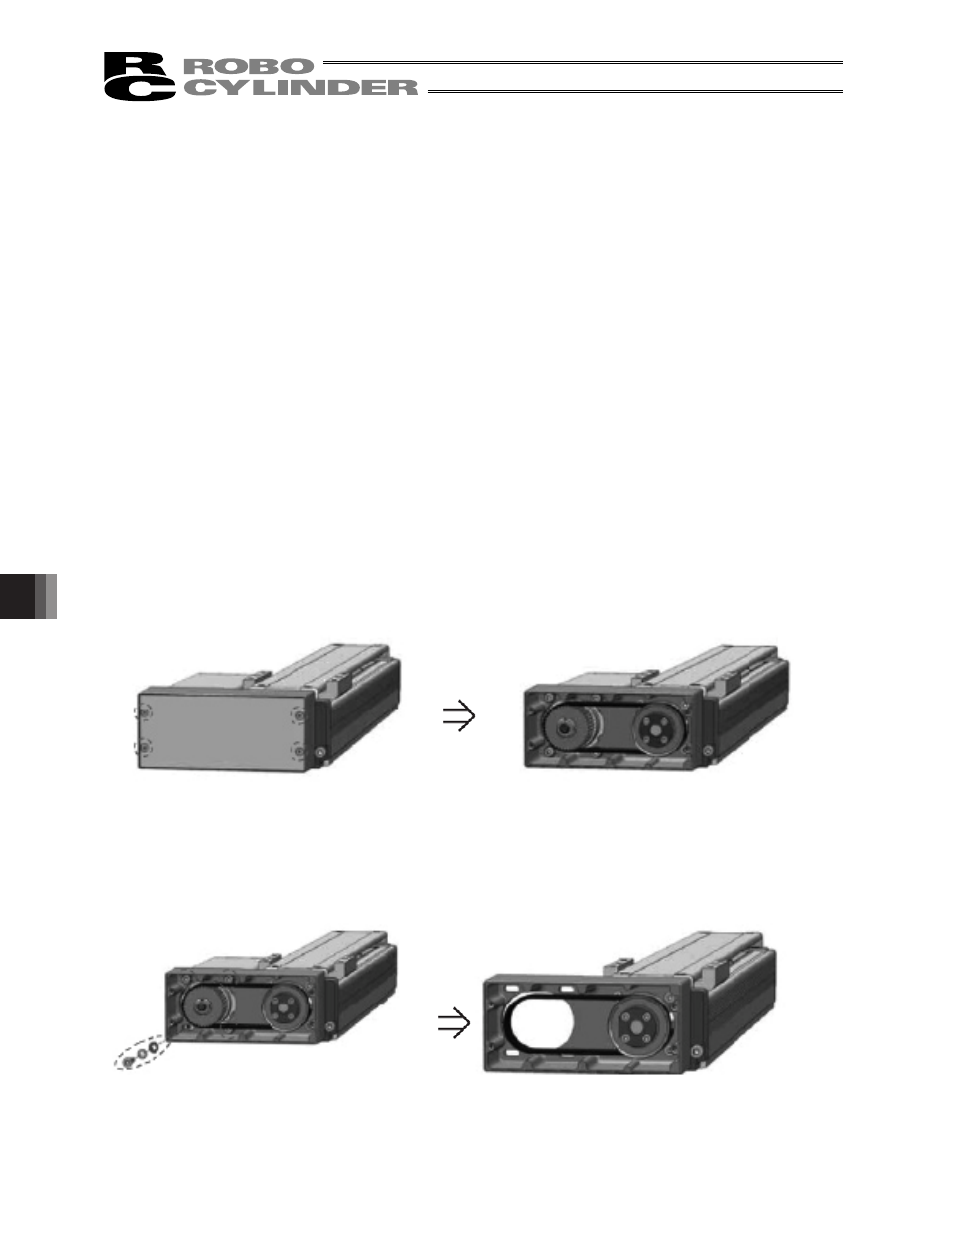
1) Remove the pulley cover.
Applicable wrench : 2 mm across flats
Applicable bolt
: Hexagonal socket head bolt _M3 x 5 (SUS), 4 pcs
2) Remove the motor unit.
Applicable wrench : 3 mm across flats
Applicable bolt
: Hexagonal socket head bolt _M4 x 16, 4 pcs
Washer : M4 flat washer, M4 spring washer #2
- RCS3PCR-SA8C RCS3CR-SS8C RCS3CR-SA8C RCS3P-SS8C RCS3P-SA8C RCS3-SS8C RCS3-SA8C RCS2CR-SS8C RCS2CR-SS7C RCS2CR-SA7C RCS2CR-SA6D RCS2CR-SA6C RCS2CR-SA5D RCS2CR-SA5C RCS2CR-SA4C RCS2-SS8R RCS2-SS8C RCS2-SS7R RCS2-SS7C RCS2-SA7R RCS2-SA7C RCS2-SA6R RCS2-SA6D RCS2-SA6C RCS2-SA5R RCS2-SA5D RCS2-SA5C RCS2-SA4R RCS2-SA4D RCS2-SA4C