IAI America RCS3PCR-SS8C User Manual
Page 166
11. Maintenance and Inspection
146
SS8C Type (For Oldham’s Coupling Type)
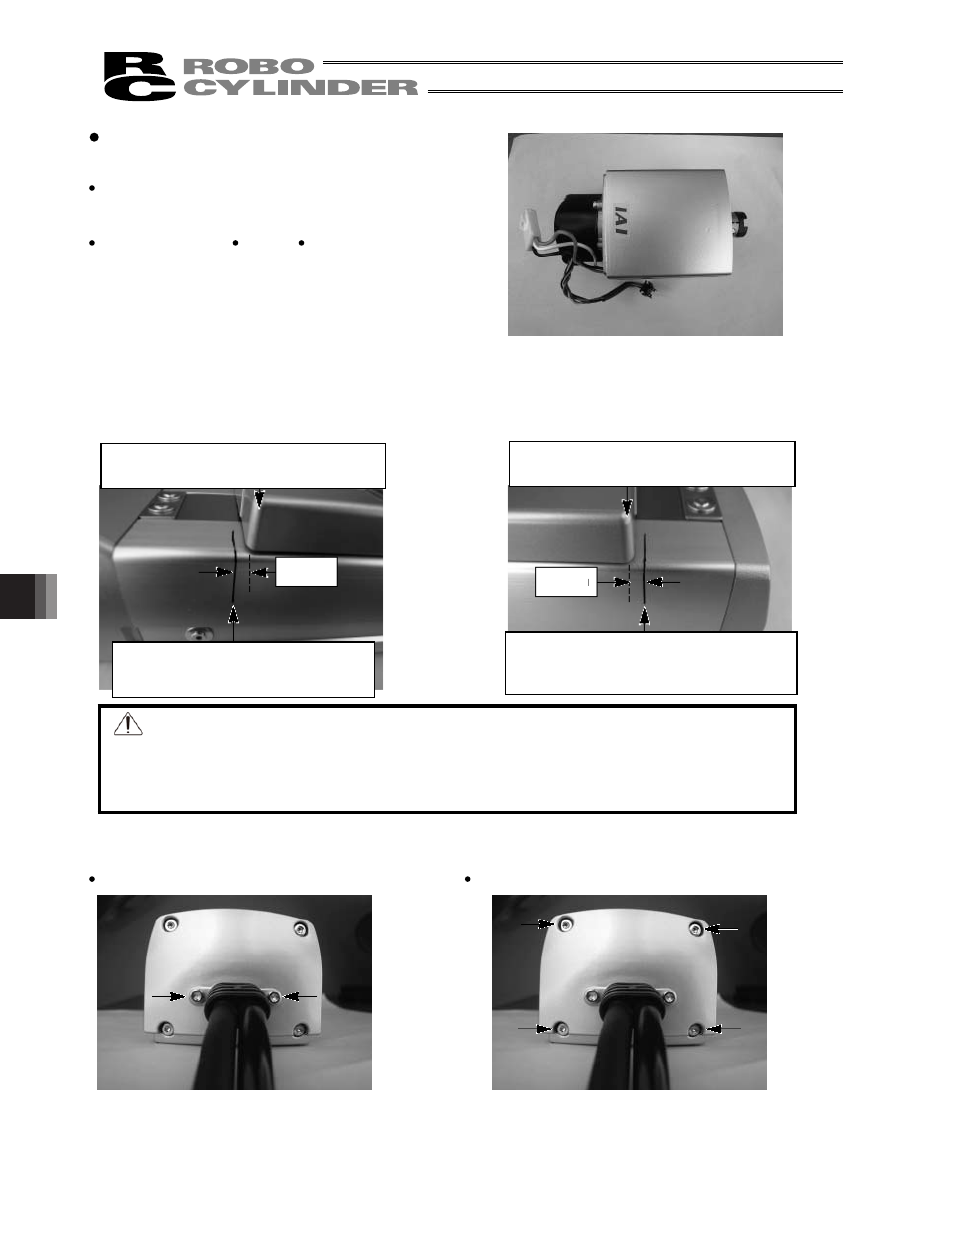
[Items Required for Replacement]
Replacement motor (with a coupling preinstalled on the
motor shaft; see the photograph on the right)
Note: Never remove the coupling.
Allen wrenches
Scale
Oil-based marker pen
[Procedure]
1) Move the slider to a position where Z-phase turns on (reference home position).
On both standard actuators and actuators whose home is set on the opposite side, this position corresponds
to 2.5 mm from the mechanical end.
[Standard specification]
[Specification with home set on opposite side]
Warning: If the actuator is installed vertically, move it after turning on the controller power
and forcibly releasing the brake. At this time, beware of danger as the actuator
may drop suddenly.
Always provide a support to brace the actuator hand to prevent sudden drop, so as
not to pinch fingers or damage the work part.
2) Using an Allen wrench of 2.5 mm across flats, remove the bolts affixing the motor-end cap and attached
cables.
Affixing bolts at attached cable end
Affixing bolts on motor-end cap
Return the slider 2.5 mm from the
mechanical end.
Return the slider 2.5 mm from the
mechanical end.
Draw a countermark with the slider
contacting the mechanical end.
Draw a countermark with the slider
contacting the mechanical end on the
counter-motor side.
2.5mm
2.5mm
- RCS3PCR-SA8C RCS3CR-SS8C RCS3CR-SA8C RCS3P-SS8C RCS3P-SA8C RCS3-SS8C RCS3-SA8C RCS2CR-SS8C RCS2CR-SS7C RCS2CR-SA7C RCS2CR-SA6D RCS2CR-SA6C RCS2CR-SA5D RCS2CR-SA5C RCS2CR-SA4C RCS2-SS8R RCS2-SS8C RCS2-SS7R RCS2-SS7C RCS2-SA7R RCS2-SA7C RCS2-SA6R RCS2-SA6D RCS2-SA6C RCS2-SA5R RCS2-SA5D RCS2-SA5C RCS2-SA4R RCS2-SA4D RCS2-SA4C