Figure 1, Psu voltage adjustment potentiometer location, Eclipse upgrade reference manual – Clear-Com Eclipse-Omega User Manual
Page 12
Eclipse Upgrade Reference Manual
Clear-Com Communication Systems
Page 12 of 155
Part Number: 810377Z Rev 6
5. Connect the red lead on the PSU Adjuster Box to the V connection of the
DVM.
6. Set the DVM to read DC voltage.
7. Insert one of the power supplies into the PSU Adjuster Box.
8. Switch on the mains supply.
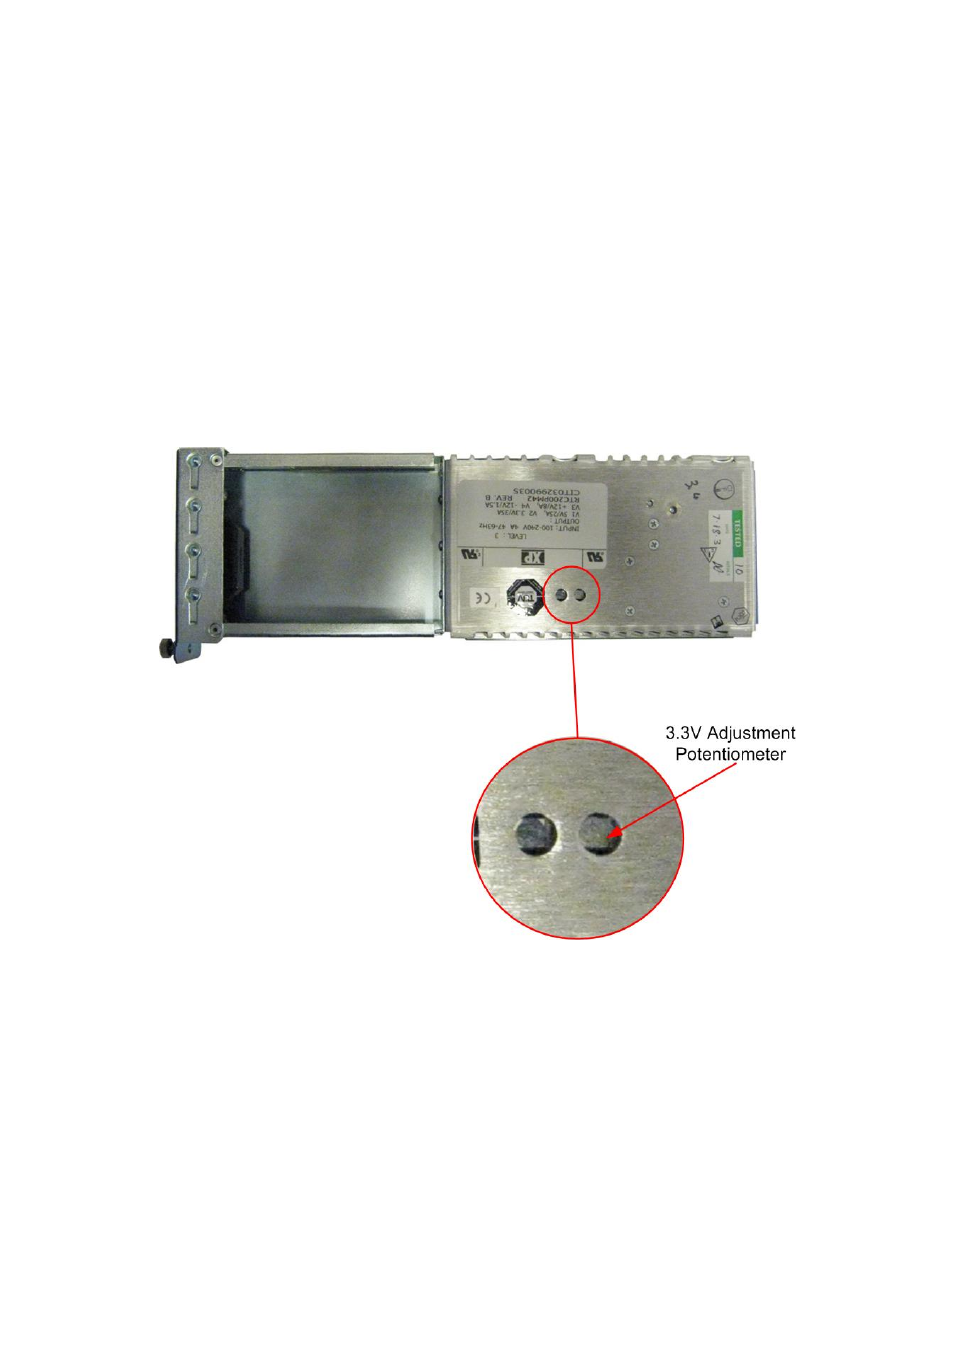
9. Adjust the 3.3V adjustment potentiometer until the DVM reads between 3.40
and 3.41V.
10. Switch off the mains supply.
11. Remove the power supply.
12. Apply a label to the PSU module indicating that it has been adjusted to 3.4V.
13. Apply locking material to the 3.3V adjustment potentiometer.
14. Insert the other power supply and repeat steps 7 through 13.
15. Insert both power supplies back into the Eclipse-Omega rack.
Figure 1 -
PSU Voltage Adjustment Potentiometer Location