Figure 108 acl setup, Table 68 acl setup – ZyXEL Communications IES-612-51A User Manual
Page 217
Chapter 31 ACL
IES-612-51A User’s Guide
217
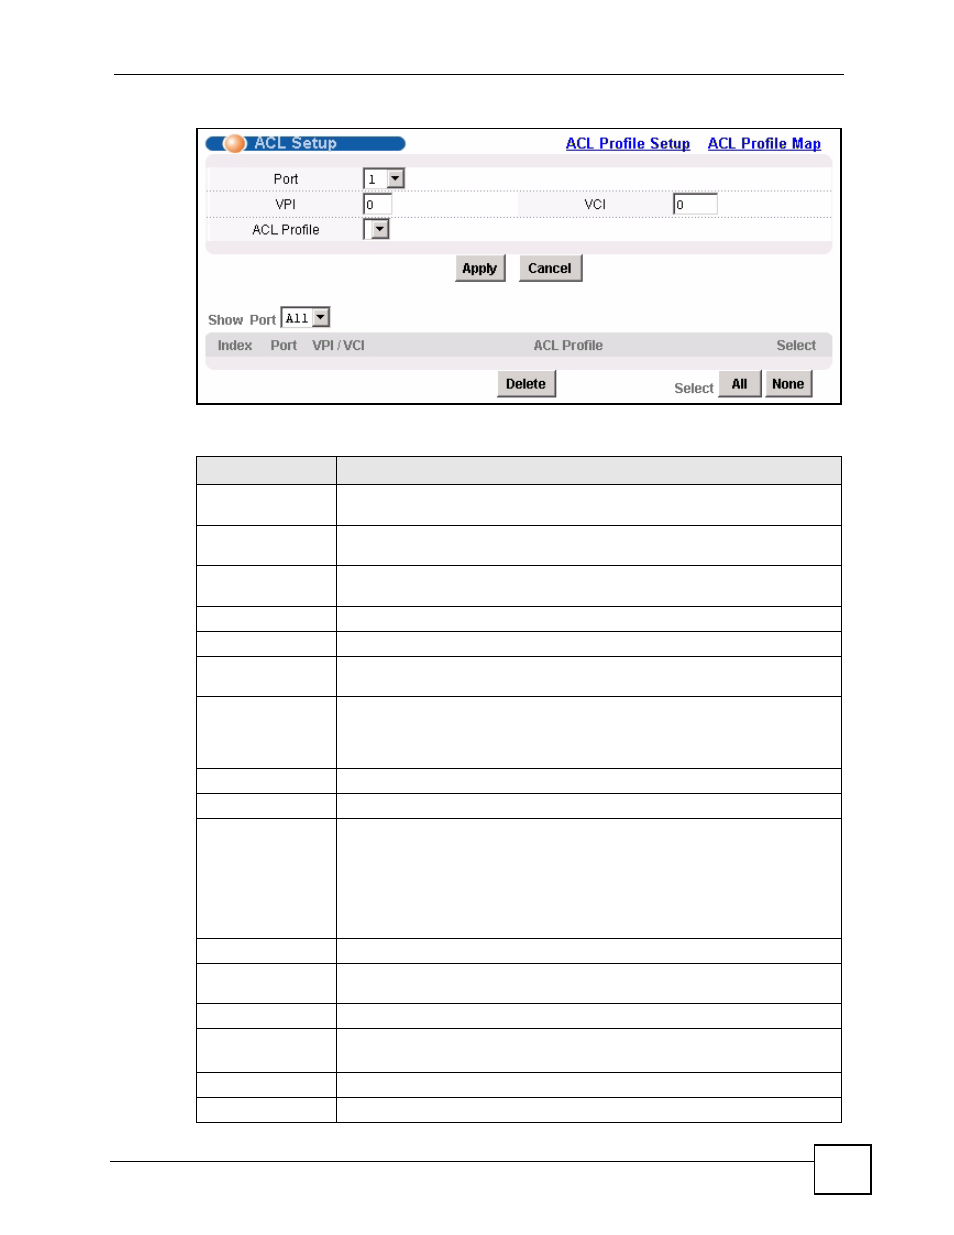
Figure 108 ACL Setup
The following table describes the labels in this screen.
Table 68 ACL Setup
LABEL
DESCRIPTION
ACL Profile Setup
Click ACL Profile Setup to open the screen where you can set up ACL profiles
(see
).
ACL Profile Map
Click ACL Profile Map to open the screen where you can look at which ACL
profiles are assigned to which PVCs (see
Port
Use this drop-down list box to select a port to which you wish to assign an ACL
profile. This field is read-only once you click on a port number below.
VPI
Type the Virtual Path Identifier for a channel on this port.
VCI
Type the Virtual Circuit Identifier for a channel on this port.
ACL Profile
Use the drop-down list box to select the ACL profile you want to assign to this
PVC.
Apply
Click this to save your changes to the IES-612-51A’s volatile memory. The IES-
612-51A loses these changes if it is turned off or loses power, so use the Config
Save link on the navigation panel to save your changes to the non-volatile
memory when you are done configuring.
Cancel Click
Cancel to start configuring the screen again.
Show Port
Select which DSL port(s) for which to display ACL profile settings.
Index
This field displays the number of the PVC. Click a PVC’s index number to use
the top of the screen to edit the PVC.
Note: At the time of writing, you cannot edit the VPI and VCI. If
you want to change them, add a new PVC with the desired
settings. Then you can delete any unwanted PVCs.
Port
This field displays the number of the DSL port on which the PVC is configured.
VPI/VCI
This field displays the Virtual Path Identifier (VPI) and Virtual Circuit Identifier
(VCI). The VPI and VCI identify a channel on this port.
ACL Profile
This field shows the ACL profile assigned to this PVC.
Select
Delete
Select the check box in the Select column for an entry, and click Delete to
remove the entry.
Select All
Click this to select all entries in the table.
Select None
Click this to un-select all entries in the table.