Enet port setup, Chapter 12 enet port setup, Figure 45 enet port setup – ZyXEL Communications IES-612-51A User Manual
Page 105: Table 17 enet port setup, Enet port setup (105)
IES-612-51A User’s Guide
105
C
H A P T E R
1 2
ENET Port Setup
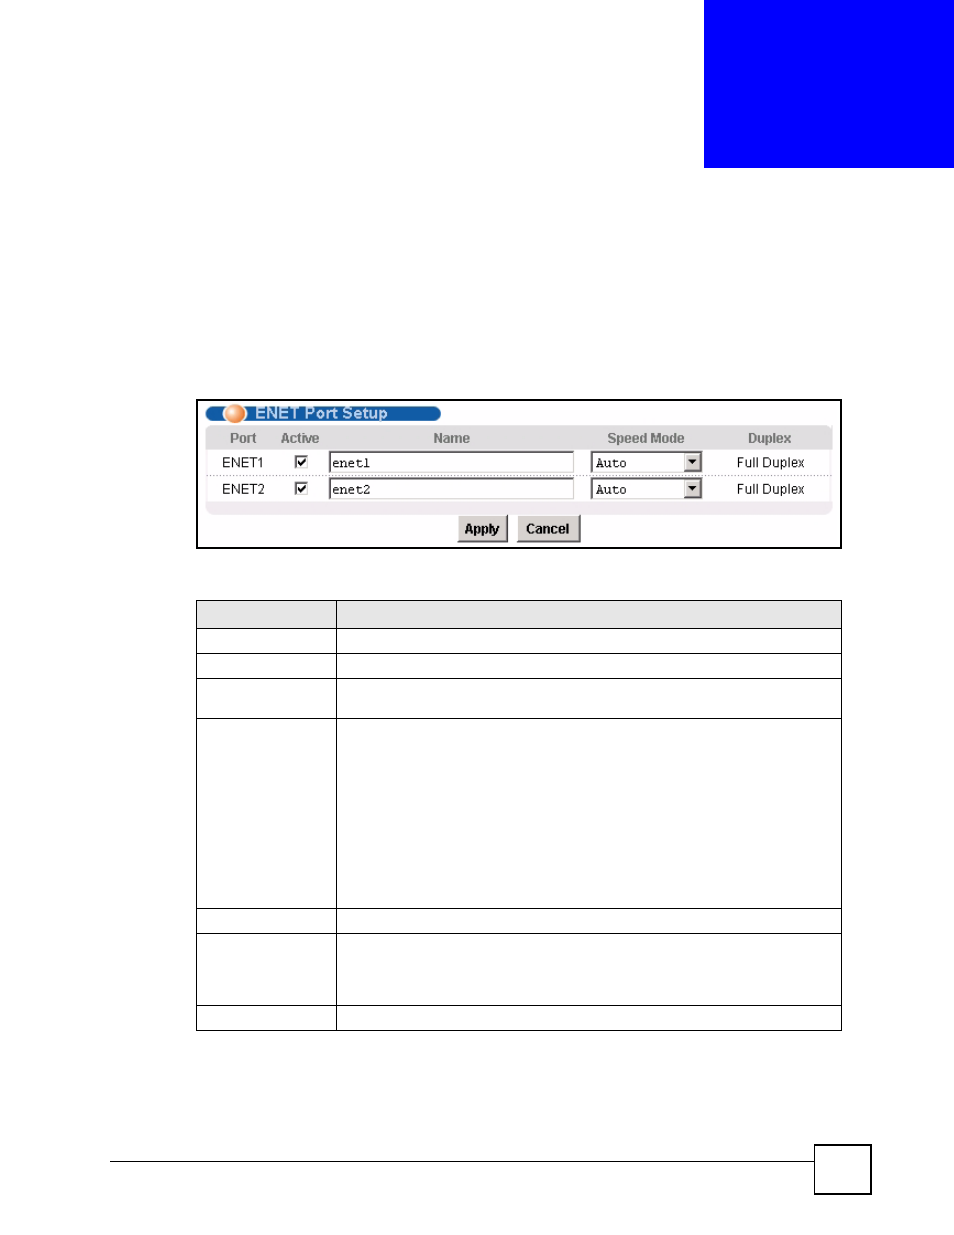
The ENET Port Setup screen allows you to configure settings for the Ethernet ports.
To open this screen, click Basic Setting, ENET Port Setup.
Figure 45 ENET Port Setup
The following table describes the labels in this screen.
Table 17 ENET Port Setup
LABEL
DESCRIPTION
Port
This is the port index number.
Active
Select the check box to turn on the port. Clear it to disable the port.
Name
Enter a descriptive name that identifies this port. You can use up to 31 ASCII
characters; spaces are allowed.
Speed Mode
Select the type of Ethernet connection for this port. When you don’t use auto-
negotiation, you must make sure that the settings of the peer Ethernet port are
the same in order to connect.
Select Auto (auto-negotiation) to have the IES-612-51A automatically
determine the type of connection that the Ethernet port has. When the peer
Ethernet device has auto-negotiation turned on, the IES-612-51A negotiates
with the peer to determine the connection speed. If the peer Ethernet port does
not have auto-negotiation turned on, the IES-612-51A determines the
connection speed by detecting the signal on the cable and using full duplex.
Select 10 Copper if the Ethernet port has a 10 MB electrical connection.
Select 100 Copper if the Ethernet port has a 100 MB electrical connection.
Duplex
The IES-612-51A uses full duplex Ethernet connections by default.
Apply
Click Apply to save your changes to the IES-612-51A’s volatile memory. The
IES-612-51A loses these changes if it is turned off or loses power, so use the
Config Save link on the navigation panel to save your changes to the non-
volatile memory when you are done configuring.
Cancel
Click Cancel to begin configuring this screen afresh.