Maintanence kit replacement guide, Maintenance kit type 4510, Replacement guide – Ricoh AP4510 User Manual
Page 423: Checking the contents of the box, Turning off the printer, Replacing the transfer unit, Replacing the development unit, Important, Type 4510a, Type 4510b
The maintenance kit contains the parts required to maintain the printer. When "Change Maint.Kit"
appears on the panel display, replace the parts included in the maintenance kit. Read this guide
carefully before you use the maintenance kit.
For safety purposes, carefully follow the instructions in this guide.
Maintenance Kit Type 4510
REPLACEMENT GUIDE
○○○○○
○○○○○○○○○○○○○○○○
○
○
○
○○○○○○○○○○○○○○○
○○○○
○○○○○○○○○○○○○○○○○○○○○○○
○
○
○○○○○○
○
○
○
○○○○○
○○○○○○○
○
○
○
○
○
○
○
○
○○○○○○○
○
○
○
○○○○○○
○○○○○○○○○○○
○○○○○○○○○○○○○○○○○○
○○○○○○○○○○○○○○○○○○○○○○○○○○○○
○○○○○○○○○○○
○
○
○
○○○○○○○○○○○○○○
< G790-8610 >
○○○○○
○
○
○
○○○○○○○
○○○○○○○○○○○
○
○
Hold both sides of the unit. Lift the side of the unit closest
to you slightly (
ቢ
), and remove the unit from the printer
(
ባ
) as shown in the illustration. Put the used transfer unit
in the disposal bag.
Important
❒ After removing the transfer unit, put the unit in the disposal
bag. Be careful not to tilt or shake the unit. Otherwise, toner
might scatter.
Take the new transfer unit out of the Type 4500B box, and
remove the plastic bag.
Take the desiccant out.
There is an arrow sticker in the bottom right side of the
cover, which is pointing to the shaft. Align the new transfer
unit with the shaft (
ቢ
), and then slide the unit in place
(
ባ
).
ቢ
ቢ
ባ
TAPM030E
While pressing down on the corner of the transfer unit
indicated by the arrow (
ቢ
), return the green lever (
ባ
) to
its original position to lock the transfer unit in place.
TAPM040E
Note
❒ If you cannot return the green lever to its original position,
raise the green lever and remove the transfer unit. After that,
try to install the transfer unit again.
Leave the right cover open, and go to “ REPLACING THE
DEVELOPMENT UNIT”.
You should replace all the parts included in the
maintenance kit at the same time. Be sure to replace them
in the following order:
1. Transfer Unit
2. Development Unit
3. Fusing Unit
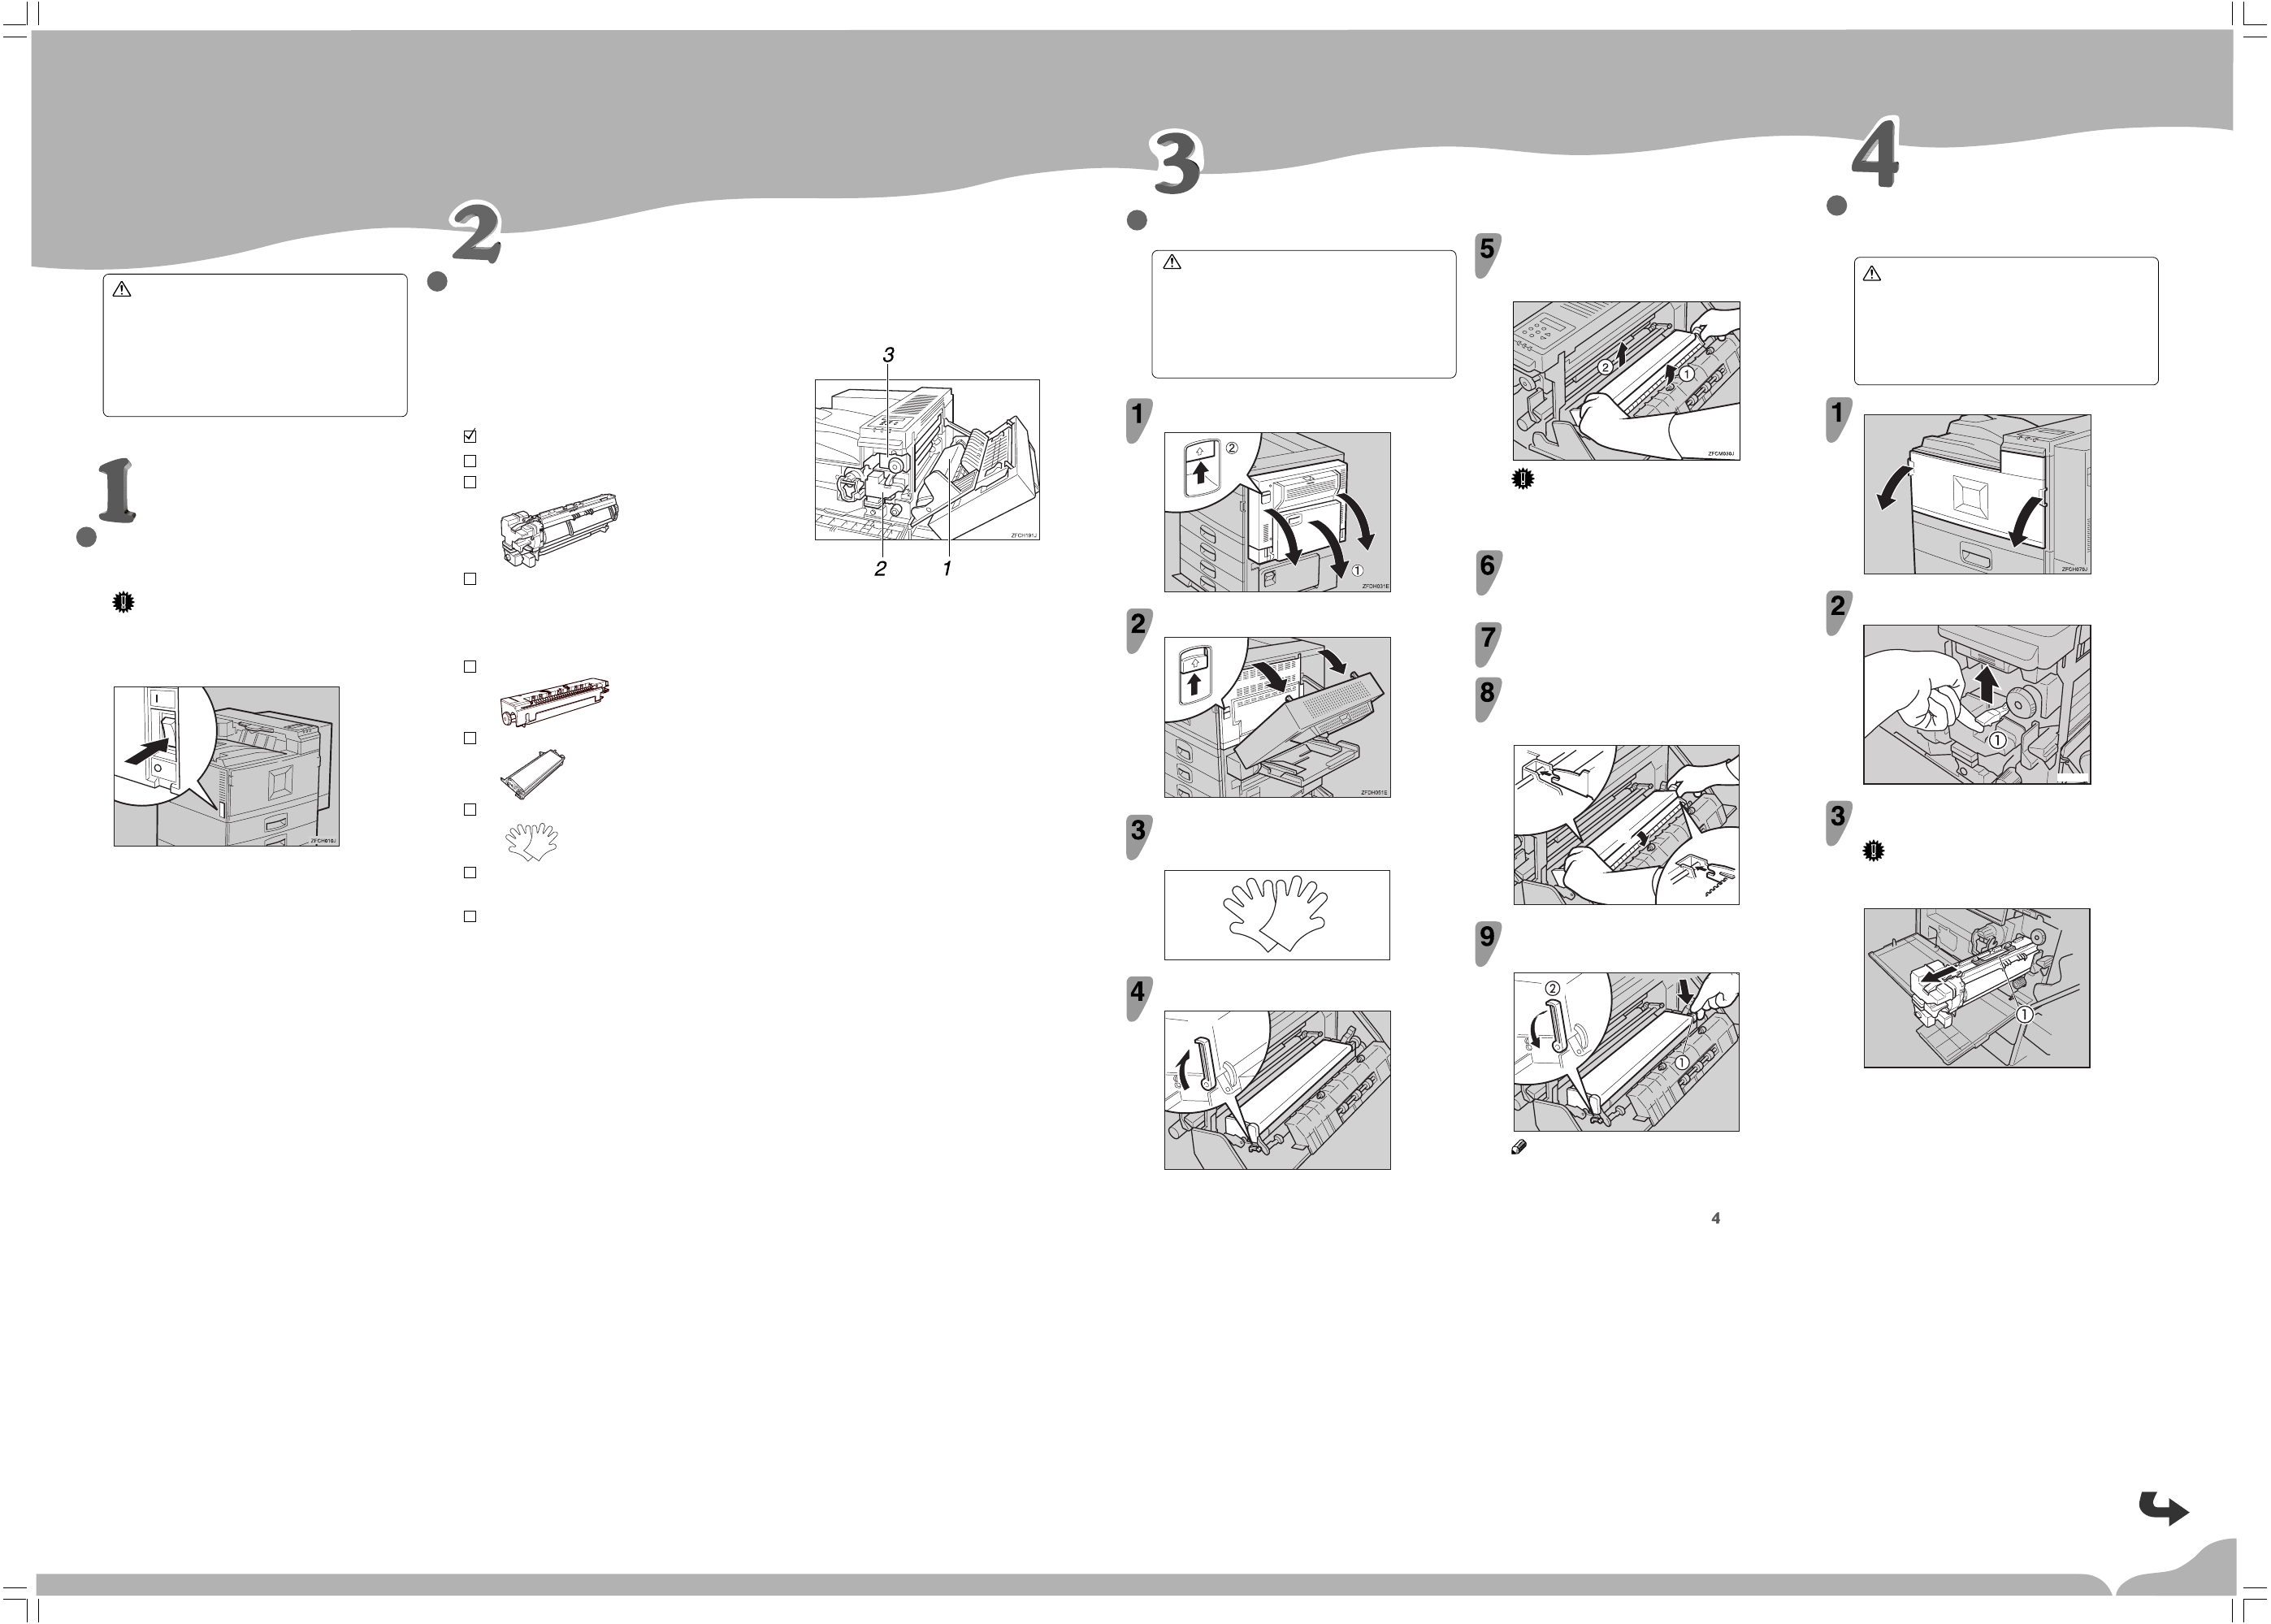
CHECKING THE CONTENTS OF THE
BOX
The maintenance kit is composed of 2 types of boxes,
Type 4510A and Type 4510B. Each box contains the
following parts. Confirm that the contents of the boxes
match the following lists.
Type 4510A
Replacement Guide (this sheet)
Removing the Development Unit from the Box
Development Unit
ZFCM010J
Disposal Bag
For packing the used Development Unit
Type 4510B
Fusing Unit
ZFCM020J
Transfer Unit
TAPM660E
Gloves
TAPM241E
Disposal Bag
For packing the used Transfer Unit
Brief reference sheet
If one or more of the items are missing, please contact your sales
or service representative.
CAUTION
•
The inside of the machine becomes very hot. Do not touch the parts
with a label indicating a “hot surface”. Touching a “hot surface”
could result in a burn injury.
•
Disposal should take place at an authorized dealer or appropriate
collection site.
•
If you dispose of the used parts yourself, dispose of them according
to local regulations.
TURNING OFF THE PRINTER
Turn the printer’s power switch off.
Important
❒ The inside of the machine becomes very hot. Be sure to turn
off the printer before attempting to replace any of the parts.
When replacing the old fusing unit with a new one, turn off
the printer and wait for about 30 minutes before beginning
the installation.
On
Off
REPLACING THE TRANSFER UNIT
WARNING
•
Do not incinerate the used transfer unit. Toner dust might ignite
when exposed to an open flame.
•
Disposal should take place at an authorized dealer or appropriate
collection site.
•
If you dispose of the used parts yourself, dispose of them according
to local regulations.
Open the bypass tray (
ቢ
), and then open the duplex unit
by pushing the catch upwards (
ባ
).
Open the right cover by pushing the catch upwards.
Put onthe gloves included in the Type 4500B box.
Be sure to wear the gloves to avoid getting your hands dirty or
damaging the belt surface of the new transfer unit.
TAPM310E
Raise the green lever (
ቢ
) inside the right cover to release
the transfer unit.
TAPM010E
ቢ
REPLACING THE DEVELOPMENT
UNIT
WARNING
•
Do not incinerate the used development unit. Toner dust might ignite
when exposed to an open flame.
•
Disposal should take place at an authorized dealer or appropriate
collection site.
•
If you dispose of the used parts yourself, dispose of them according
to local regulations.
Open the front cover.
While raising the green lever inside the front cover (
ቢ
),
and then slide the development unit out about 10cm (4”).
ZFCM050E
Slide the development unit out far enough so that you can
hold it by the handle (
ቢ
).
Important
❒ Slide the unit out to the position shown in the following
illustration. If you slide it out too far, it may fall and damage
the front cover.
ZFCM040E