Installing 1394 interface unit type4510 – Ricoh AP4510 User Manual
Page 32
Installing Options
22
2
Installing 1394 Interface Unit
Type4510
R CAUTION:
Important
❒ In Windows 2000, the 1394 Inter-
face Unit can only be used with
Service Pack 1 or later. If the Ser-
vice Pack is not installed, the con-
nectable number of devices in a
1394 bus is only one, and the client
cannot access the 1394 Interface
Unit without using an account that
has the administrators permission.
❒ The 1394 Interface Unit can be
damaged by a small amount of
static electricity. You should touch
some metal to discharge static elec-
tricity.
❒ Use the 1394 interface cable that
comes with this printer.
❒ Do not plug or unplug the 1394 in-
terface cable while installing the
printer driver.
❒ Do not turn the device on or off,
while installing the printer driver.
❒ When the 1394 Interface Unit is in-
stalled, uninstall the printer driver
after the 1394 interface cable is un-
plugged.
❒ Before pulling out the printer
board, make sure that the printer's
power switch is off, and the 1394
interface cables are unplugged. If
there is electricity provided from
the equipment connected with the
1394 interface cables, the printer
board and the 1394 Interface Unit
might be damaged.
Installing the 1394 Interface Unit
AAAA
Check the contents of the box for
the following items:
• 1394 Interface Unit
• 1394 interface cable (6–pin x 4–
pin)
• 1394 interface cable (6–pin x 6–
pin)
• Installation Guide
Note
❒ Other provided parts are not to
be used.
BBBB
Turn off the printer.
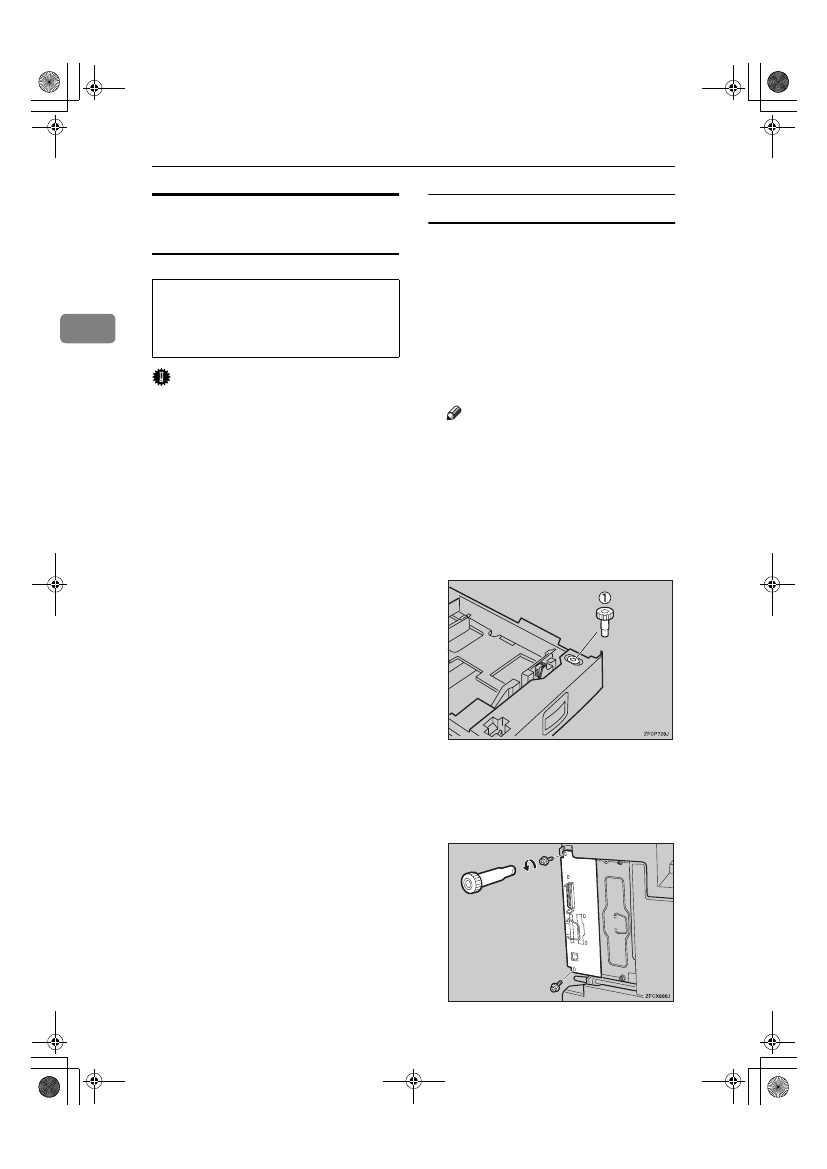
CCCC
Pull out the first paper tray (Tray
1) and take the screwdriver (
A
A
A
A)
from the tray. Each screw to be re-
moved requires this screwdriver.
DDDD
Remove the two screws locking
the printer board.
The screws are needed to lock the
printer board afterwards.
• Do not touch the inside of the
printer board compartment. It
may cause a machine malfunc-
tion or a burn.
AP3ENSetup-F-ricoh_FM.book Page 22 Friday, October 5, 2001 2:43 PM