Setting up your system, Set up a dv or hdv system – Adobe Premiere Pro CC v.7.xx User Manual
Page 94

Setting up your system
Set up a DV or HDV system
Set up an SD-SDI, HD-SDI, or component system
Set up a file-based system
Set up an S-Video or composite system
Specify the default audio device
Specify ASIO device settings (Windows only)
Specify whether to render audio when rendering video
Specify the duration for preroll and postroll pauses
Specify scratch disks to improve system performance
Move or clean the Media Cache Database
Optimize rendering for available memory
For Premiere Pro system requirements, see the
.
For lists of various categories of hardware compatible with Adobe Premiere Pro, see the
.
Jeff Sengstack provides detailed tips for optimizing a computer system and Premiere Pro for performance on the
.
To run a series of performance tests on your computer system and determine how to optimize for performance with Premiere Pro,
provides recommendations for setting up disk drives for optimum performance and reliability.
For details about CUDA processing, the Mercury Playback Engine, and GPU processing,
includes several experienced users’ suggestions for practical system requirements for Adobe
Premiere Pro.
resources about optimizing performance.
an After Effects and Premiere Pro performance workshop from video2Brain.
a performance tip: stopping software not relevant to your work.
“What computer and components should I buy for Premiere Pro?” for advice about a good computer system for editing.
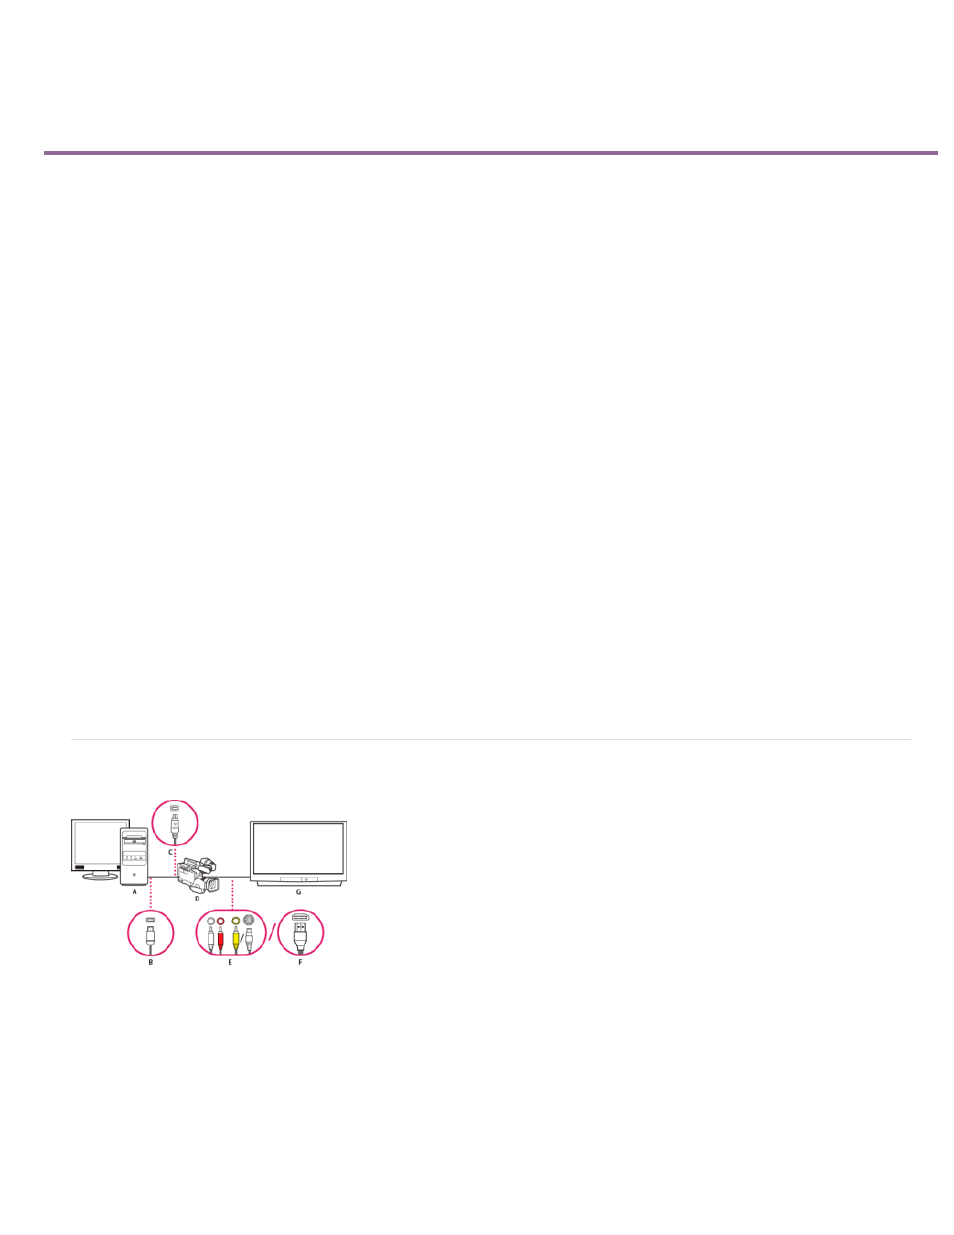
Set up a DV or HDV system
DV/HDV setup
A. Computer and computer monitor B. 6-pin FireWire port and connector C. 4-pin FireWire port and connector D. DV/HDV camcorder E. RCA
jacks and plugs for L (white) audio, R (red) audio, composite video (yellow); jack and plug for S-Video (y/c) F. HDMI port and connector G.
Television monitor
With this setup, you can capture audio and video from a DV or HDV source. You can monitor the signal on a TV monitor while editing. Finally, you
can export any sequence back to videotape.
1. Connect the DV or HDV camcorder or VTR to the computer using a FireWire cable.
97
