Next steps, Install the motherboard – FUJITSU SPARC T5440 User Manual
Page 163
Servicing Field-Replaceable Units
137
5. Unplug the front I/O connector from J9901 on the motherboard.
6. Remove the six No. 2 Phillips screws that secure the bus bar assembly to the
motherboard.
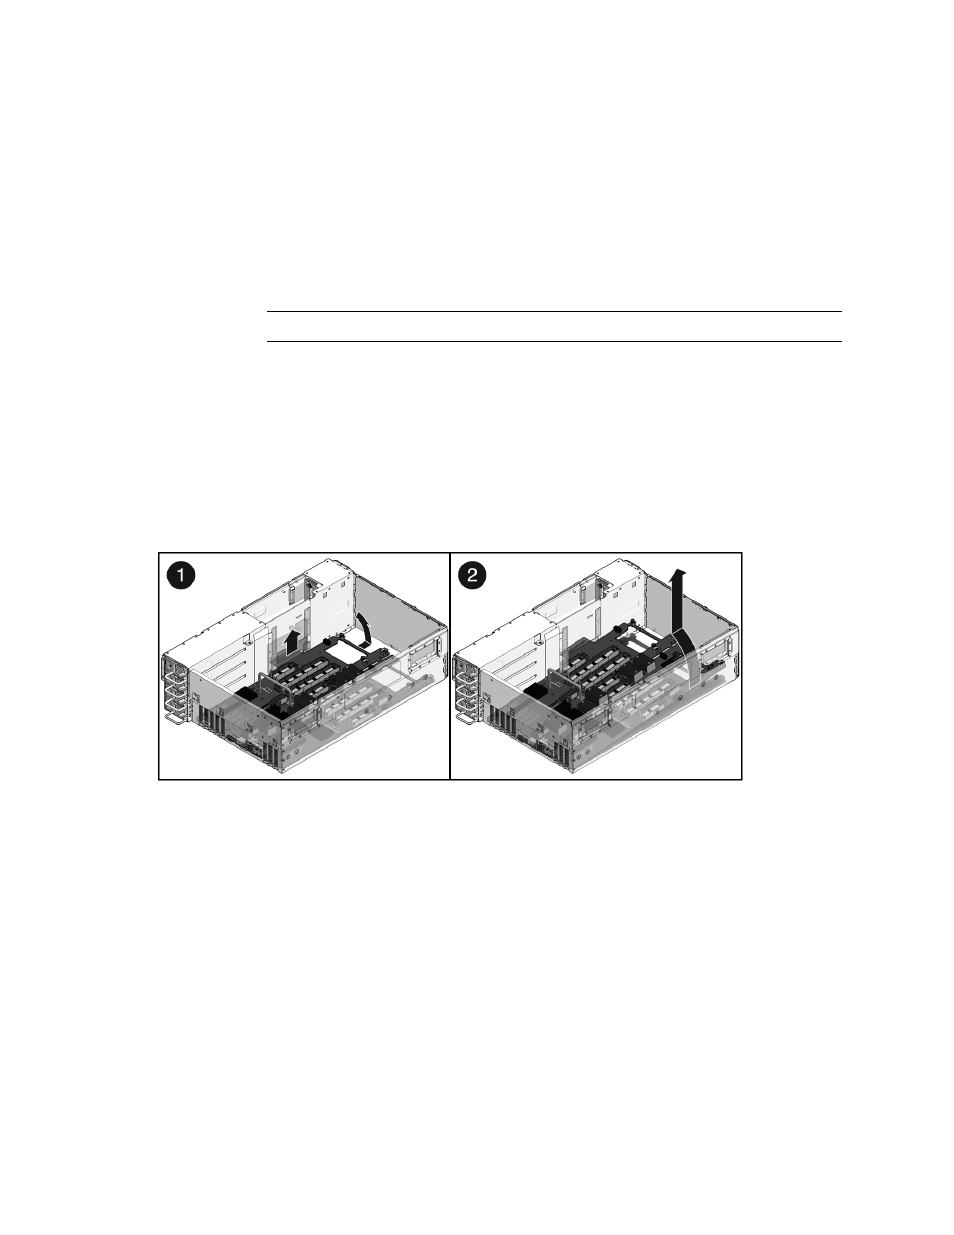
7. Slide the chassis midwall panel up.
Note –
Use the clips to secure the midwall panel in the open position.
8. Loosen the No. 2 Phillips screws that secure the motherboard to the chassis
floor.
See
FIGURE: Motherboard Fastener Locations on page 140
for the fastener
locations.
9. Lift the motherboard up and out of the chassis.
Guide the flex cable connector out from under the midwall partition.
FIGURE:
Removing the Motherboard
10. Place the motherboard on an antistatic mat.
Next Steps
If you are replacing a faulty motherboard, you must program the chassis serial
number and product part number into the new motherboard. See your service
representative.
▼ Install the Motherboard
1. Ensure that all 14 captive screws in the motherboard are retracted.
- T2000 (30 pages)
- SPARC ENTERPRISE M3000 (212 pages)
- PRIMERGY RX600 S6 (134 pages)
- BS2000 (37 pages)
- BX900 S1 (144 pages)
- BX900 S1 (142 pages)
- PRIMEQUEST 1000 Series C122-E119EN (109 pages)
- T5120 (26 pages)
- SPARC ENTERPRISE M9000 (560 pages)
- DESKPOWER 2000 (50 pages)
- SPARC M4000 (376 pages)
- ServerView Respurce Orchestrator Virtual Edition V3.1.0 (247 pages)
- PRIMERGY MX130 S2 (256 pages)
- SPARC ENTERPRISE T5120 (58 pages)
- T5240 (28 pages)
- M4000 (310 pages)
- SPARC M4000/M5000 (76 pages)
- TX150 S3 (95 pages)
- SPARC T5220 (240 pages)
- M9000 (518 pages)
- ServerView Resource Orchestrator Cloud Edition V3.1.0 (180 pages)
- PRIMERGY BX600 S2 (173 pages)
- FR family 32-bit microcontroller instruction manuel CM71-00101-5E (314 pages)
- M Server M4000 (30 pages)
- Primergy RX200 S2 (307 pages)
- DESKPOWER P301 (56 pages)
- SPARC Enterprise Server M4000 (62 pages)
- SPARC M8000 (4 pages)
- PRIMERGY B120 (68 pages)
- C120-E361-04EN (36 pages)
- R630 (76 pages)
- 2000 (66 pages)
- T1000 (84 pages)
- Server TX200 S6 (126 pages)
- PRIMERGY BX600 S3 (164 pages)
- SPARC ENTERPRISE T5220 (34 pages)
- SPARC M3000 (56 pages)
- TX300 (122 pages)
- PRIMERGY BX600 (288 pages)
- DESKPOWER 6000 (105 pages)
- SPARC Enterprise Server M3000 (202 pages)
- SPARC Enterprise Server M3000 (8 pages)
- T850 (18 pages)
- T5440 (212 pages)
- Service View Resource Orchestrator Cloud Edition V3.0.0 (102 pages)