Creating appliqués, Tutorial, Step 1 creating an appliqué pattern – Brother PE-DESIGN V7 User Manual
Page 78
72
Tutorial
Creating Appliqués
The Applique Wizard provides instructions for easily creating appliqués.
This procedure will go through each step of the basic operation.
Step 1
Creating an appliqué pattern
An appliqué can be created from any sharp.
In the following steps, we will draw a circle and
create an appliqué.
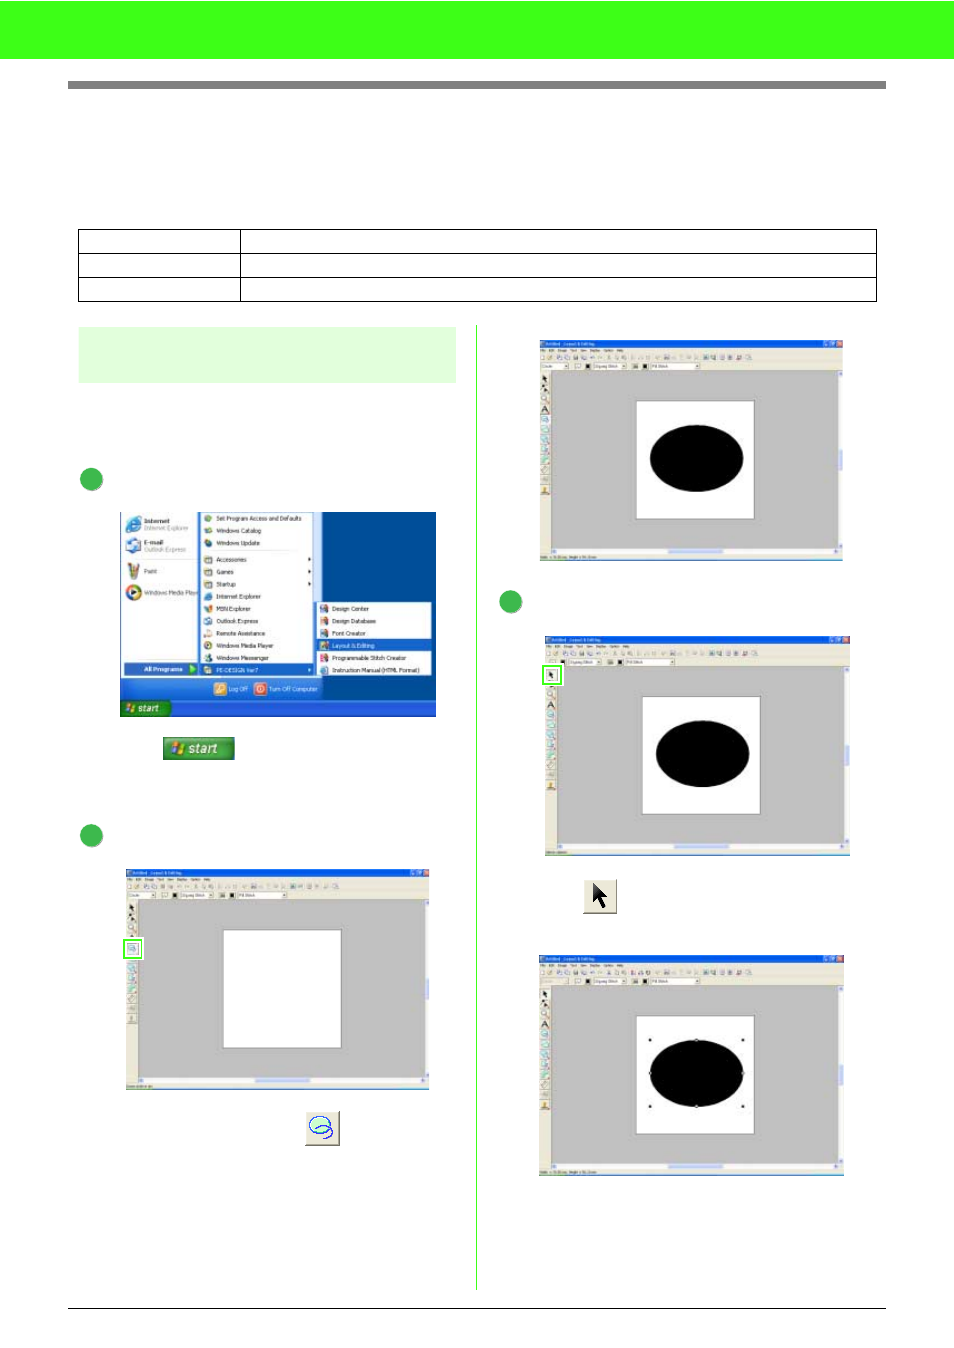
Start up Layout & Editing.
Click
, then select All Programs,
then PE-DESIGN Ver7, then Layout &
Editing.
Draw a circle.
To draw a circle click on
.
Then drag the pointer in the Design Page to
the desired size.
Create the appliqué.
Click
. Then select the circle pattern that
will be the appliqué.
Step 1
Creating an appliqué pattern
Step 2
Saving the design
Step 3
Transferring the design to an original card
1
2
3
This manual is related to the following products: