An overview of full screen mode, P. 164) – Apple Aperture User Manual
Page 164
164
An Overview of Full Screen Mode
Full Screen mode projects your images onto a black background for detailed viewing.
Using a dual-display system in Full Screen mode gives you an enlarged space to
compare and adjust images. For more information about setting up a dual-display
system, see “
Setting Up Your System with Two Displays
You can view, compare, and stack your images in Full Screen mode. You can also apply
adjustments and keywords. When you’ve finished working with your images, you can
use this mode to preview and proof your images.
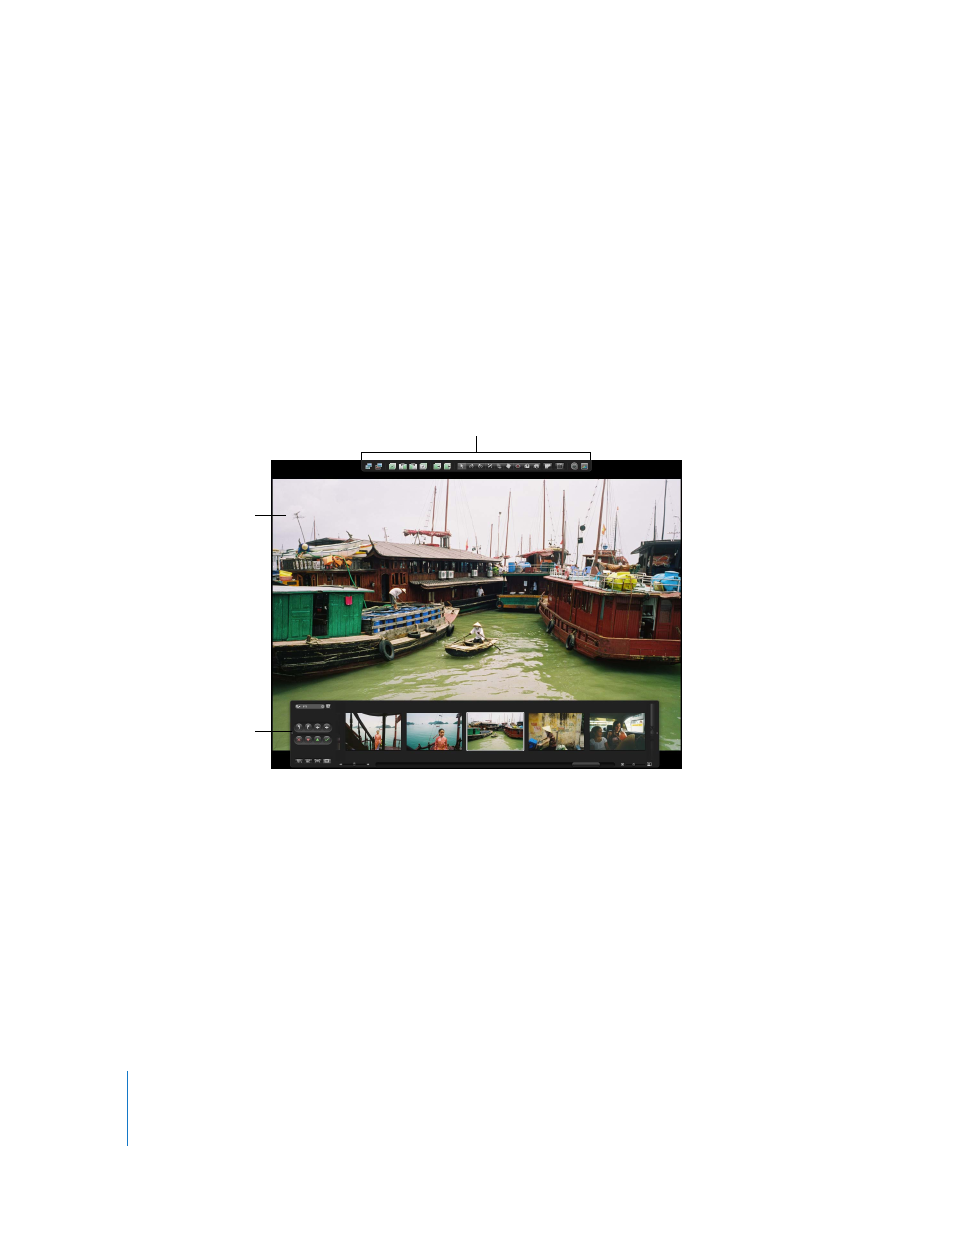
Full Screen mode includes a toolbar and filmstrip to help you view, organize, and adjust
your images.
Use the toolbar buttons and tools to change your images. The toolbar includes
buttons for creating versions and working with stacks, as well as a full set of image
adjustment tools.
Use the filmstrip to move through, organize, and rate your images. You can dock the
filmstrip on the left, right, or bottom of the screen—wherever it best suits your work
habits. You can also hide or show the filmstrip whenever you want.
You can use any of the Aperture HUDs in Full Screen mode. You can open the
Adjustments HUD or Keywords HUD by pressing its keyboard shortcut. In fact, you’ll
find it convenient to use keyboard shortcuts for most features you use in Full Screen
mode. For more information about keyboard shortcuts you can use, see “
Keyboard Shortcuts in Full Screen Mode
Filmstrip available
in Full Screen mode
Toolbar available in
Full Screen mode
The displayed image fills
the screen.