Fig. 292: select module type, Fig. 293: module properties dialog box – Hardy HI 3010 Filler/Dispenser Controller User Manual
Page 98
HI-3000 Series
84
Operation and Installation
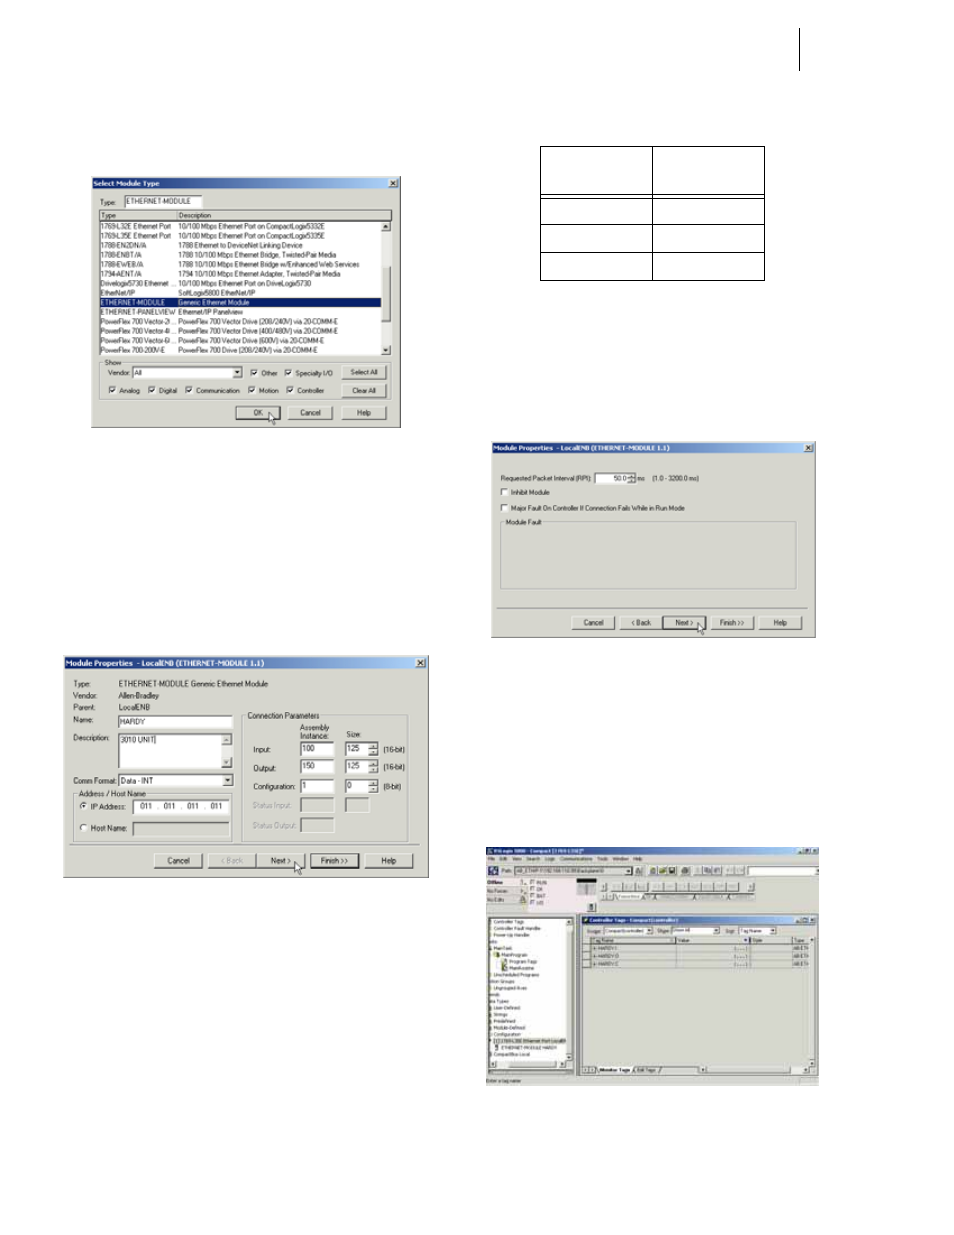
Step 3. Click on New Module. The Select Module type dia-
log box appears. (See Fig. 342)
FIG. 292: SELECT MODULE TYPE
Step 4. Scroll down until you find “ETHERNET-MOD-
ULE Generic Ethernet Module”
Step 5. Click on the Generic Ethernet Module.
Step 6. Click on the OK button to select the module type.
The Module Properties - EtherNet_Bridge
(ETHERNET-MODULE 1.1) dialog box appears.
(See Fig. 293)
FIG. 293: MODULE PROPERTIES DIALOG BOX
Step 7. In the text field next to Name type in the name you
want to use for the module. In our example we used
Hardy.
Step 8. In the Description text field type in a description of
the module. In our example we entered 3010 Unit.
Step 9. Click on the Comm Format pull down menu.
Step 10. Click on “Data-INT”.
Step 11. Click in the IP address field.
Step 12. Enter the IP address of the module you are config-
uring.
Step 13. Under “Connection Parameters” enter the follow-
ing:
Step 14. Click on the Next button.
Step 15. In the Requested Packet Interval (RPI) field use the
up or down arrows to select 50 milliseconds, or
double click in the field and type 50.0. (See Fig.
294)
Step 16. Make sure that the Inhibit Module is not checked.
FIG. 294: REQUESTED PACKED INTERVAL/
SELECTING 50.0 MILLISECONDS
Step 17. Click on the Next button or the Finish button. The
original dialog appears with the newly added
“ETHERNET-MODULEHARDY” added to the I/
O configuration list and the Controller Tags list.
(See Fig. 295)
FIG. 295: ETHERNET-MODULE HARDY ADDED TO
I/O CONFIGURATION LIST
Assembly
Instance
Size
100
125
150
125
1
0