Fig. 186: omniserver configuration dialog box – Hardy HI 3010 Filler/Dispenser Controller User Manual
Page 76
HI-3000 Series
62
Operation and Installation
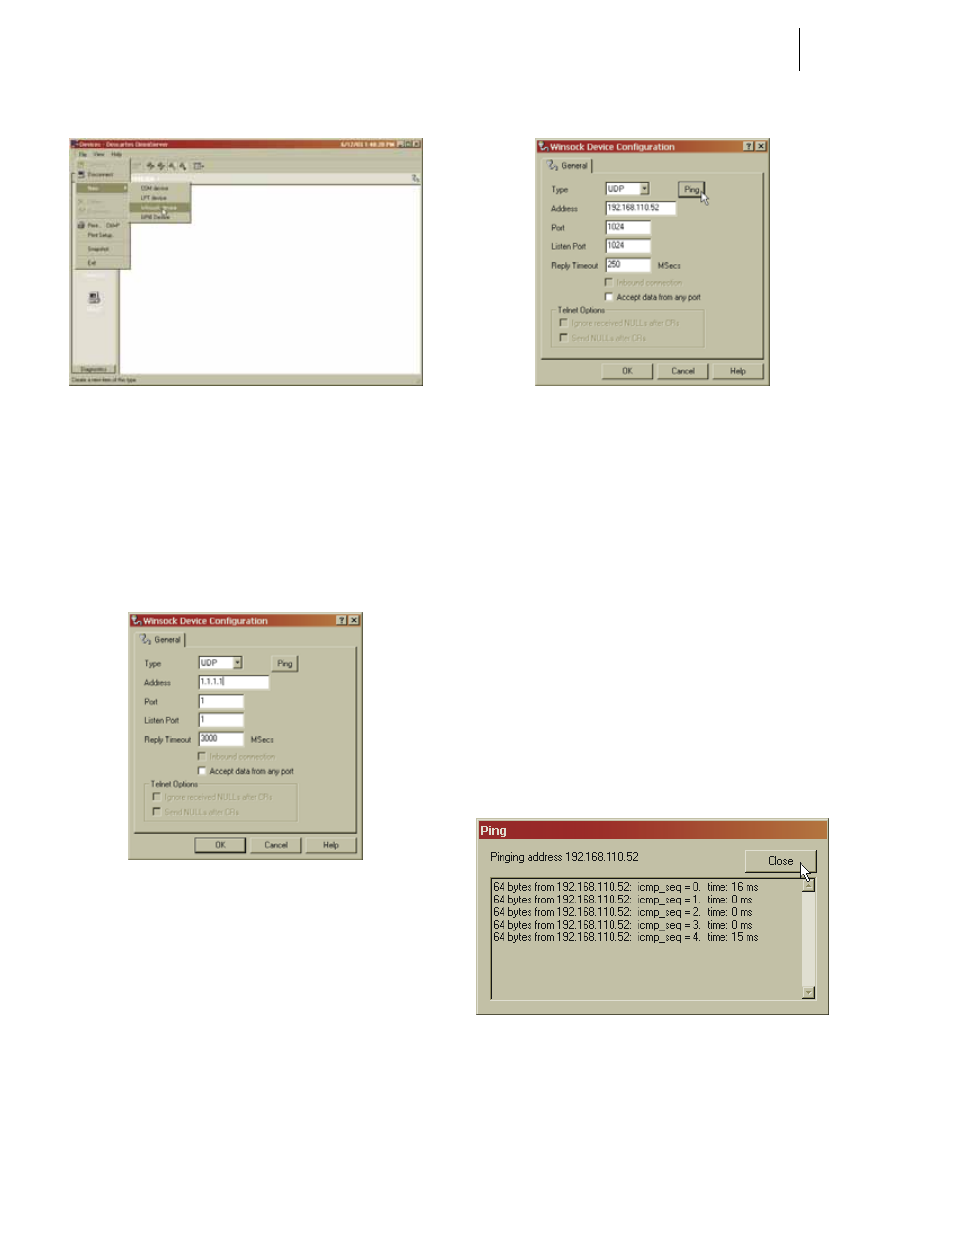
FIG. 186: OMNISERVER CONFIGURATION DIALOG
BOX
Step 7. Click on New.
Step 8. Move the cursor to the right until the flyout menu
appears.
Step 9. Click on Winsock Device. (See Fig. 186) The Win-
sock Device Configuration dialog box appears. (See
Fig. 187)
FIG. 187: WINSOCK DEVICE CONFIGURATION/
DEFAULT PARAMETERS
Step 10. If UDP is not selected, click on the Type pull down
list. Click on UDP to select it. (See Fig. 188)
FIG. 188: WINSOCK CONFIGURATION/ENTERING
HI 3000 SETUP PARAMETERS
Step 11. Click in the Address text field. Type in the IP
address of the HI 3000 device to which you want to
connect. In our example we used 192.168.110.27
which is the IP address for an HI 3601 Machine
Monitor.
Step 12. Click in the Port text field. Enter the number
“1024” without the quotation marks.
Step 13. Click in the Listen Port text field. Enter the number
“1024” without the quotations marks.
Step 14. Click in the Reply Time out to select the tim (in
milliseconds) you want to wait until the instrument
replies. We selected 250 MSecs. Your application
will require a different reply time.
Step 15. If you want to see if the HI 3000 module is con-
nected, click on the Ping button. If the instrument is
connected you should receive messages back like
the ones below: (See Fig. 189)
FIG. 189: PINGING HI 3000 MODULE/CONNECTION
INDICATED
Step 16. Click on the Close button.
Step 17. Click on the OK button. An Icon appears with the
IP address of the HI 3000 device you just connected
to. (See Fig. 190)