Fig. 201: topic definition/hardyfloat icon – Hardy HI 3010 Filler/Dispenser Controller User Manual
Page 79
65
Network
Installation
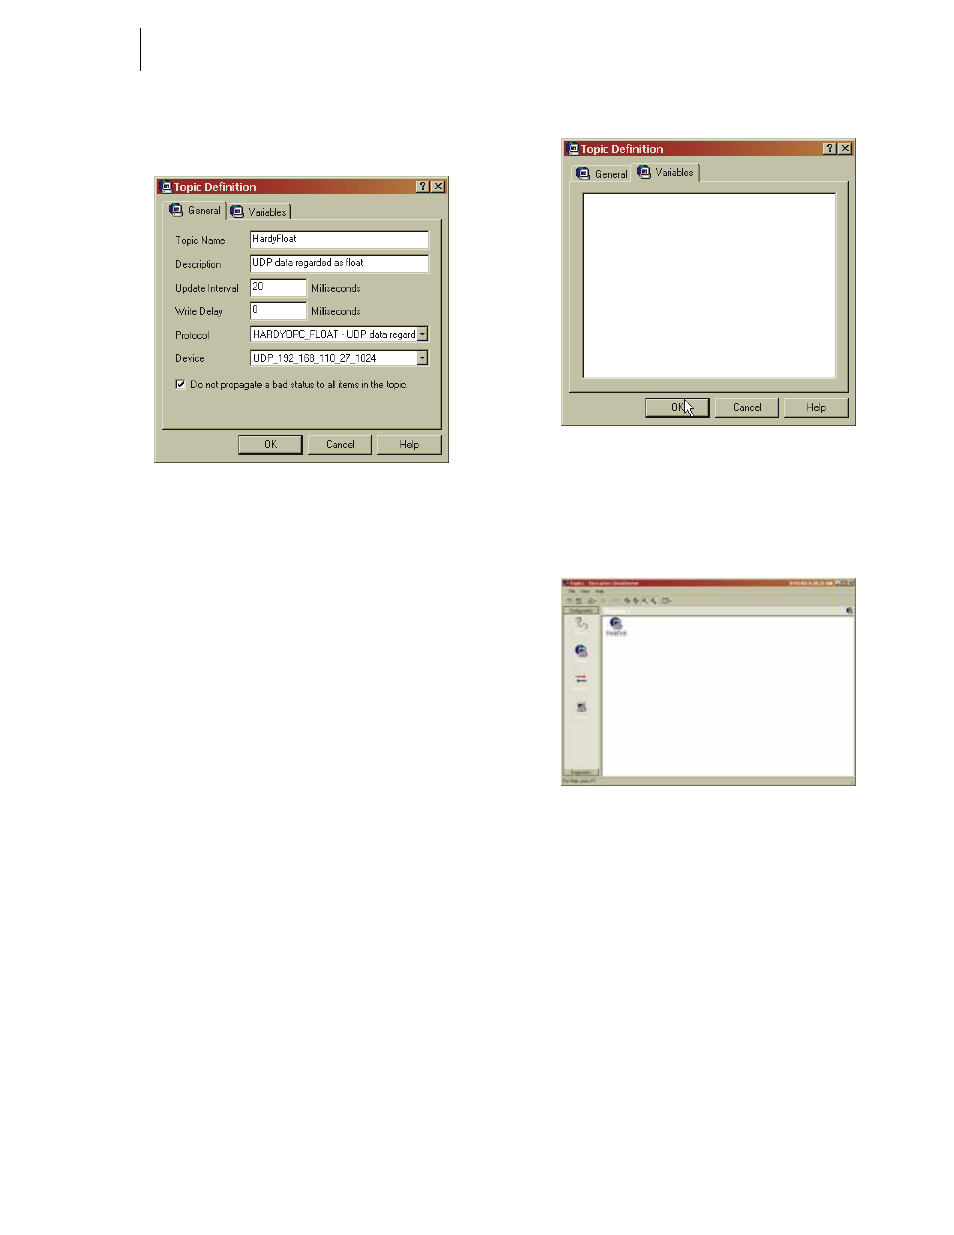
Step 4. Click on Topic. (See Fig. 198) The Topic Definition
dialog box appears. (See Fig. 199)
FIG. 199: TOPIC DEFINITION DIALOG BOX/
CREATING TOPIC DEFINITION
Step 5. Click in the Topic Name text field. Enter a descrip-
tive name for the Topic. In our example we entered
HardyFloat.
NOTE:
The topic name must be one word. Do not put
spaces between the words.
Step 6. Click in the Description text field. Enter a descrip-
tive name for the topic. We entered “UDP data
regarded as float”.
Step 7. Click in the Update Interval text field. The Update
interval is the amount of time between updates. In
our example we selected 20 Milliseconds.
Step 8. Click in the Write Delay text field. Select the time
you want a write to delay before writing to a file. In
our example we selected 0 milliseconds.
Step 9. Click on the Protocol pull down list. Click on
“HARDYOPC_FLOAT - UDP data regarded as
float.”
Step 10. Click on the Device pull down list. Click on the IP
Address of the device you are configuring. In our
example the IP Address selected is:
• UDP_192_168_110_27_1024
Step 11. Click on the Variables tab. The Variables page
appears. (See Fig. 200) The Variables Page should
be empty.
FIG. 200: TOPIC DEFINITION/VARIABLES PAGE
Step 12. Click on the OK button to select the Topic Defini-
tion parameters. A HardyFloat Topic Icon appears.
(See Fig. 201)
FIG. 201: TOPIC DEFINITION/HARDYFLOAT ICON
Step 13. Click on the Protocols Icon again. The Protocol
page appears. (See Fig. 202)
Step 14. Click once on HARDYOPC_FLOAT to high light
the selection.
Step 15. Click on the File pull down menu.
Step 16. Click on New.
Step 17. Move the cursor to the right until the fly-out menu
appears. (See Fig. 203)
Step 18. Click on Item. The Item Definition dialog box
appears. (See Fig. 204)
Items Definition Setup