Fig. 63: ethernet i/p/option card, Fig. 64: ethernet/i/p/slide into option slot #0, Fig. 65: ethernet/ip option card installed – Hardy HI 3010 Filler/Dispenser Controller User Manual
Page 37: Removing the ethernet/ip option card, Hernet i/p/option card, Ernet/i/p/slide into option slot #0, Ernet/ip option card installed
23
Cabling
Installation
ware which overwrites any and all dip switch set-
tings.
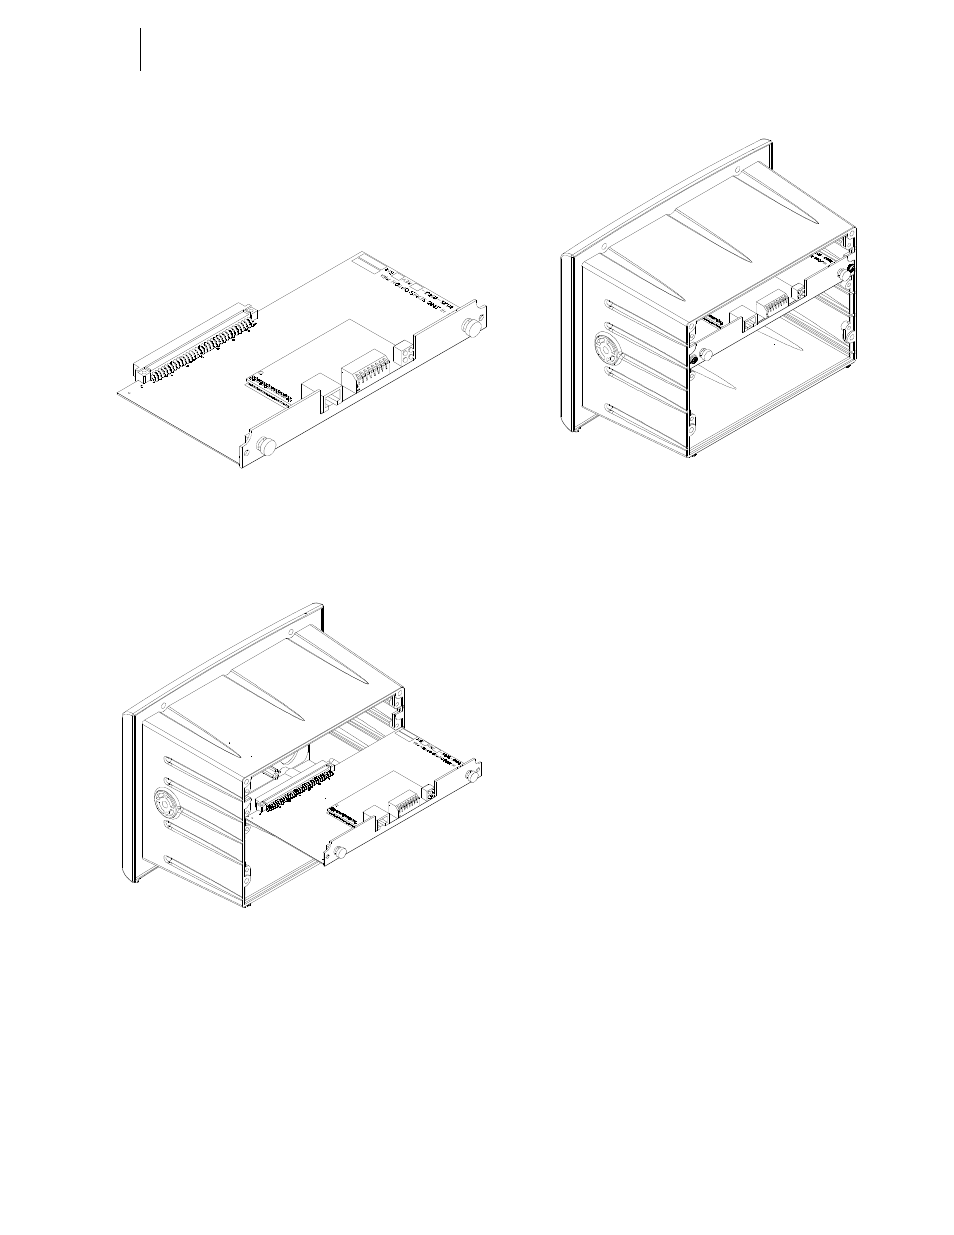
Step 1. Position the EtherNet/IP Option Card with the back
plane connector facing Option Slot #0 or Option
Slot #1. (See Fig. 63)
FIG. 63: ETHERNET I/P/OPTION CARD
Step 2. Slide the EtherNet/I/P Option Card into Slot #0.
(See Fig. 64)
FIG. 64: ETHERNET/I/P/SLIDE INTO OPTION SLOT
#0
Step 3. Push the EtherNet/I/P card up against the back
plane and gently press until the card connector seats
in the back plane connector.
Step 4. Use a phillips head screw driver and install the two
(2) screws that fasten the EtherNet/I/P card panel to
the HI 3000 Instrument Chassis. (See Fig. 65)
FIG. 65: ETHERNET/IP OPTION CARD INSTALLED
Step 5. Tighten the screws until the EtherNet I/P panel is
snug. Do not overtighten. Recommended 10 inch/
lbs torque.
Step 6. Connect an approved EtherNet/IP (shielded, double
shielded, waterproof, etc.) cable to the EtherNet I/P
RJ 45 connector on the EtherNet I/P Option Card.
NOTE:
Do not use standard ethernet cable that you can
buy from a local computer store.
Removing the EtherNet/IP Option Card
Step 1. Disconnect the EtherNet/IP RJ-45 connectors.
Step 2. Use a phillips head screw driver and remove the
two (2) screws that fasten the EtherNet/IP Option
Card panel to the HI 3000 Chassis.
Step 3. Using the thumb and index finger on both hands,
grasp the two (2) knobs on the card panel and pull
away from the instrument.
Step 4. When the EtherNet/IP Option Card clears the chas-
sis, store in a static free, safe location.
Setting Up the EtherNet I/P Address from the Front
Panel
Step 1. At the front panel click on the Setup/3 button. The
Configuration Menu appears.
Step 2. Push the up or down arrows until the cursor is next
to “OPTIONS”. (See Fig. 66)