Setting the ip address for the blind remote, Fig. 34: ip setup menu, Fig. 35: ip setup/setting new address – Hardy HI 3010 Filler/Dispenser Controller User Manual
Page 29: Menu, Address
15
Cabling
Installation
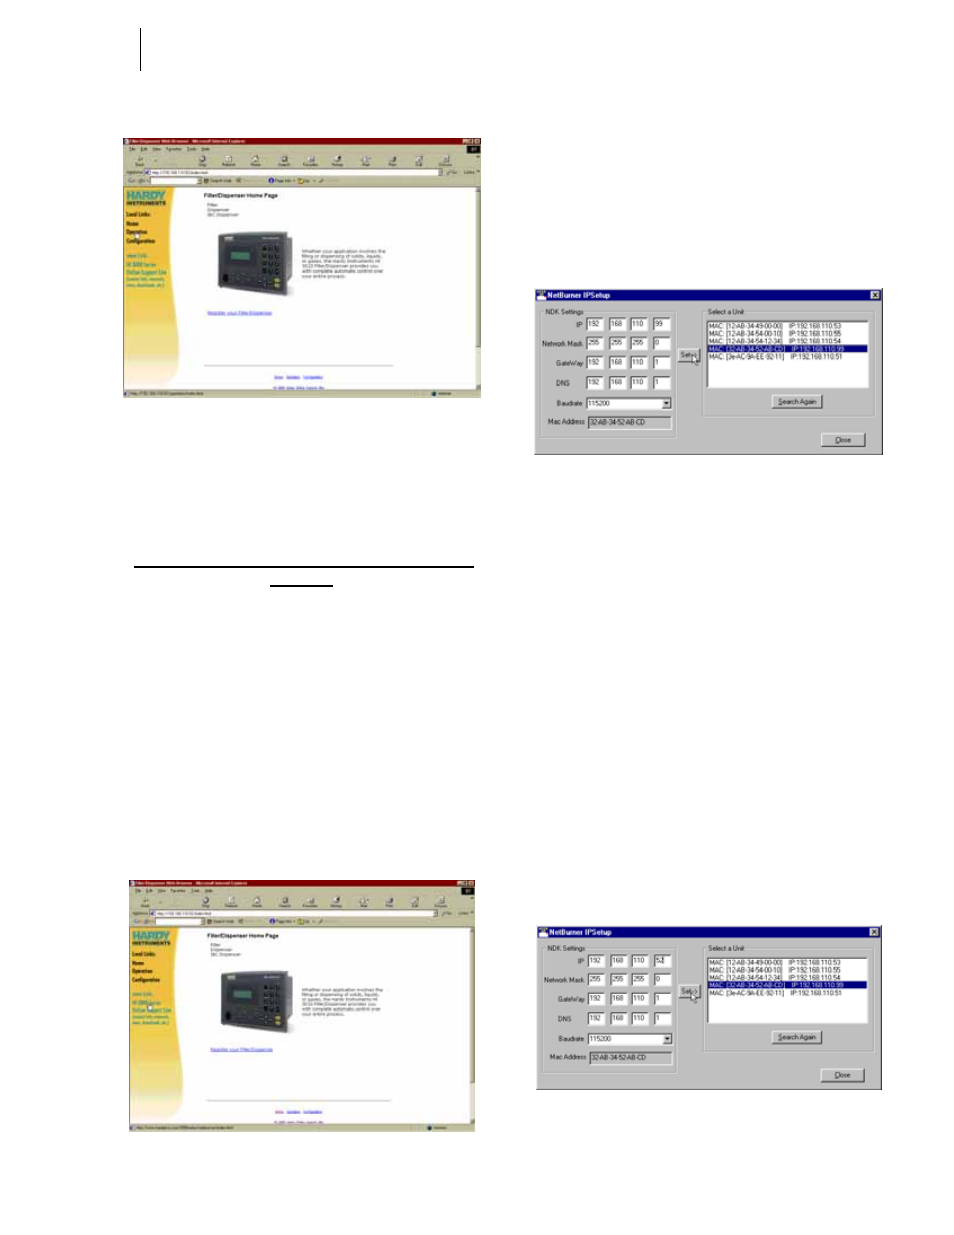
FIG. 32: WEB PAGE
Setting the IP Address for the Blind Remote
Since the Blind Remote does not have a keypad you will
have to set the IP Address by via the Ethernet (TCP/IP).
Setting or Changing the IP Address using the
Ethernet
Software Requirements:
IP Setup
Step 1. Get the CD ROM that came with HI 3000 Series
Instrument and load it into to your CD Drive.
Step 2. If you don’t have the CD or can’t find it, you can
connect to the HI 3000 Instrument Web Site by
opening the Instrument Web page and clicking on
the “www.Link: HI 3000 Series Online Support
Site” link. (See Fig. 33) Click on Downloads/IP
Setup.
FIG. 33: INSTRUMENT WEB PAGE
•
On the CD is a folder called Web-Link.
•
Open the Folder to get this File -
“IPSetup.exe”
•
When saving the file from our Web Site,
save it to this folder.
•
Load “IPSetup.exe” on your hard drive.
•
Double click on “IPSetup.exe”. The IP
Setup Dialog box appears. (See Fig. 34)
FIG. 34: IP SETUP MENU
Step 3. IP Setup automatically searches the network for all
the HI 3000 instrument IP addresses that are on the
network. Keep in mind the computer that has the IP
Setup application must be connected to the same
network as the devices.
Step 4. In the Select a Unit field, click on the unit IP
address that you want to change. You will notice
that we clicked on a default address:
192.168.110.99. This means that there is a new HI
3000 Series instrument on the network. The high-
lighted address also appears in the NDK Settings/
IP.
Step 5. Contact your Network Administrator for the correct
IP Address for this unit.
Step 6. Click in each IP address field that you want to
change. REMEMBER DO NOT DUPLICATE IP
ADDRESSES. Type in the new IP Address. In our
example we changed “192.168.110.99” to
“192.168.110.52”. (See Fig. 35)
FIG. 35: IP SETUP/SETTING NEW ADDRESS