Devicenet network setup, Rsnetworx setup for hi 3000 series instruments, Fig. 110: selecting eds wizard – Hardy HI 3010 Filler/Dispenser Controller User Manual
Page 55: Fig. 111: eds wizard dialog box, Fig. 112: selecting “register an eds file, Fig. 113: selecting the hardy eds file, Lecting eds wizard, S wizard dialog box, Ecting “register an eds file, Ecting the hardy eds file
41
Network
Installation
Devicenet Network Setup
RSNetWorx Setup for HI 3000 Series Instruments
Step 1. Download the Hardy EDS file either from the CD
that came with your instrument or go to the Hardy
Instruments Website to get the most current file. Put
the Hardy EDS file in the Rockwell Software
folder. DO NOT PUT THE EDS FILE IN THE
EDS FOLDER!
Step 2. Start up RSNetWorx.
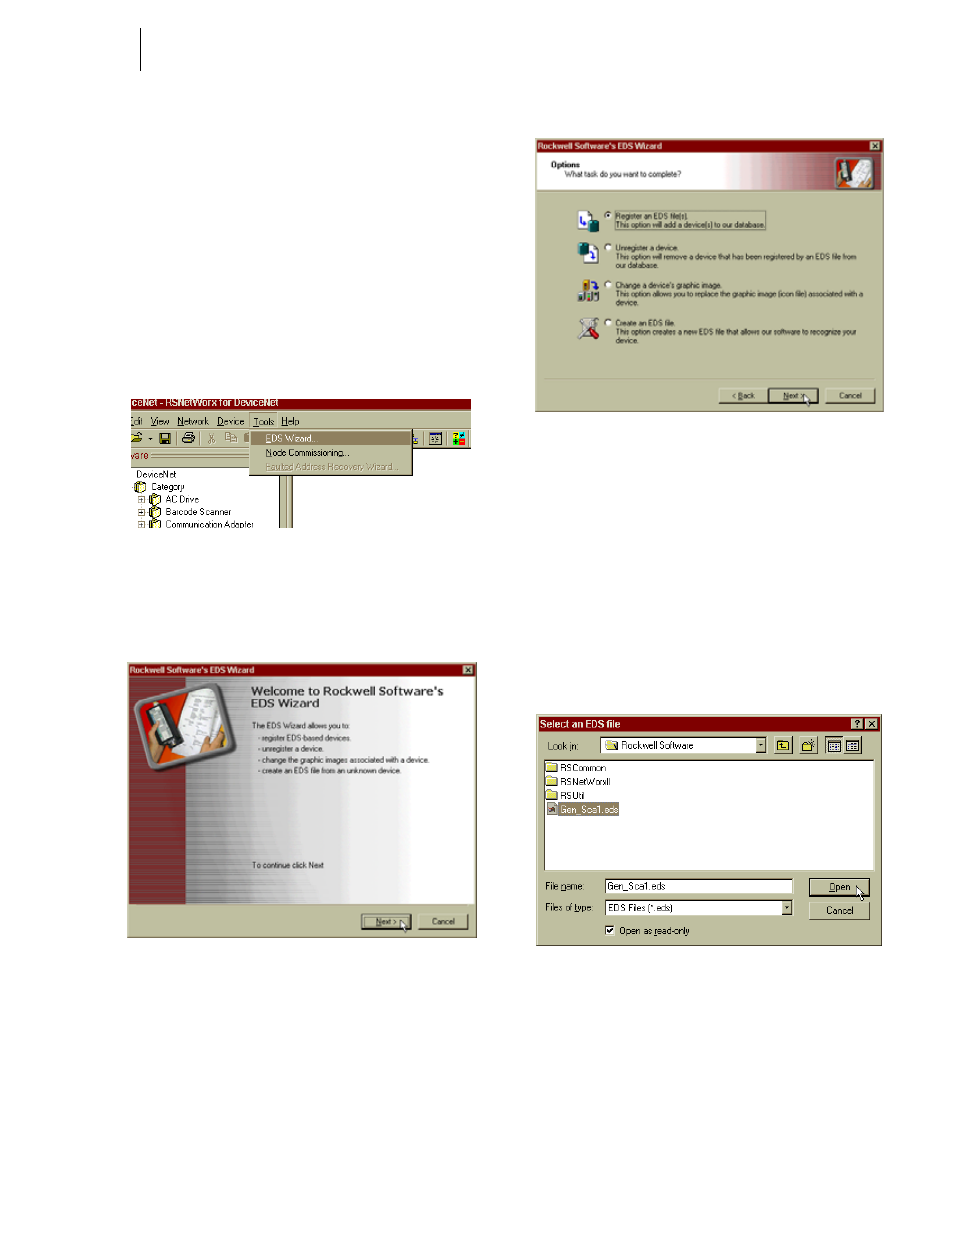
Step 3. Click on the Tools pull down menu. (See Fig. 110)
Step 4. Click on EDS Wizard. The EDS Wizard dialog box
appears. (See Fig. 111)
FIG. 110: SELECTING EDS WIZARD
Step 5. Click on Next. The EDS Options dialog box
appears. (See Fig. 112)
FIG. 111: EDS WIZARD DIALOG BOX
FIG. 112: SELECTING “REGISTER AN EDS FILE”
Step 6. Click on Next. (See Fig. 112) The Registration dia-
log box appears.
Step 7. Click on the Browse button. The Select EDS file
dialog box appears. Go to the folder that contains
the Hardy EDS file. We put the file in the Rockwell
Software folder. (See Fig. 113)
Step 8. Click on the Hardy EDS file to highlight it.
Step 9. Click on Open. (See Fig. 113)
Step 10. The Registration dialog box reappears with the path
to the Hardy EDS file in the text field. (See Fig.
114)
FIG. 113: SELECTING THE HARDY EDS FILE