Fig. 101 c, Fig. 102 configur, Fig. 103 se – Hardy HI 3010 Filler/Dispenser Controller User Manual
Page 53: Lected instrument with ip address in ip address
39
Network
Installation
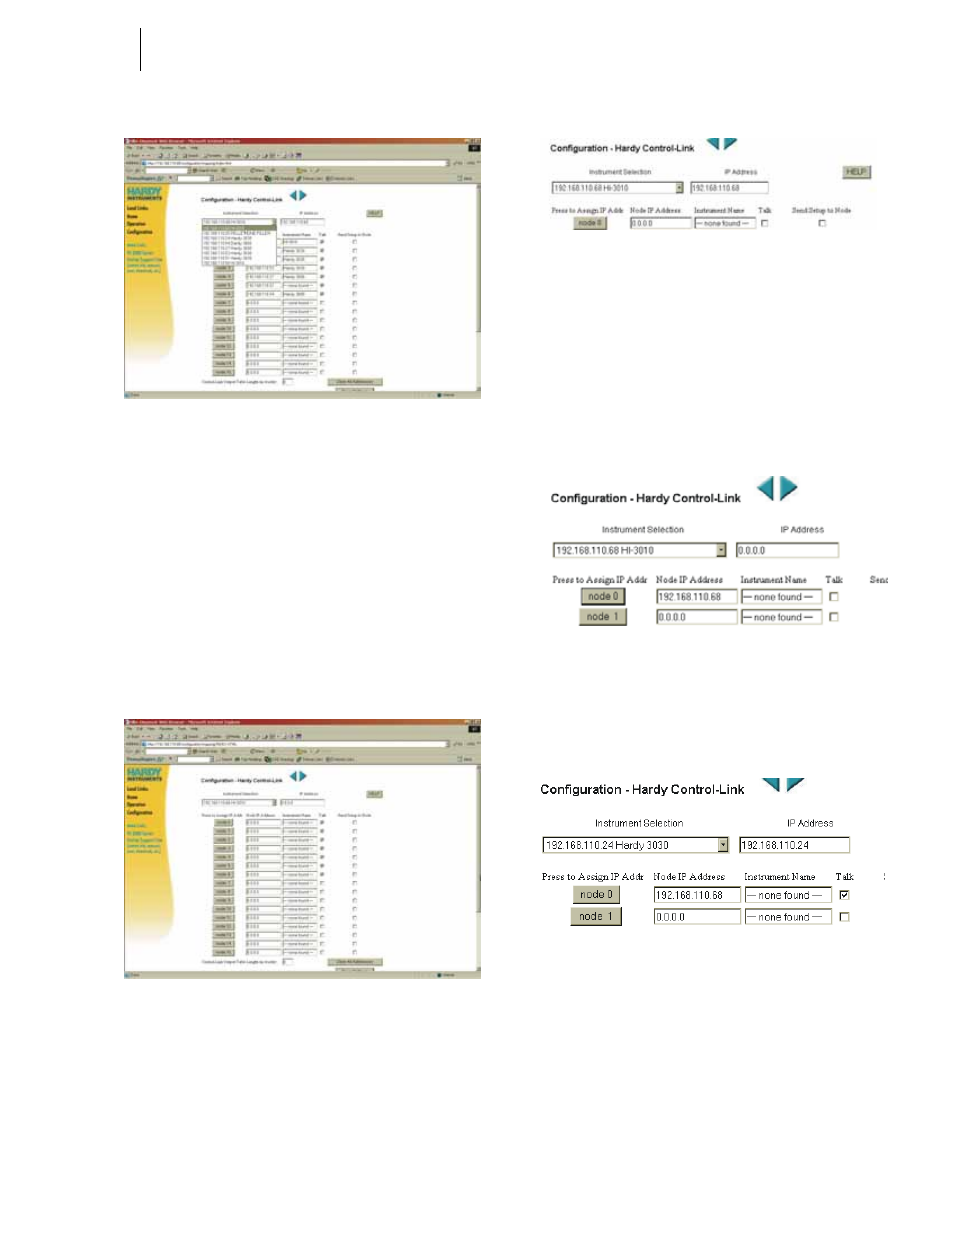
FIG. 101: CONFIGURATION - HARDY CONTROL-
LINK/INSTRUMENT SELECTION PULL DOWN
LIST
Step 4. When you arrive at the Configuration - Hardy Con-
trol-Link page for the first time the Node address
fields have “0.0.0.0” and the Instrument Name
fields indicate “none found” however the instru-
ment you are currently using is displayed in the
Instrument Selection field. (See Fig. 102)
Step 5. To Assign an IP address to a node, click on the
instrument you want to assign to a node in the pull
down list. The IP address of the selected instrument
loads into the IP Address field. (See Fig. 103)
FIG. 102: CONFIGURATION PAGE WITH
INSTRUMENTS NOT ASSIGNED A NODE ADDRESS
FIG. 103: SELECTED INSTRUMENT WITH IP
ADDRESS IN IP ADDRESS FIELD
NOTE:
It is always a good practice to assign node 0 to
the instrument you are currently using.
Step 6. Click on the node 0 button to assign the HI-3010 to
Node 0. The IP address and model of the instrument
appear in the Node 0, “Node IP Address”. (See Fig.
104)
FIG. 104: HI-3010 (IP ADDRESS 192.168.110.68)
ASSIGNED TO NODE 0
Step 7. Repeat Steps 5 and 6 to assign the next instrument
to node 1. (See Figs. 105 & 106)
FIG. 105: SELECTED INSTRUMENT WITH IP
ADDRESS IN IP ADDRESS FIELD